How to create a manual injection?
Let us demonstrate how to create a manual lead injection step by step.
Note: As the procedure includes a lot of peculiarities and important details, we recommend going through this article to take in the process completely.
Go to Injections → Injections and click the + button next to the page title.
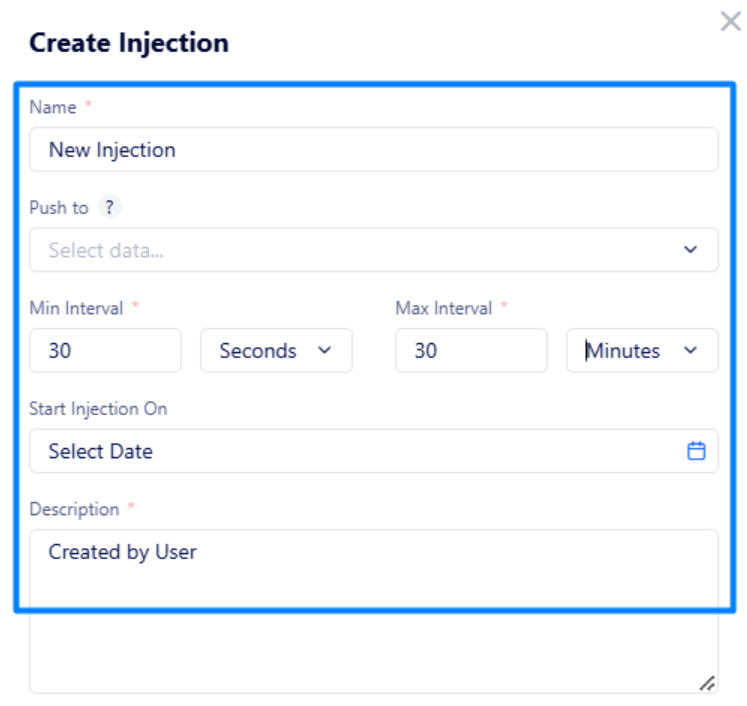
In the appeared window, fill in the following fields:
Name – enter a unique injection name.
Push to – select an advertiser to re-push leads to.
Note: Leave this field empty so that leads will be re-pushed to an advertiser according to Rotation Control rules.
Mind that the leads will not be re-pushed to their original advertiser in this case.Intervals – set an approximate time interval during which selected leads will be randomly re-pushed.
For example, if Min Interval is set to 10 minutes and Max Interval – to 20 minutes, all collected leads will be re-pushed approximately 10 to 20 minutes after being added to the injection.Start Injection On (optional) – if you want the leads to be re-pushed at a certain time in future, select the corresponding date and time.
Description – put a brief injection description.
According to the settings above, the leads will be re-pushed to suitable advertisers based on Rotation rules approximately 30 seconds to 30 minutes after being added to the injection.
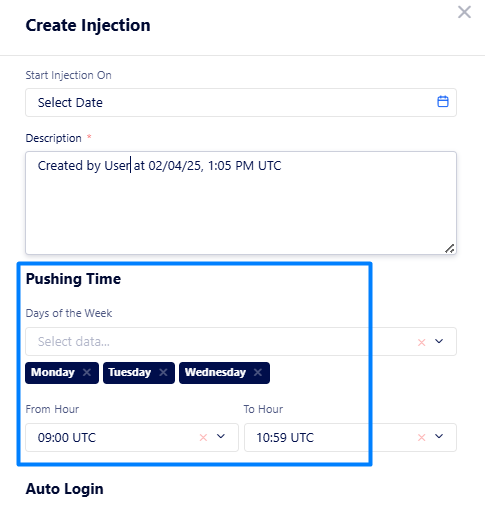
Pushing Time section
Here, you can optionally set recurring days of the week and a certain time range for pushing leads.
The configuration above says that collected leads will be automatically pushed every Monday, Tuesday, and Wednesday from 09:00 to 10:59 UTC.
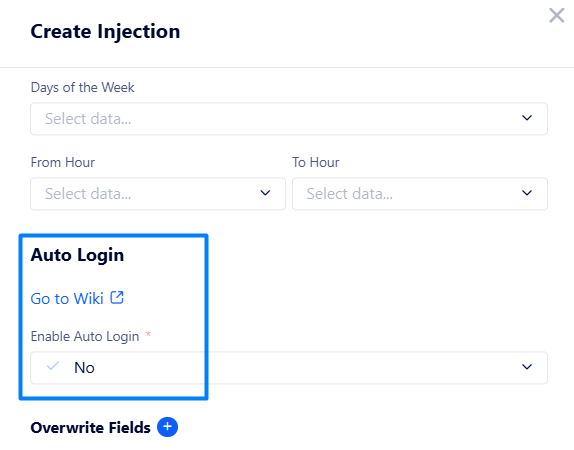
Auto Login section
If you want to re-push leads in a more advanced way by emulating auto login action, you need to set up the “Auto Login” section in the injection creating window.
Read this article to learn how to configure it correctly.
Important: If you want to use advanced auto login, contact our support team first.
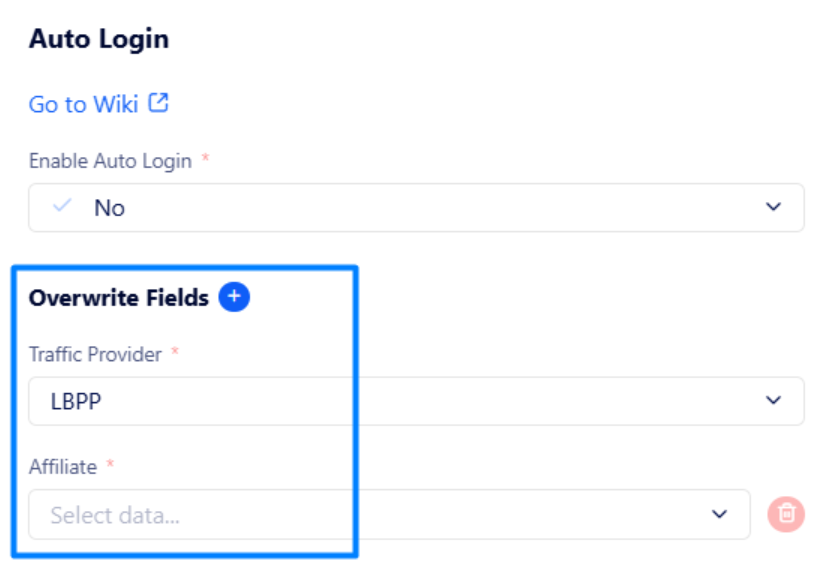
Bottom setting section
Override Fields (optional) – if needed, you can replace some existing fields of source leads such as affiliate, offer, etc. with different ones.
Traffic Provider – select a required traffic provider.
Affiliate – select an affiliate which replaces leads’ original affiliate after re-pushing.
Once you click “Submit”, the newly-created injection will appear in the injection list.
Note: If needed, you can edit an injection afterwards. Read this article to learn the details.
Click this injection name to select leads to be re-pushed.
On the injection page, click “Actions” in the top right corner of the page and select the way you want to add leads to the injection:
Then, you will be redirected back to the injection page where you can see tasks with leads to be re-pushed. To start the procedure, click “Run Injection” as it is highlighted in the screenshot below and confirm the action in the appeared window.
If you have created a delayed (scheduled) injection, you do not need to run it manually, as it will start automatically according to the specified date and time.
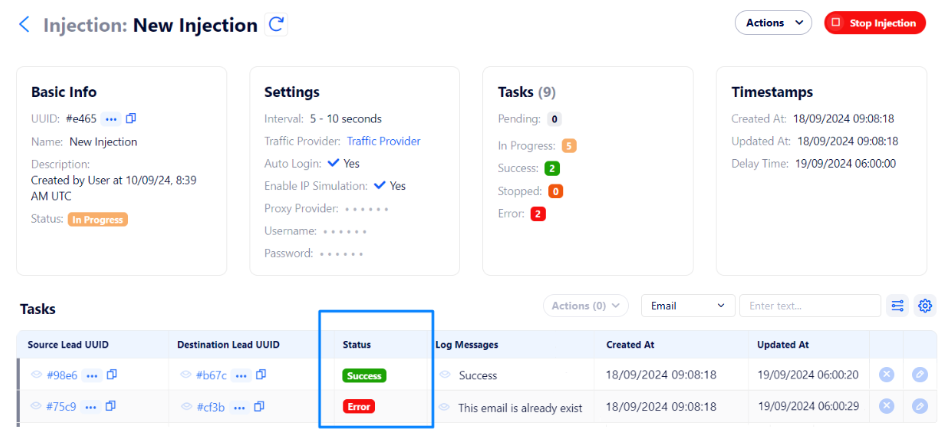
Once the procedure is finished, you can see each lead status in the corresponding column.
If an error occurs, its reason is displayed in the “Log Messages” column.
Note: Mind that once an injection has been completely executed, it will be transferred from the Active injection table to the Finished one.
Important: You cannot re-push leads having click or click-landed states as they do not have some required information. It is possible to re-push leads with states such as pushed lead, rejected lead, FTD, etc.
Note: You can run a maximum of 10 injections at the same time.


