CSV Injection guide
Here's how to make an injection by uploading a CSV file
Step 1. Accessing the Injection Section
Create a new Injection.
Open the Injections section.
Open the created injection.
Step 2. Uploading the CSV File
On the top right corner, press the Add Leads button.
Select Import from CSV.
Insert your desired CSV file.
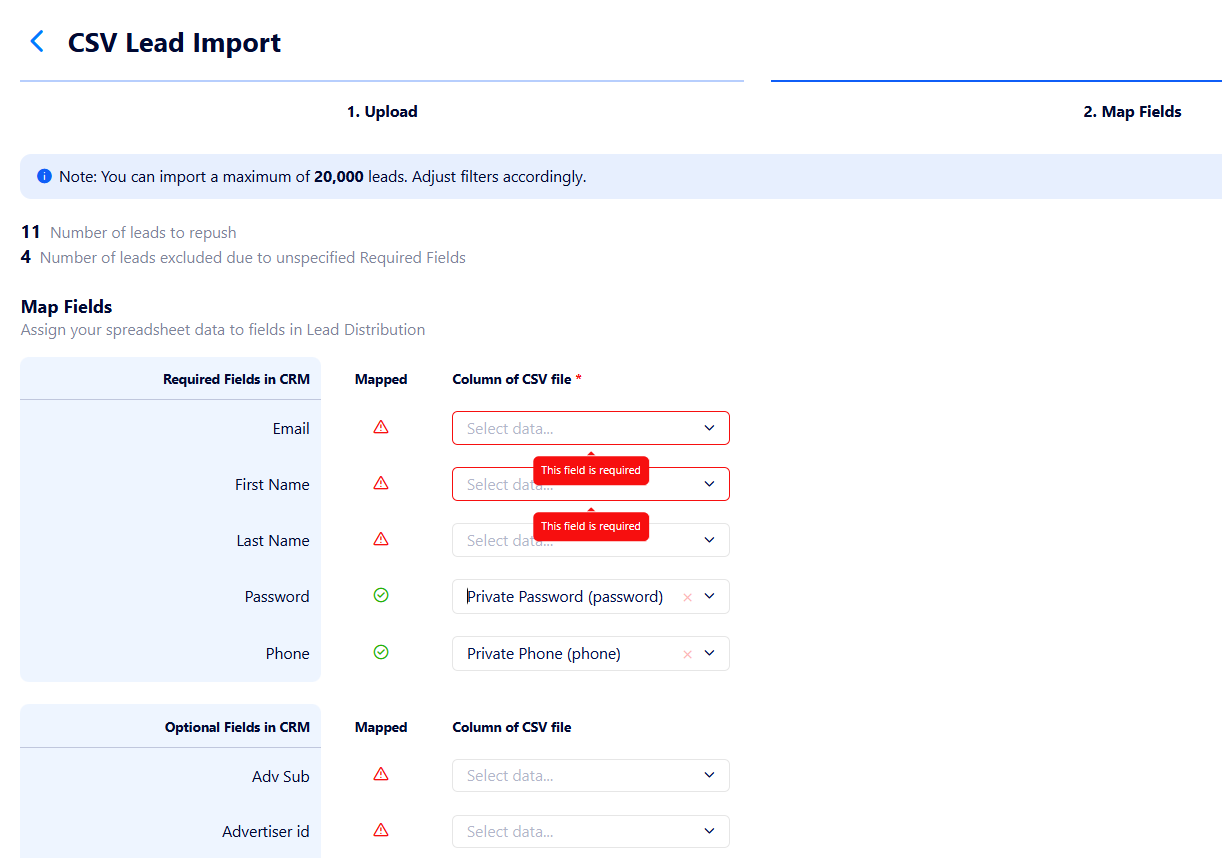
Once the file has been uploaded, you can see the number of valid leads to be re-pushed as well as the number of invalid ones (the leads with no required fields specified).
Step 3. Formatting the CSV File
Ensure each row represents a single lead.
The first row is interpreted as the column's name.
Make sure all lead data is appropriately divided into columns.
You can include additional information, like AffSubs.
Mandatory columns to have:
First Name
Last Name
Password
Email
Phone
The actual name of the columns inside the file isn't significant.
You can find an example of a correct Injection CSV file in the attachments
Step 4. Mapping and Importing Leads
Press Next Step.
Match the file's columns to the CRM Columns.
Note: Any unmatched columns will be ignored.
You can import leads when you mapped at least all the required fields.
Press Import Leads. The imported leads will then appear inside the injection.
Important: Do not close the current tab or turn off the internet connection or VPN until the lead import is finished.
Step 5. Final
Start the Injection.


