
How to create Rotation control rules?
Here, you can learn how to create rotation elements to allocate traffic among any number of advertisers based on specific passing rules. Essentially, it creates multiple access points for the lead, thereby reducing traffic decline and boosting conversion rates. You can find the rotation feature in Traffic Distribution → Rotation Control.
Let's start with the simplest form of creation traffic rotation rules and gradually introduce more complex methods.
Simple rotation rule
Ideal for those with a small number of advertisers, countries, and sources, the basic traffic rotation involves placing an advertiser element directly into the Tree. Here's how:
Click "Add New".

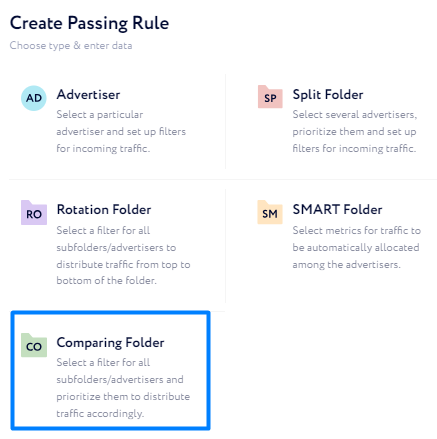
Select the "Advertiser" option.
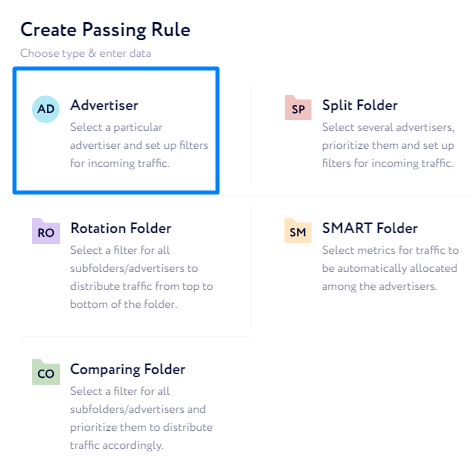
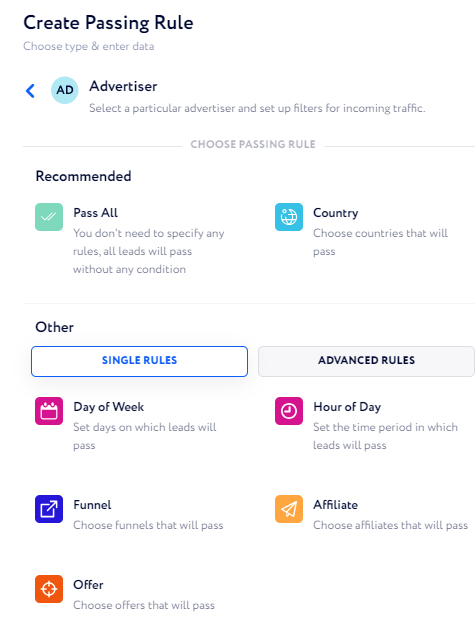
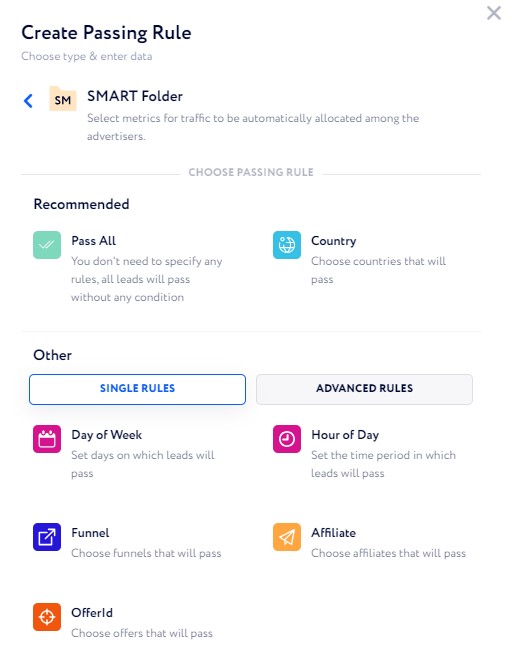
Select traffic filtering rule ("Affiliate", "Country", or "Pass All" are recommended).
Fill in the required information.
Press the "Submit" button.
When you have finished creating an element, you may notice that a cap (capacity) is automatically created.

If needed, customize it according to your requirements. Read this article to learn more about the procedure.
More advanced rotation rule
If you work with many countries and advertisers, consider adding another layer of rules with Rotation Folders. Follow these steps:
Press "Add New" at the top right of the page.
Select the "Rotation Folder" option.
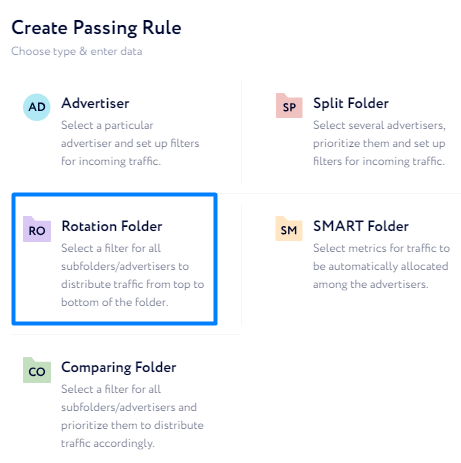
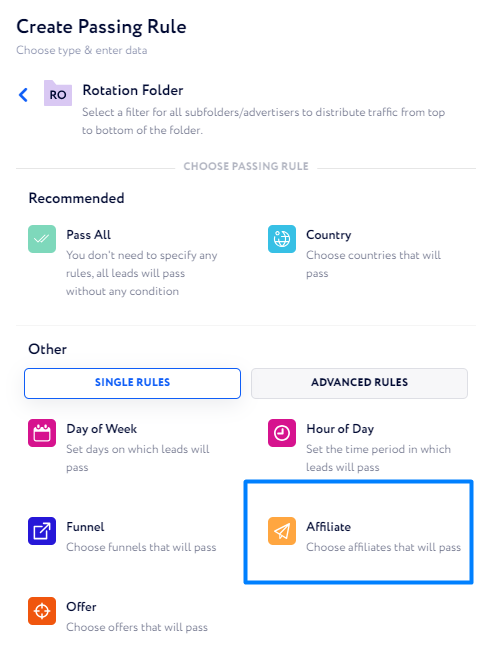
Choose "Affiliate" as the filtering rule.
Fill in the required information.
Press "Submit".
Repeat these steps for every affiliate needed.
Create advertisers inside each folder (as for the simple rule), selecting "Country" as the filtering rule.
Proportional traffic allocation
For a more complex traffic rotation or to prioritize traffic distribution among advertisers, consider using Split Folders. Here's how:
Create Rotation Folders as per the previous example.
Press "Add New" inside the Rotation Folder.

Select the "Split Folder" option.
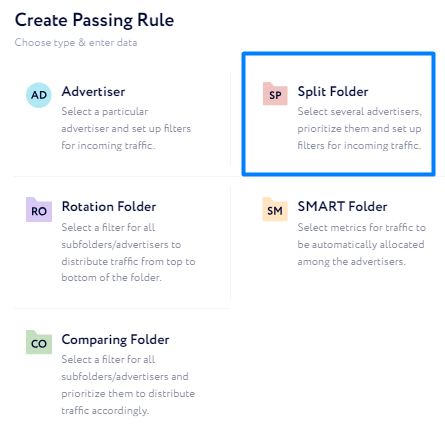
Choose "Country" as the filtering rule.
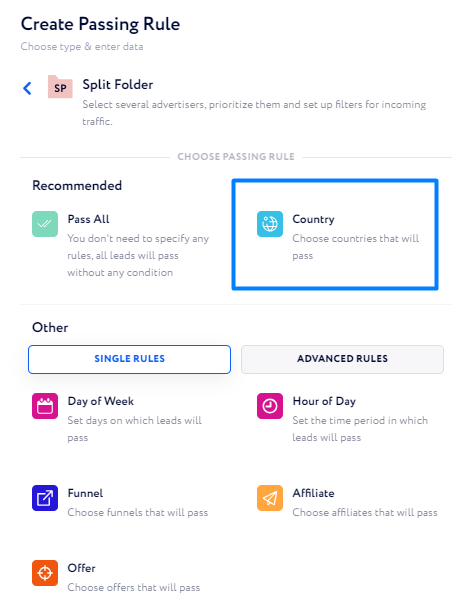
Fill in the necessary information. Here, you may find an optional field:
"Traffic Distribution Mode" – define a way of traffic allocation among the advertisers in the folder:
"Ignoring Cap Filling Rate". If you later add another advertiser to the folder, the following incoming leads will be allocated proportionally (according to their weights) among all the existing advertisers regarding how many leads the others have already received.
"Considering Cap Filling Rate". If you later add another advertiser to the folder, all the following incoming leads will be sent to the new advertiser until it reaches the number of leads according to its weight.

Select required advertisers and set their weights (the more the weight the more traffic will be sent to such an advertiser).
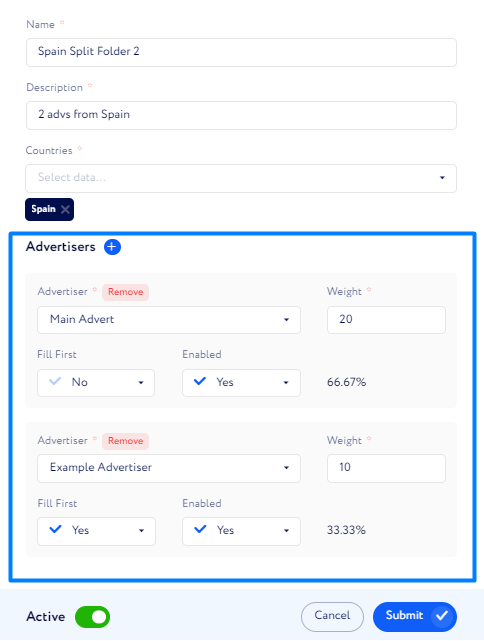
If you allocate weights as in the screenshot above, 2 out of 3 leads will be sent to "Main Advert", whereas "Example Advertiser" will receive 1 out of 3 leads accordingly.
Press "Submit".
Note: Make sure not to duplicate the same Split Folder to avoid traffic distribution errors.
Automatic traffic allocation
If you do not want to manually prioritize advertiser for traffic to be allocated among, it can be done with our SMART Folder. Follow the steps below to set it up:
Click "Add New" at the top right of the page.
Select the "SMART Folder" option.
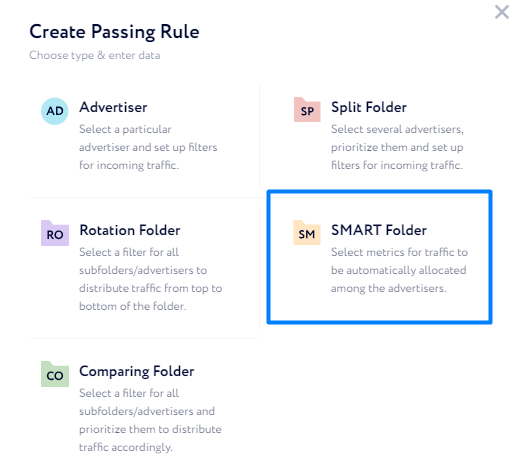
Select a rule (filter) according to which incoming traffic will be filtered.
Also, select metrics according to which incoming traffic is automatically allocated among the advertisers via the following fields:
Parameter To Compare – parameter each advertiser has. The parameter will be compared among all selected advertisers. The traffic will be automatically allocated among the advertisers according to their priority.
Note: You can select up to 5 parameters maximum.Prioritize By – CRM Term according to which the parameter above will be compared (what metric – total FTD, conversion rate, etc. – you want to increase).
Select required advertisers.
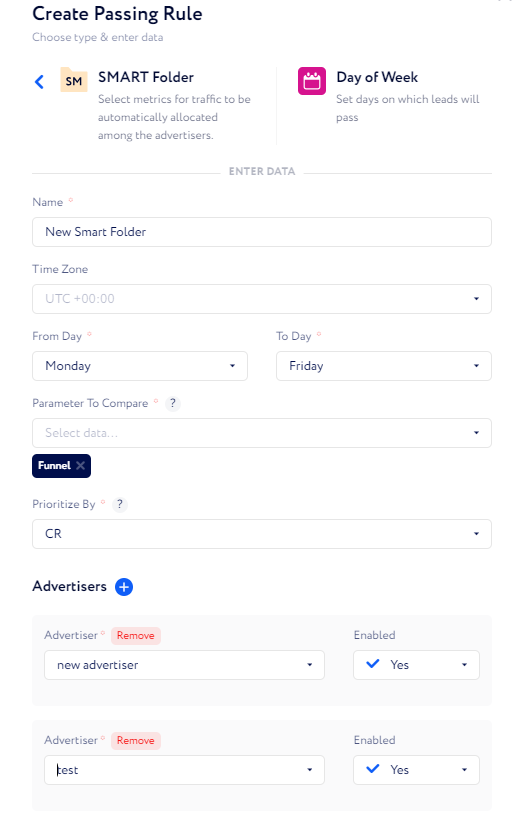
Once the statistics have been gathered, the traffic will be distributed accordingly.
Learn more about SMART folder in this article.
Manual vs automatic traffic allocation
If you feel uncertain about using automatic traffic allocation, you can compare performace of automatically allocated traffic via SMART Folder to manually set advertiser weights via Split Folder.
To compare, you need to create a Comparing Folder as follows:
Click "Add New" at the top right of the page.
Select the "Comparing Folder" option.
Select a rule (filter) according to which incoming traffic will be filtered.
Add 1 SMART Folder and 1 Split Folder inside as follows:

Split their weights evenly.
Then, you can compare performance of automatically distributed leads to manually allocated ones.
Read this article to learn how to do it.
Learn more about Comparing folder in this article.
Conclusion and Tips
The examples provided in this instruction serve as starting points. Rotation is highly customizable to your specific needs, so feel free to experiment. Remember, a thoughtful rotation structure can save you a lot of time in the long run, particularly if you handle a large amount of traffic, advertisers, affiliates, and so on.
Here are some final tips:
If you don't want to place a specific rule on a folder or entity, opt for the "Pass All" rule, which allows any traffic type to enter the entity it's placed on.
Don't rush when planning your rotation structure. A broad structure like main folder – affiliate folders – country folders – advertisers/split folder - cap/caps folders may take time to set up, but it can save you even more time managing and configuring changes later.