
Rotation Control deep dive
This article guides you through the Rotation Control functionality. In general, it allows you to distribute traffic among your advertisers by setting required rules with various criteria.

This video is hosted on YouTube and requires cookies to view.
YouTube Privacy PolicyImportant: All the rules in the Rotation Control list have their priority from top to bottom. The higher a rule, the higher its priority is. To change a rule priority, drag it up or down in the list.
You can find the needed functionality via Traffic Distribution → Rotation Control.
Here, click "Add New" to create a new rule.

In the appeared window the following options are suggested:
Advertiser
Split Folder
Rotation Folder
SMART Folder
Comparing Folder
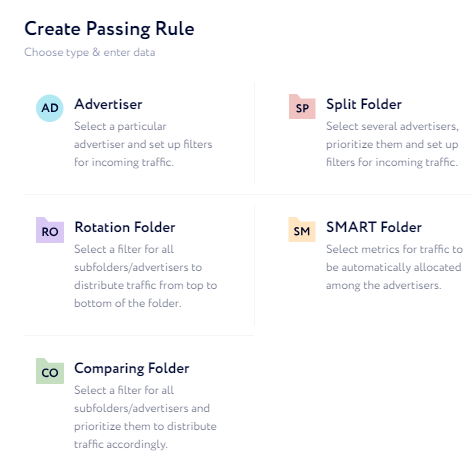
Let us describe the essence of each option for you to understand them better.
Advertiser
Using this option, you can create a separate traffic rule for each advertiser. This is considered as the simple way of rule creation for traffic to pass.
Read this article to learn how to create a simple rule to allocate traffic and find the most common use cases.
Rotation Folder
This is a more advanced way to create rules for traffic distribution among advertisers. Here, you may create a common rule for multiple advertisers as well as assign a separate rule for each one.
Read this article to learn how to create a more complex rule to allocate traffic and find the most common use cases.
Split Folder
This option aims to split the incoming traffic according to the weight you assign to each advertiser within this folder.
Weight is a way to prioritize advertisers for distributing traffic among them. It sums the total weight of all selected advertisers and allocates leads according the each share.
We suggest you get familiar with this article to learn how to properly set up this option as well as to study the most common use cases.
SMART Folder
This is an enhanced option which allows you to create rotation elements where traffic will be automatically allocated among advertisers according to their performance based on customizable metrics.
This option is an innovative one. It helps you to save your time as it will manage the traffic distribution itself. All you need to do is to assign what metric to compare and a criterion to prioritize the traffic among advertisers by.
Although this may seem to be easily set up, you are advised to get familiar with this article to learn some crucial and important aspects of the folder configuring and its performance monitoring.
Comparing Folder
This option is an enhanced alternative for Split Folder, where you can manage priority by advertisers only. Here, you can prioritize not only by advertisers but by any other elements such as affiliates, countries, etc.
Moreover, this folder has another important use case. You may use it to compare manual traffic allocation among advertisers by weights (as in Split Folder) to automatically allocated traffic (as in SMART Folder) to decide what strategy suits you most.
Feel free to read this article to learn more on how to properly set up this folder.
Traffic filtering rules
Although there are a great variety of strategies to select from to efficiently allocate traffic among your advertisers, all of them have the same rules to filter the incoming traffic.
Let us comment on them.
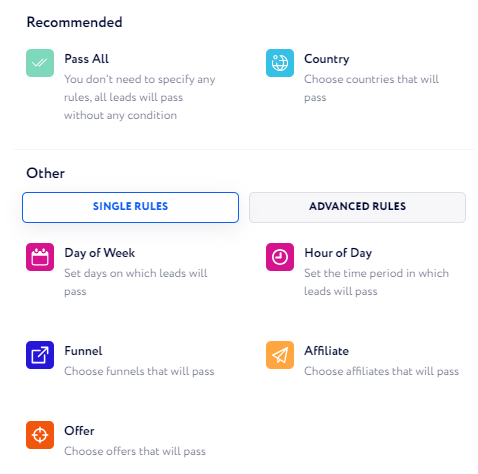
Recommended:
Pass All – select it if you want all the leads despite their country, affiliate, time, etc. to be sent to the advertiser.
Country – select it to specify country/countries from which leads are sent to the advertiser.
Other:
Single Rules:
Day of Week – day(s) of the week during which leads are sent to the advertiser.
Here, you can also choose a timezone considering which traffic is filtered. By default, your CRM timezone is set.Hour of Day – time period during the day in which leads are sent to the advertiser.
Here, you can also choose a timezone considering which traffic is filtered. By default, your CRM timezone is set.Funnel – funnel(s) from which leads are sent to the advertiser.
Offer – offer from which leads are sent.
Affiliate – affiliate(s) from which leads are sent to the advertiser.
Advanced Rules:
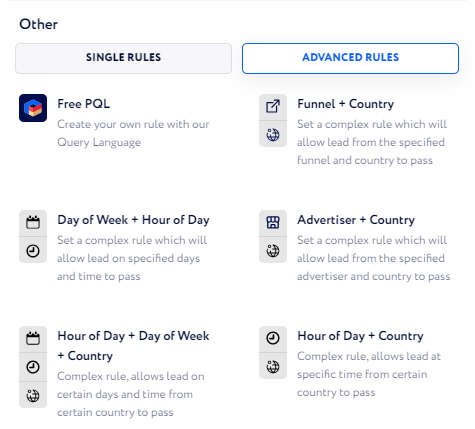
Here, combinations of single rules are introduced. However, there is one advanced rule that needs explaining.
Free PQL – this option allows you to create more detailed and precise rules for traffic filtering (i.e., you can specify ways of traffic filtering).
If you need to add your own filter, add it to Lead Profile and then include it into a Lead form.
Important details to get familiar with:
You can manage cap reset time in two ways:
Via Cap settings (can be used when you need to reset a certain cap individually).
To learn what a cap is, read this article.Via Reset time on the top right of the page (cab be used when you need to reset all caps at once).

Note: Reset time specified for a single cap has a higher priority than Reset time set for all caps.
As caps need resetting at least once a day, make sure you set no less than one cap reset time.
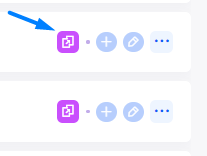
You can copy whole folders as well as their nodes individually and paste it into other folders. To do so, click the "Copy" button next to the folder/element you wish to copy.
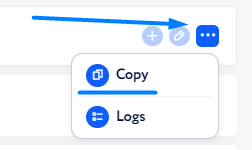
Then, click the highlighted button next to the element you would like to paste an element into. All the copied elements are inactive by default.
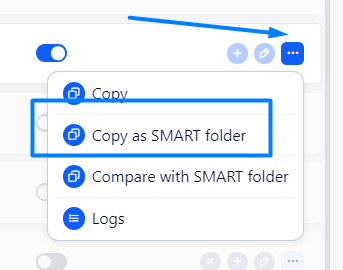
Additionally, you can copy an existing Split folder as a SMART one. To do that, click .... next to the required Split folder and select the “Copy as SMART folder“ option:
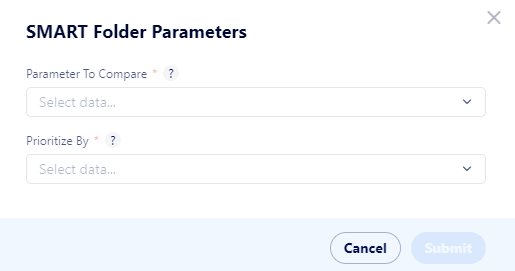
In the appeared window, set up a new SMART folder by defining comparing and prioritizing criteria:
If you want to compare an existing Split folder performance with a SMART folder to find out what strategy – manual or automatic – suits you most, click .... next to the required Split folder and select the “Compare with SMART folder“ option:
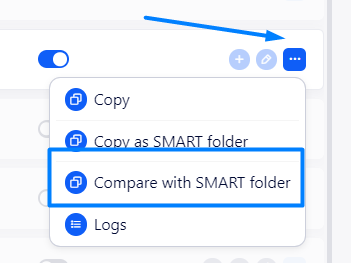
In the appeared window, set up a new SMART folder by defining comparing and prioritizing criteria.

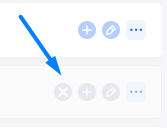
If an element or a whole folder needs to be deleted, you should deactivate it first and then, click the ⨯ button appeared on the right of the corresponding line.
There is an option to study all the rule and element logs. To do so, click ⋯ next to the necessary rule line.
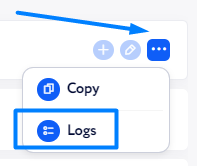
Then, choose logs for what date you wish to look at and click the "Logs" button in the "Argument" column of the corresponding line.

Then, you will see clear and precise information on a particular action as in the screenshot below:
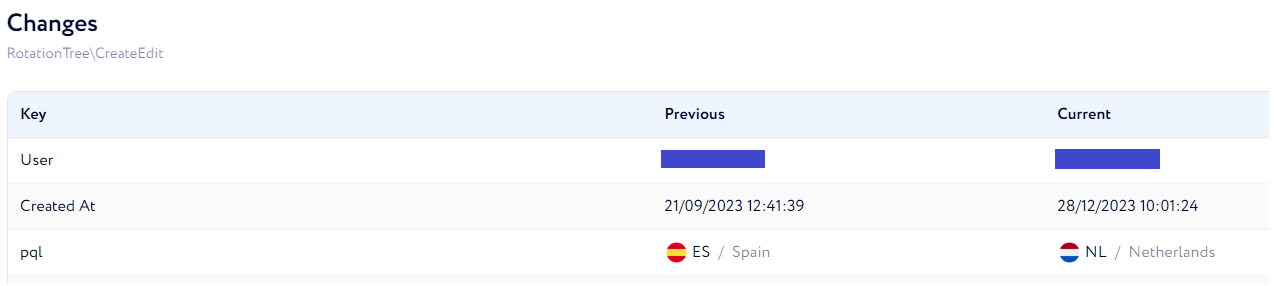
Here, you may find all the updates of a particular element starting from its deactivation to changing its priority, rule items (affiliates, funnels, time, etc.). To find out what was changed you need to compare the "Previous" column to "Current". If their data is different, then this is what was changed.
The example above says that a user changed the element's country from Spain to Netherlands. Also, the "Created At" line defines the time of the update. Thus, we may see that Span was assigned to the element 21/09/2023 12:41:39 and then was changed to Netherlands 28/12/2023 10:01:24.
If you would like to inspect traffic, you can find detailed lead information in the Traffic Data tables or in Navigation Settings → Lead Push Logs.