How to create an auto injection?
You can use auto injections to automatically re-push leads that were declined by an advertiser or did not match their campaign to another suitable advertiser.
To ensure leads are correctly re-pushed, it is essential to configure auto injections properly. Let us guide you through the process of creating an auto-injection step by step.
Basic configuration
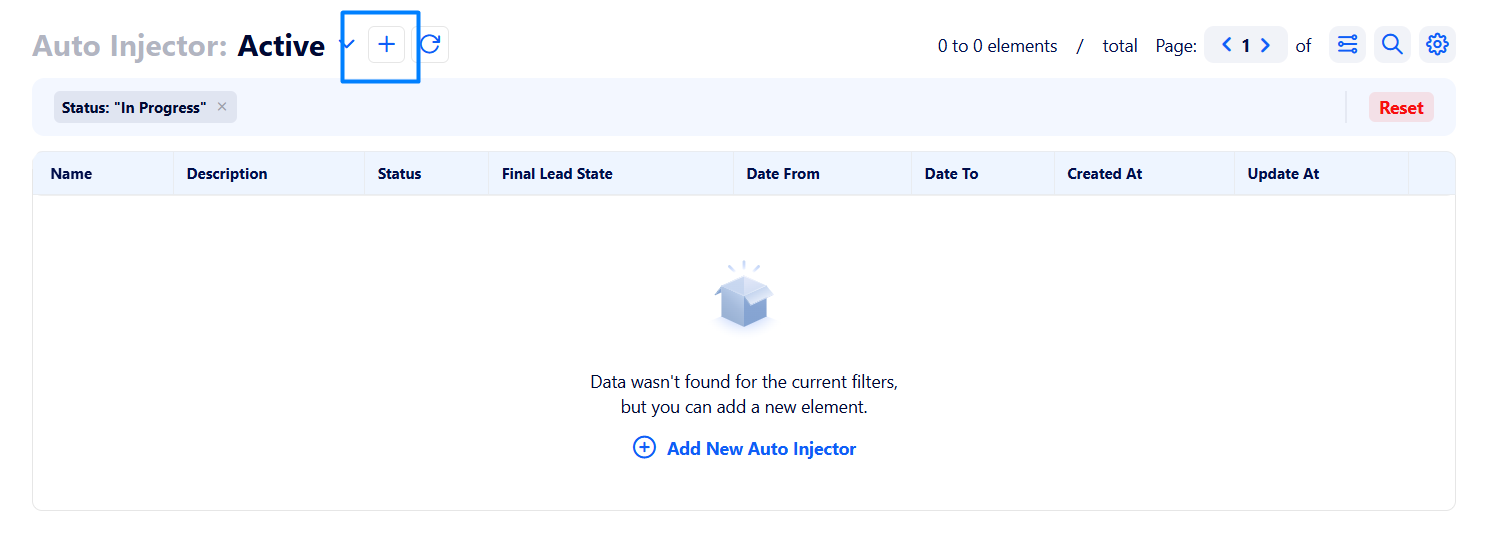
Go to Injections → Auto Injector and click the + button next to the page title.
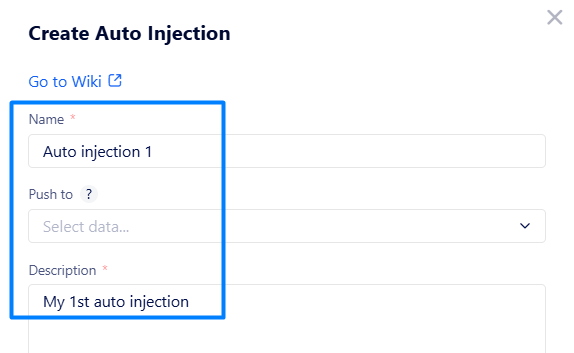
In the appeared window fill in the following fields:
Name – enter a unique auto injection name.
Push to (optional) – select an advertiser to which you want to re-push leads. Leave the field empty, if you want the leads to be re-pushed according to Rotation Control rules.
Note: Leads will not be re-pushed to their initial advertiser. Such an advertiser will be skipped.Description – put the auto injection description.
The configuration above says that leads will be re-pushed to advertisers according to Rotation Control rules.
Pushing Time section
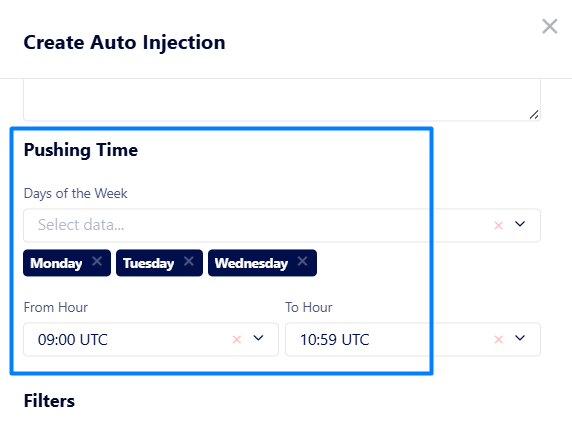
In this section you can set recurring days of the week and a certain time range for pushing leads.
The configuration above says that collected leads will be automatically pushed every Monday, Tuesday, and Wednesday from 09:00 to 10:59 UTC.
Filters
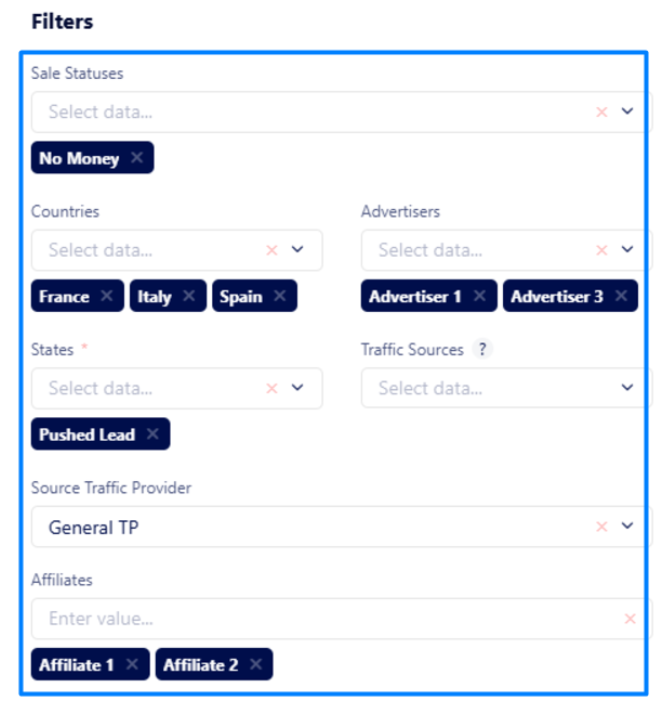
Here, you need to set up parameters to filter and re-push required leads.
Sale Statuses (optional) – select CRM sale statuses of leads that will be automatically re-pushed.
Countries (optional) – define leads from what countries will be automatically re-pushed.
Advertisers (optional) – select advertiser(s) to automatically re-push leads from.
States – define leads of what states will be automatically re-pushed.
Traffic Sources (optional) – select way(s) leads being initially pushed.
Note: If not specified, already injected leads will not be used.Source Traffic Provider (optional) – select a required source traffic provider.
Affiliates (optional) – select affiliate(s) from which leads will be automatically re-pushed.
According to the screenshot above, leads initially sent by Affiliate 1 and Affiliate 2 (of General Traffic Provider) and pushed to Advertiser 1 and Advertiser 2 in France, Italy, and Spain will be collected by this auto injection. Additionally, the leads must be of the “Pushed Lead” state with the “No Money” CRM sale status.
Lead Collection Time section
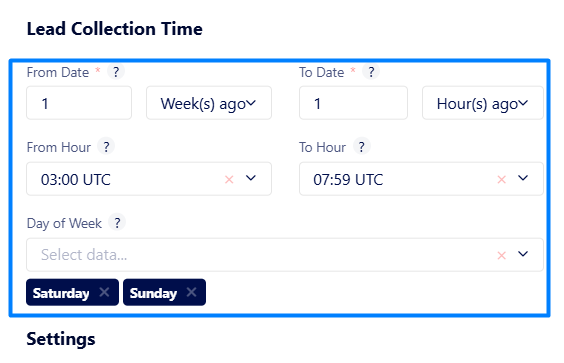
Here, specify the time period for which the leads should be included in order to further re-push them.
From / To Date – specify the time range for which leads will be selected to be further re-pushed (e.g., you need to re-push leads for the last 2 days).
Note: The time range is relative and is constantly changing compared to the current time.From / To Hours (optional) – specify during which hours within the selected date range leads will be selected (e.g., you only need to gather leads from 05:00 UTC to 09:00 UTC for the last 2 days).
Day of Week (optional) – specify what day(s) of the week will be considered for lead filtering taking into account the time filters above (e.g., you need to only collect leads for the last 2 days if the days are Saturday and Sunday).
The settings above mean that leads will only be collected on Saturdays and Sundays for the last 7 days from 03:00 UTC to 07:59 UTC.
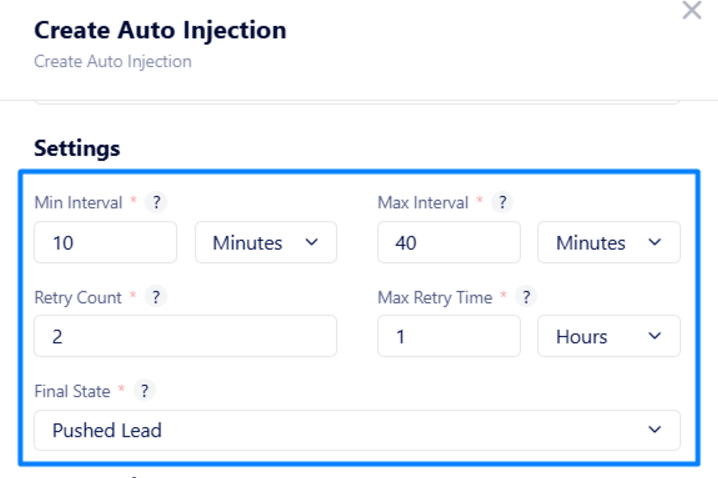
Settings – customize the period when leads will be automatically re-pushed.
Min / Max Interval – set an approximate time interval during which selected leads will be randomly re-pushed.
For example, if Min Interval is set to 10 minutes and Max Interval – to 20 minutes, all collected leads will be automatically re-pushed approximately 10 to 20 minutes after collection completed (after the tasks created).Retry Count – number of re-push attempts for each lead (how many times a lead will try to be re-pushed if an error occurs for the first time).
Max Retry Time – period of time during which a lead should be re-pushed. If it is not re-pushed successfully during this time, the lead will be rejected.
Final State – set what state a lead should achieve to be considered as successfully re-pushed.
Example: Let’s say that the leads have been collected by 10:20. According to the interval above, the first lead might be re-pushed at 10:36, the second lead – at 10:37, etc. Once a lead reaches the pushed lead state, it is considered as successfully pushed.
If the third lead fails to be re-pushed, it will retry to be pushed twice. If the lead exceeds 2 reattempts or it takes more than 1 hour, the lead will be declined.
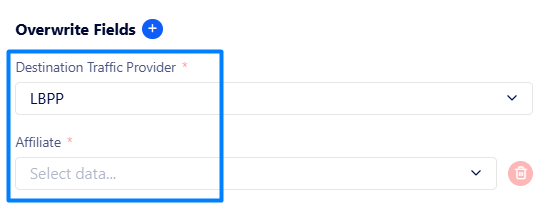
Destination Traffic Provider – select a required destination traffic provider.
Affiliate – select an affiliate which replaces leads’ original affiliate after re-pushing.
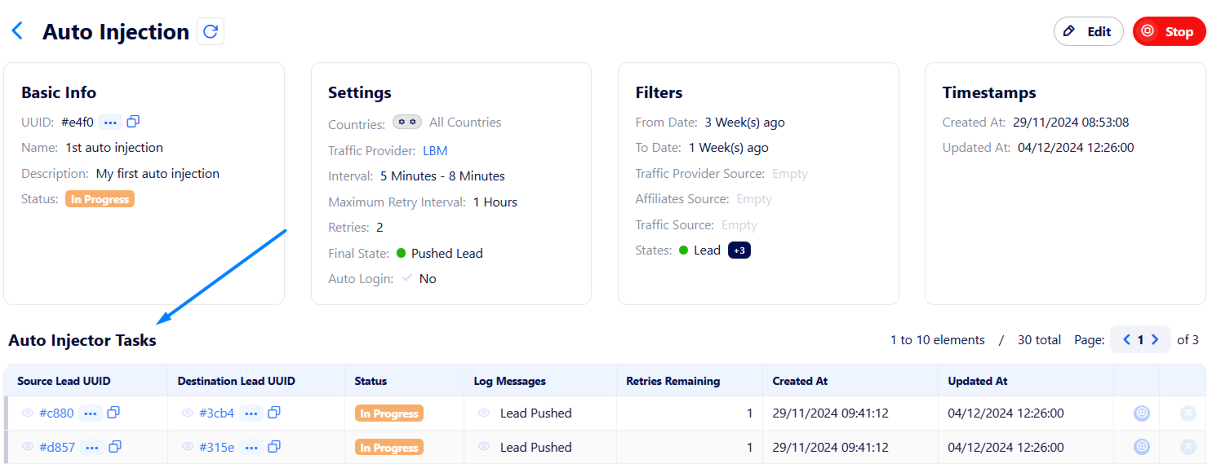
Thus, we have performed basic auto injection configuration required to properly re-push leads. When you have created the auto injection, collected leads for re-pushing will appear in the “Auto Injector Tasks” table.
Note: If you create an auto injection and do not see any data in the “Auto Injector Task” table, you need to wait as the auto injector requires time to collect leads for re-pushing. If no leads match the criteria set in the injection, the process may take longer.
If you need to re-push leads faster, consider using manual injections instead.
If you want to re-push leads in a more advanced way by emulating auto login action, you need to set up the “Auto Login” section in the injection creating window.
Read this article to learn how to configure it correctly.
Lead Collection Time vs Intervals
You may notice that time ranges need to be specified in two different sections.
To avoid any potential confusion, let us clarify their purpose and differences with the example below:
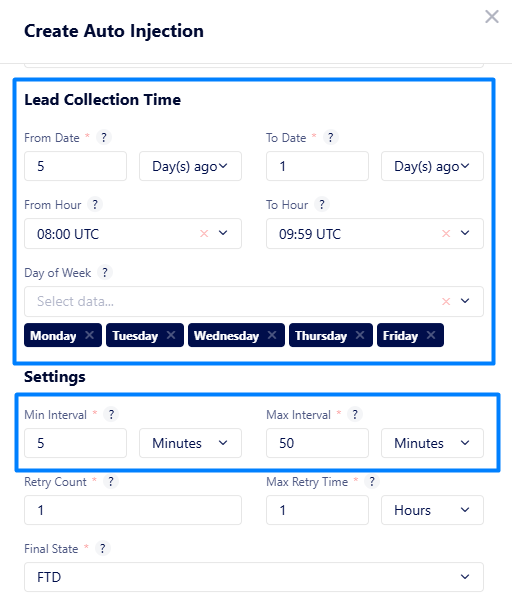
The screenshot shows that only leads recorded in the system over the last 5 days (excluding today) will be collected by the auto injector, if those days are weekdays and the time is between 08:00 UTC and 09:59 UTC.
All these leads will be automatically re-pushed approximately 5 to 50 minutes after collection completed (after the corresponding tasks created).
Note: The “Lead Collection Time” filters source leads to be collected, while “Intervals” defines the period within which the collected leads will be re-pushed.
Fields overwriting
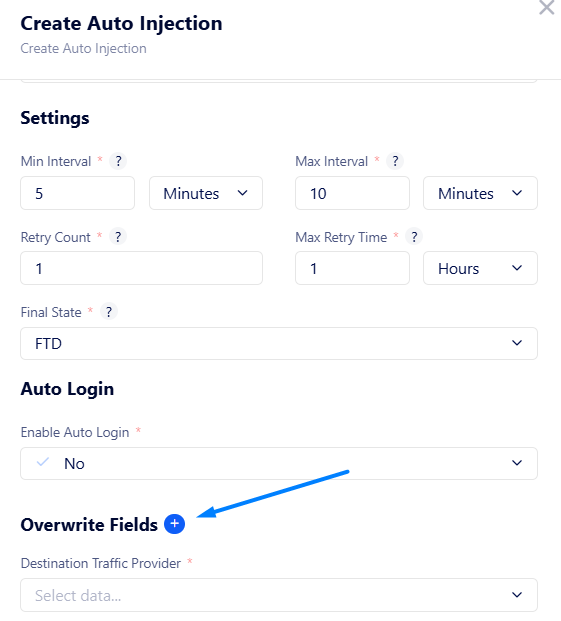
If you want to monitor and view source lead data in re-pushed leads, consider using the “Overwrite Fields” section when creating an auto injection.
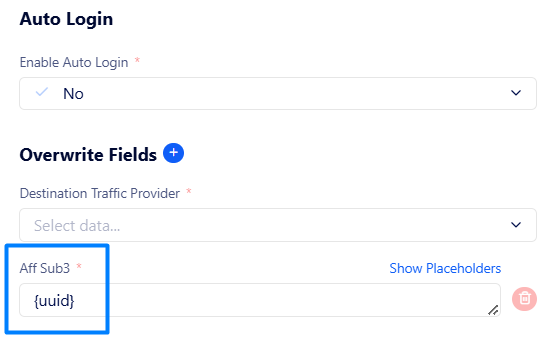
Example: You need to see the source leads' UUID for re-pushed leads.
An overwritten field according to the example above will look as follows:
Once a lead has been repushed successfully, you may find its source lead UUID in the “Aff Sub3” column in a "Traffic Data" table.


