
Rotation Control troubleshooting
In this article you will learn how to avoid common traffic-related errors in Rotation Control as well as how to address them correctly.
Preventing potential errors
You can prevent traffic errors by getting notified about potential issues in advance. In this case, setting up corresponding notifications can help.
Full rotation cap notifications
One of the most common traffic rotation issues occurs when caps get full, resulting in leads being rejected. That’s why it is essential to be alerted to full caps as soon as possible. Notifications can be very useful in this scenario. They can be sent in various ways, such as to your CRM, IREV Telegram bot, or any other destination that you can customize using the HTTP/HTTPS protocols.
Note: This option is beneficial if you have a modest amount of traffic. Otherwise, consider using scheduled reports.
If you want to be notified every time your Rotation Control capacity is full, read this article to set up notifications properly.
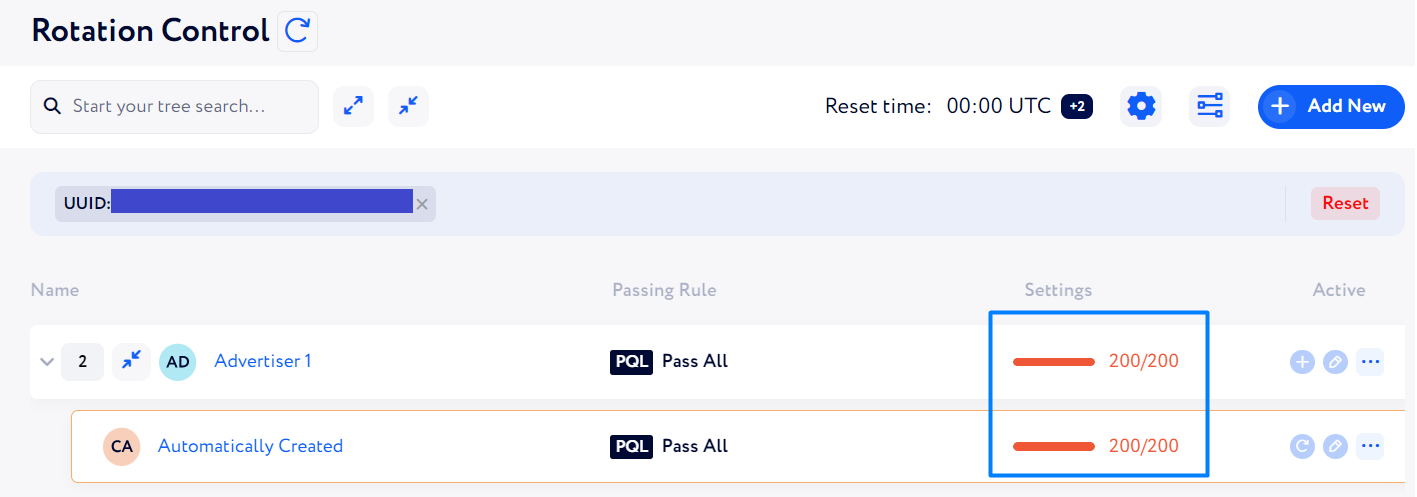
Thus, when caps in your Rotation Control have become full, you will receive a notification.
The default notification looks as follows:

Here, you can quickly access the full cap by clicking "Cap" and update its settings.
Additionally, you can visit the advertiser's page by clicking "Advertiser" in the notification.
Alternatively, the CRM notifications can be found as highlighted below:

So, notifications help you stay updated on your cap status, allowing you to avoid errors related to full caps.
Addressing errors
To avoid major traffic-related issues, it is crucial to stay informed about traffic performance and errors, especially rotation-related ones. Here are the tools that will help you stay on top of these errors.
Reject Report
If you want to examine rotation-related errors whenever it suits you, generating a Reject report is a good option.
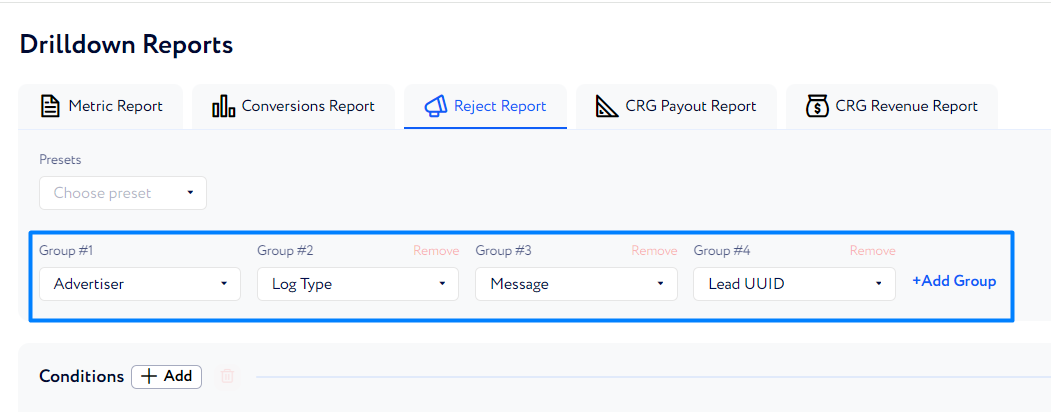
The report can be found via Reports → Drilldown Reports → Reject Report.

Here, add the following groups (in the same sequence):
Advertiser – to group errors by advertiser.
Log Type – to group errors by certain types (e.g., validation errors, duplication errors, rotation errors).
Message – to display error messages (e.g., “Rotation rules for this lead weren’t found”, “Lead with this email already exists”).
Lead UUID – to display UUIDs of rejected leads.
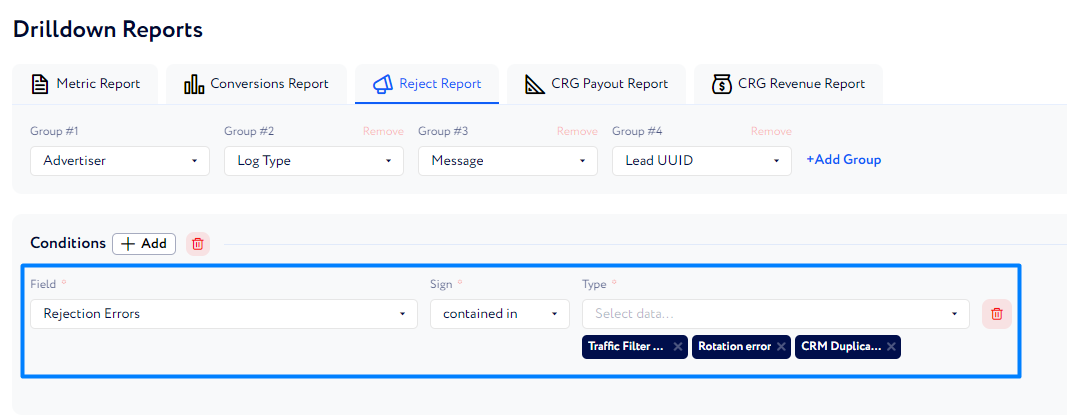
Also, add the following condition:
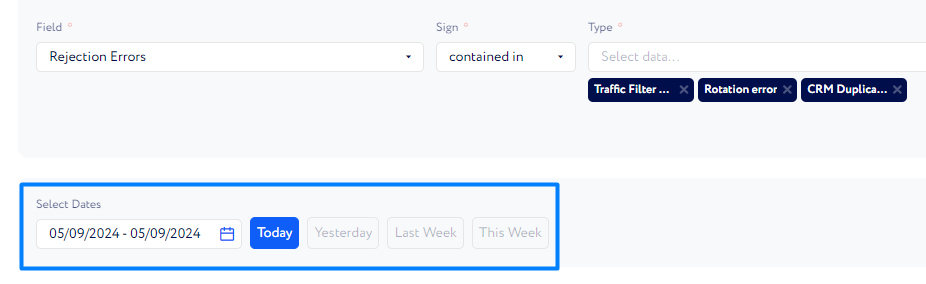
Then, select the period to generate the report:
Thus, the generated report will look as follows:
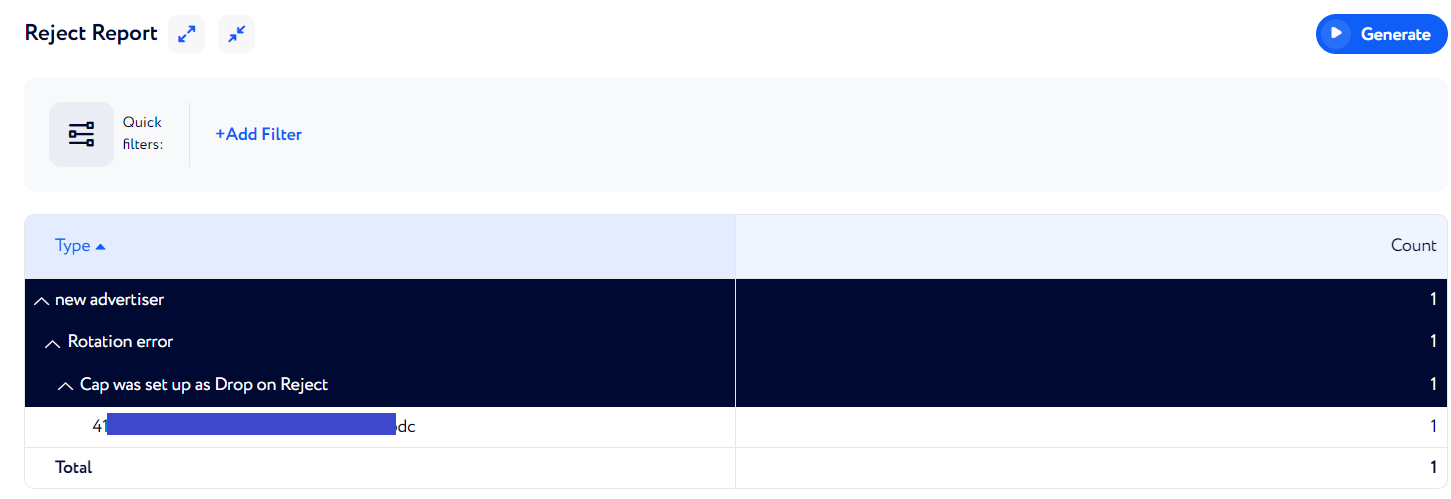
This report shows that the lead was rejected due to the corresponding advertiser’s capacity being set as “Drop on Reject”. To investigate the rejection reason, copy the lead UUID and find the lead via Traffic Data → Events:

Go to the lead’s page, the “Logs” tab:
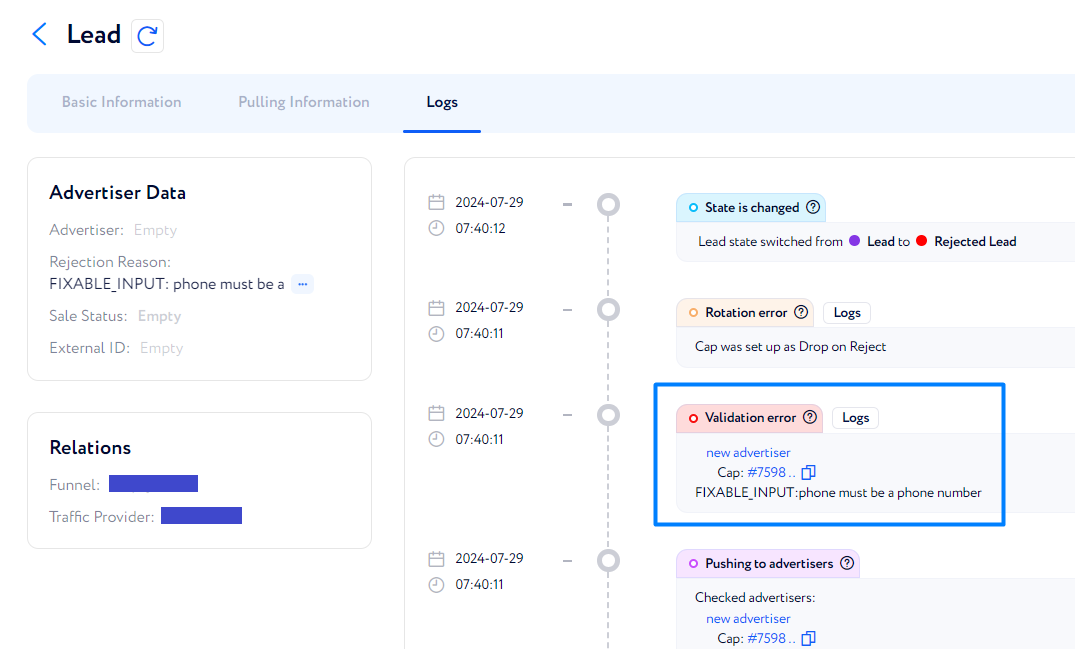
The logs say that the lead was rejected because of the invalid phone number. To check what is exactly wrong with the phone number, click the “Logs” button next to “Validation error” and look at the “body” part on the left:
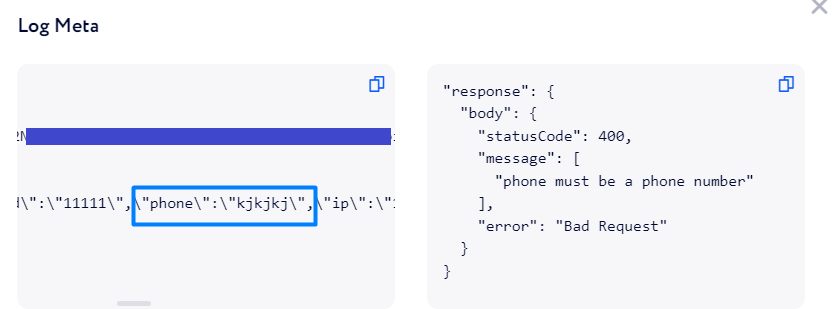
As we see, the phone number is invalid as it does not consist of numbers. In this particular case, you need to check if the phone validation is set up properly (e.g., via Settings Navigation → Lead Forms).
So, we have found out that the advertiser rejected the lead because of the invalid phone number. And prevent other leads from being rejected the same way by checking validation of the corresponding registration form field.
Another report example:
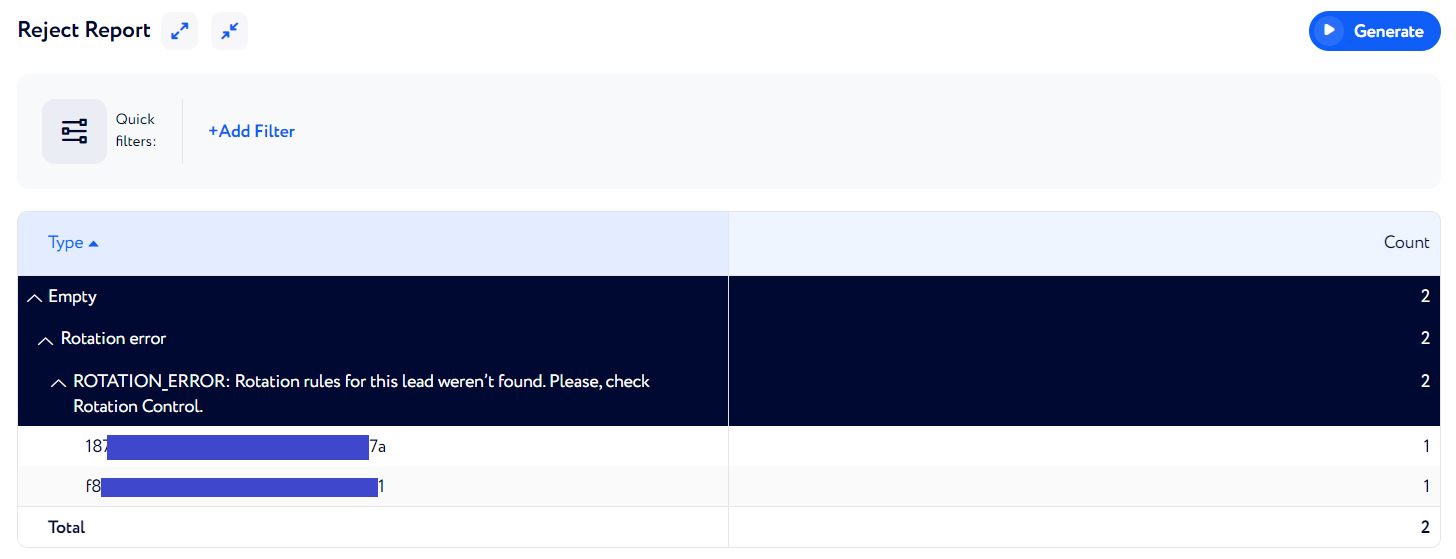
This report says that the reported 2 leads could not be pushed to any advertiser because there were no matching rules for them. To avoid such errors, carefully set up your rotation rules to cover all incoming traffic. Additionally, consider creating a pass-all rule for a Fallback Provider. This will help you to keep irrelevant traffic and then push it directly to suitable advertisers.
Alternatively, if you prefer not to manually generate reports each time, you can set up a scheduled report that will be automatically sent to you at regular intervals.
Scheduled report
Note: This option is beneficial if you have a large amount of traffic. Otherwise, consider using notifications.
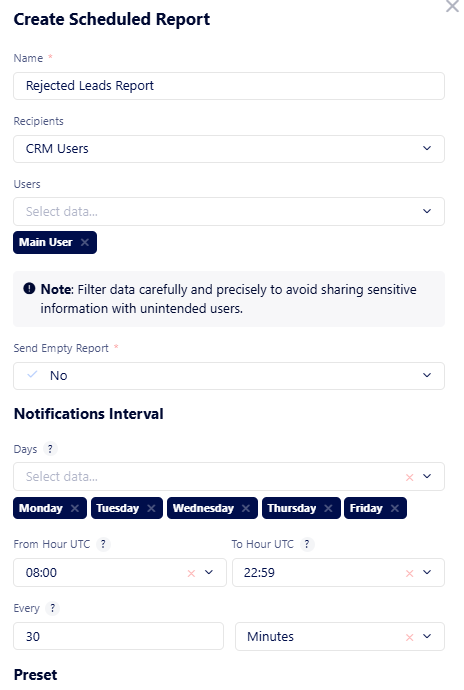
To quickly respond to errors, create a report that will periodically notify you via Telegram about leads rejected due to rotation-related issues. To do that, go to Reports → Scheduled Report and create a report according to recommendations mentioned below:
Name – enter a report name.
Recipients – define type of users which the report will be sent to.
CRM Users – select if you want to send the report via Telegram to Lead Distribution users.
Non-CRM Users – select if you want to send the report via Telegram to recipients outside Lead Distribution.
Send Empty Report – check the box if you want to receive a notification even if your report has no data.
Notifications Interval – in this block, you need to specify the day the report will be sent, along with the sending frequency.
Days – select day(s) of the week on which the report will be sent.
For example, if you only work with traffic during weekdays, you can set it from Monday to Friday to receive the report during those days.From Hour UTC / To Hour UTC – select a certain hour(s) during the day (in UTC format) at which you want the report to be sent.
Every – define the frequency at which the report will be sent during the selected period.
For example, if you set it to every 30 minutes, the report will be sent every 30 minutes on the selected days via Telegram.
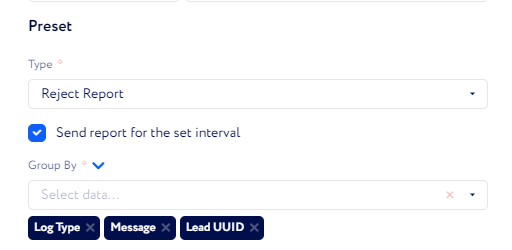
Preset – here, you need to customize the report data.
Type – select a report type. In this case, select Reject Report.
Send report for the set interval – check the box if you want to monitor rejected leads data only for the period you set. Otherwise, specify the period via the From Date / To Date fields below.
From Date / To Date – define the period for which the data needs to be generated.
Group By – select the data to include in the report.
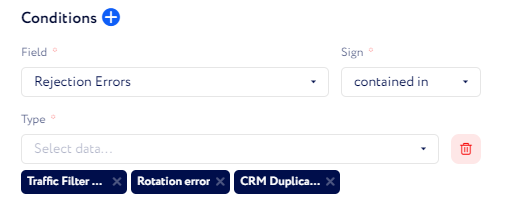
Conditions – select necessary conditions to filter report data more precisely. Here, we recommend you to include the following conditions:
Rejection Errors contained in Setup Errors (to only receive rotation-related errors).
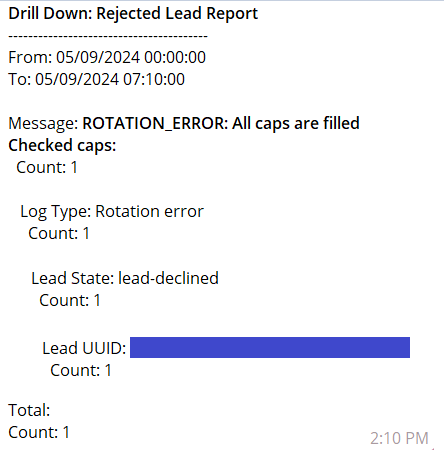
Thus, you will receive notifications on the errors within the interval set.
Here’s an example of the report sent via Telegram:
Rejected Leads Notifications
Rejected leads are one of the major challenges in traffic allocation, which is why it is important to minimize them to maximize your traffic performance and revenue. Notifications on rejected leads can be a valuable tool in achieving this.
Note: This option is beneficial if you have a modest amount of traffic. Otherwise, consider using scheduled reports.
The notifications can be sent to your CRM, IREV Telegram bot, or any other destination which you can customize using the HTTP protocol. To do that, follow the steps described below:
Go to Settings Navigation → Notifications and click “Create Notification” at the top right corner of the page.
In the appeared window, customize the notification step by step.
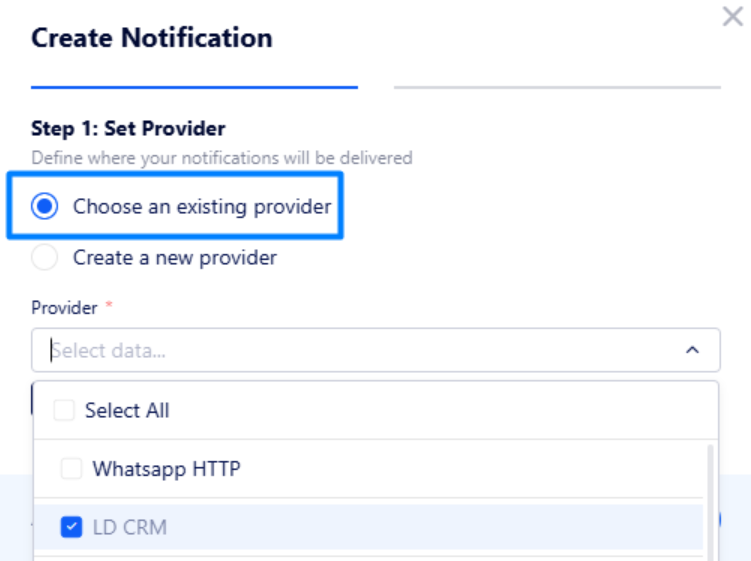
On Step 1, manage the notification provider – endpoint where notifications will be sent (e.g., Telegram).
Choose a required existing provider if you created one before.
Or create a new notification provider if you do not have one or if existing ones are not suitable.

In this case, you need to specify the following fields:
Name – enter a name for this provider.
Provider type – select a provider type (where notifications will be sent to):
IREV Telegram Bot for CRM Users – notifications will be sent to the specified CRM users via IREV Telegram Bot;
IREV Telegram Bot for Non-CRM Users – notifications will be sent to Telegram users outside Lead Distribution via IREV Telegram Bot;
HTTP – notification will be sent to your endpoint integrated via HTTP/HTTPS;
LD CRM – notifications will be sent to Lead Distribution CRM of the specified users.
Recipients – select CRM users which will receive notifications.
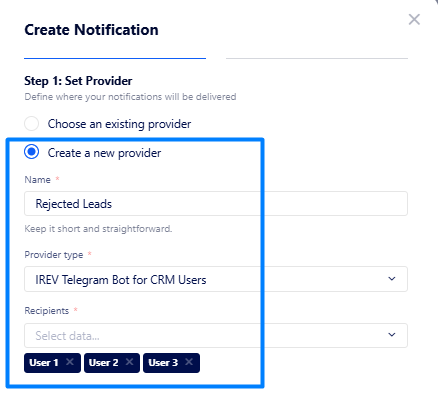
The screenshot above says that notifications will only be sent to Lead Distribution CRMs for User 1, User 2, and User 3.
Once you have set a required destination and recipients, you need to customize notifications. To do so, click "Next" to switch to Step 2.
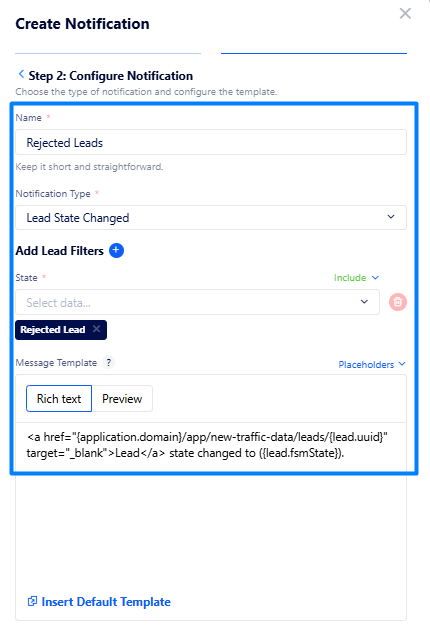
Here, specify the following:
Name – enter the notification name.
Notification Type – in this case, select Lead State Changed.
Add Lead Filters – apply additional filters to only get notified about necessary leads. Recommended filters:
State = Rejected Lead
Message Template – type a notification message or use the default one. If needed, you can use placeholders.
Thus, when any lead gets rejected, you will receive notification.
The default notification looks as follows:

Here, you can quickly open the rejected lead page by clicking the “Lead” part of the message.
Alternatively, the CRM notifications can be found as highlighted below:
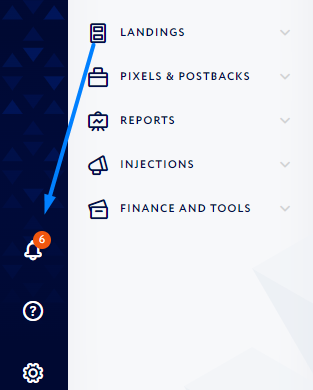
So, notifications keep you informed about all rejected leads, enabling you to analyze the issue promptly.
Thus, the notifications and reports mentioned in this article can help you to identify why leads were rejected and optimize your rotation rules to maximize profit.