
User Access walkthrough
The User Access tab lets you control data visibility for your employees, ensuring they see only the necessary information in the CRM.
Note: Mind that permissions set when creating a user group are different from the restrictions in the User Access.
Permissions control access to system functionalities (e.g., tables, reports) while User Access restricts specific traffic-related information (e.g., advertiser names, leads’ email addresses).
Permissions are of higher priority than User Access.
How to limit user access
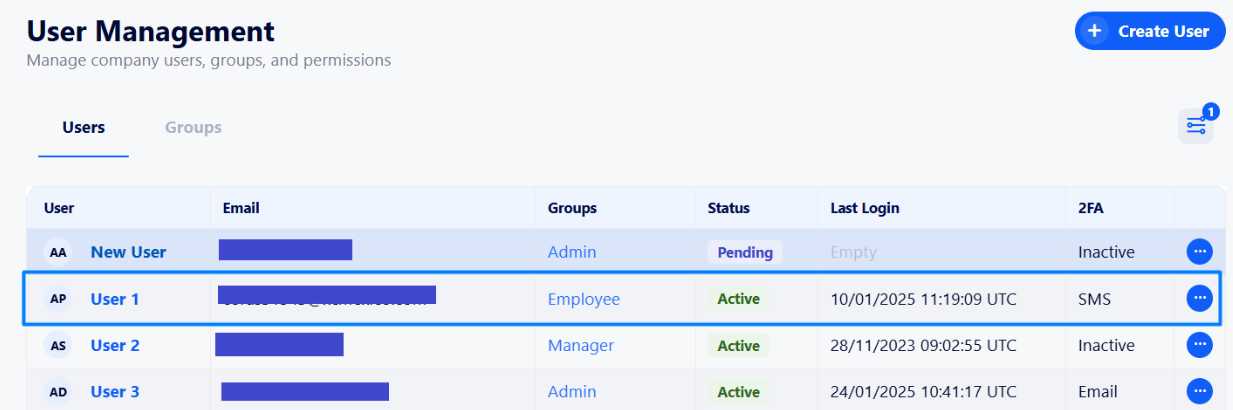
In order to restrict Lead Distribution data access for a specific user, go to Control → User Management → Users and select a necessary user.
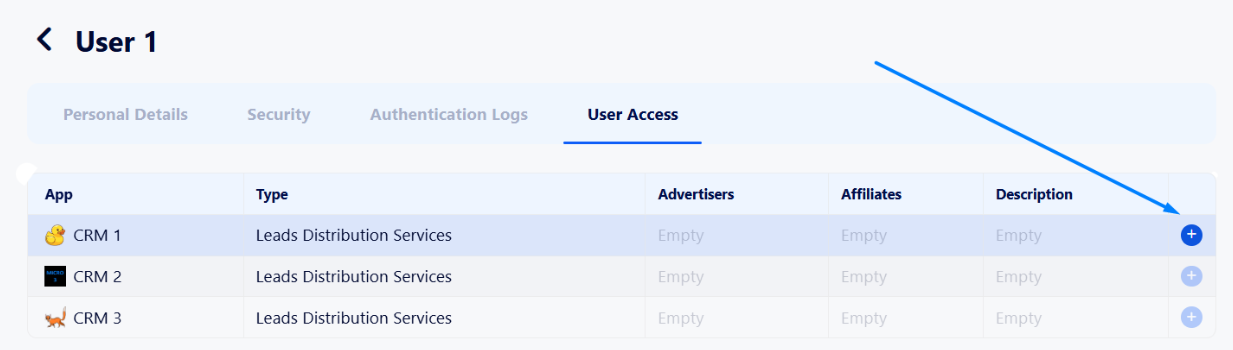
Then, go to the “User Access” tab and click + next to the required CRM line to customize access:
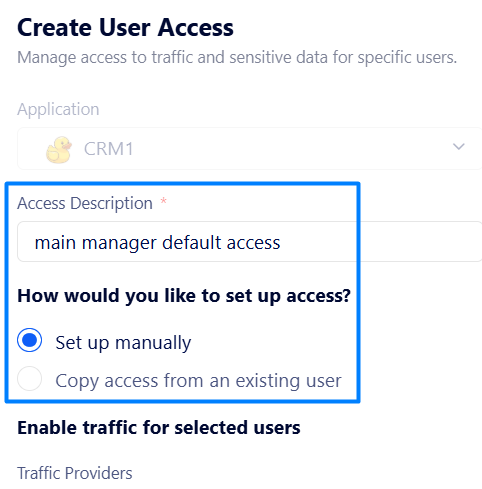
In the appeared window, set up the following fields:
Access Description – enter key details about the access.
Then, choose how you want to set up the access:
Manually – set up the data access from scratch.
Copy access from an existing user – copy already existing user access and update it if needed.
As the fields remain the same for both manual setup and copying from the user, let us demonstrate and describe the fields using the manual setup option as an example.
First, specify advertisers and affiliates whose data will be visible to the user:
Traffic Providers – select traffic providers which affiliates will be visible to the user.
Affiliates – select affiliates to show or hide. Only affiliates linked to the selected traffic provider can be displayed.
Note: To select affiliates, you need to select a corresponding traffic provider first.Advertisers – select advertisers which data to display to the user.
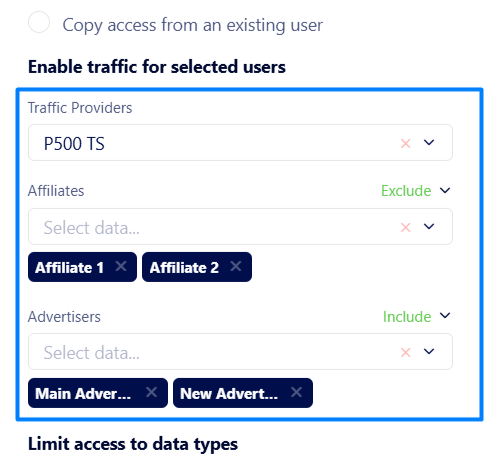
Here, you can choose to either include advertisers/affiliates so the user can see them in the system or exclude them to hide them from the user. The best approach depends on your needs:
To grant access to specific advertisers/affiliates data, use the “Include” filter.
To restrict access to specific advertisers/affiliates data, use the “Exclude” filter.
The example above says that all the traffic data from the P500 TS traffic provider (except for data from its Affiliate 1 and Affiliate 2) will be visible to the current user. Additionally, only data from the Main Advertiser and New Advertiser will be accessible.
Note: If you do not select any affiliates or advertisers in this section, data from all advertisers and affiliates will be visible to such a user.
Next, define specific traffic-related data to be visible in reports, logs as well as traffic and conversion tables:
Terms – select metrics to be visible for the user on dashboard, reports, tables, etc
Lead Fields – select lead data to be visible in Traffic Data tables, Data Exporter, Drilldown Metric reports, etc.
Conversion Fields – select conversion data to be visible in Conversion tables, Drilldown Conversions report, etc.
Lead Push Log Fields – select fields the user can view in Lead Push Logs and in the Lead Push Logs report.
Hide Name – select what names to hide from a specific user if you do not want to reveal this information. Here, you can only hide the names of the entire group (e.g., all offers in the system), but not individual names within a group (e.g., a specific offer name).
Note: If you hide element (offer, advertiser, or affiliate) names, their UUIDs are displayed for the user instead.Rejected Leads – define whether rejected leads will be visible for the user or not.
Note: If enabled, only rejected leads from the enabled advertisers are displayed.

The settings shown above means that the user can only view the following in the CRM:
Rejected leads, clicks, total FTDs, and pushed leads data in reports, tables, etc.
Lead’s UUID, email address, first and last name, password, phone number, advertiser, and country columns in lead reports and traffic tables.
Conversion’s UUID, country, goal type, and advertiser columns in conversion reports and tables.
No Lead Push Log Fields will be visible.
Leads rejected by the enabled advertisers will be visible.
Lead Profile
In this section, you can additionally restrict access to the lead data you manually created via Lead Distribution → Settings Navigation → Lead Profile.
As the options in this section may vary for each client, there are no specific details to outline.