
v.1.1.45
06.02.2025
Features
Enhanced injector
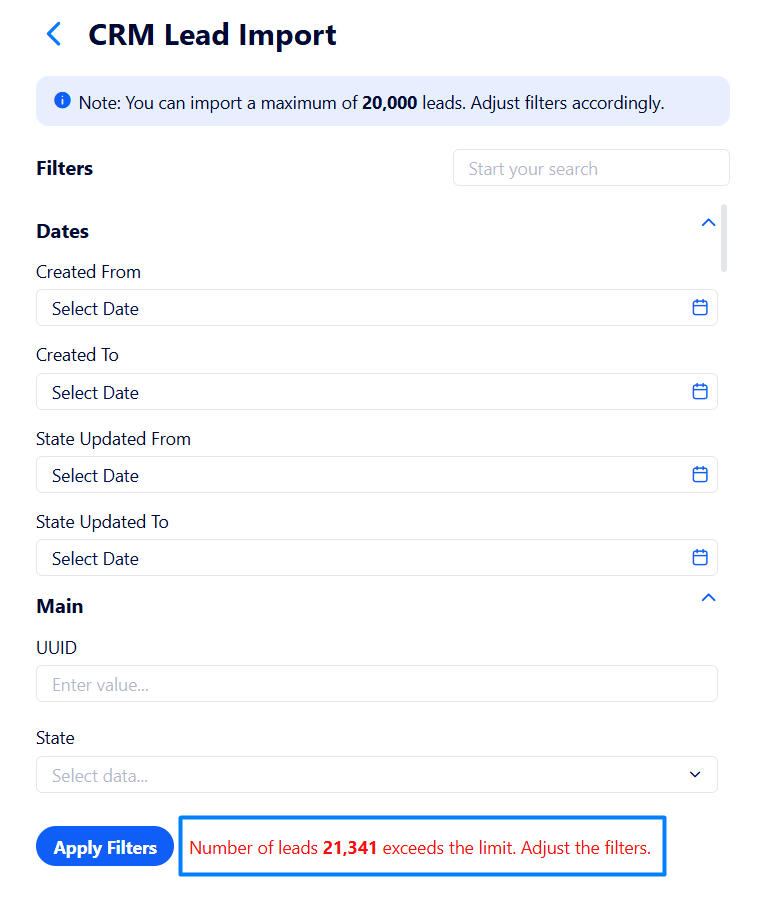
The lead capacity to be importer per injection has been increased up to 20,000 leads.
Note: You can run a maximum of 3 injections at the same time.
Moreover, the lead importing process from both the CRM and a CSV file has become more intuitive. Let us comment on each option separately.
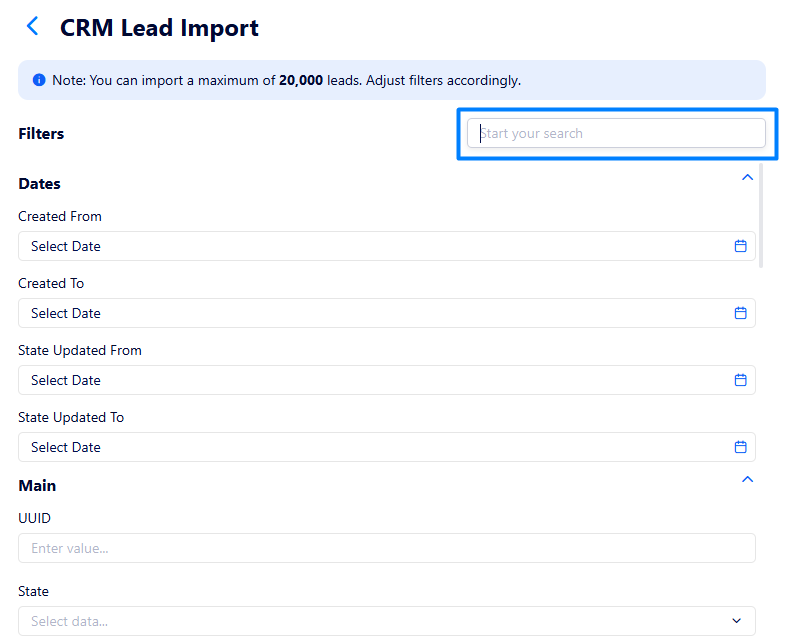
Import from the current CRM
Now, all the filters are grouped allowing more convenient navigation. Additionally, you can search for a specific filer using the search bar at the right.
If the number of selected leads exceeds the allowed limit, the corresponding notification appears at the bottom of the page highlighting the actual number of leads.
Also, if duplicated leads (when the leads are selected to be pushed to the same advertiser) occur during the importing, the warning window appears:
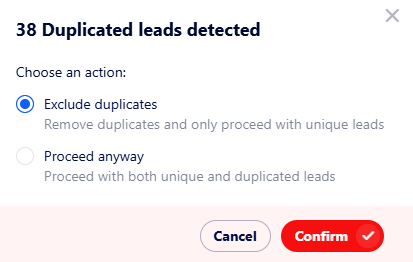
Here you can either exclude them from being re-pushed or re-pushed duplicates along with unique leads.
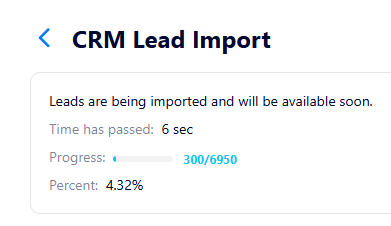
Once you have selected leads to be imported and start the process, the window appears where you can view the import progress.
Import from a CSV file
Here, the procedure remains the same, though the interface has become more user-friendly.
First, you need to upload a lead file in CSV format.
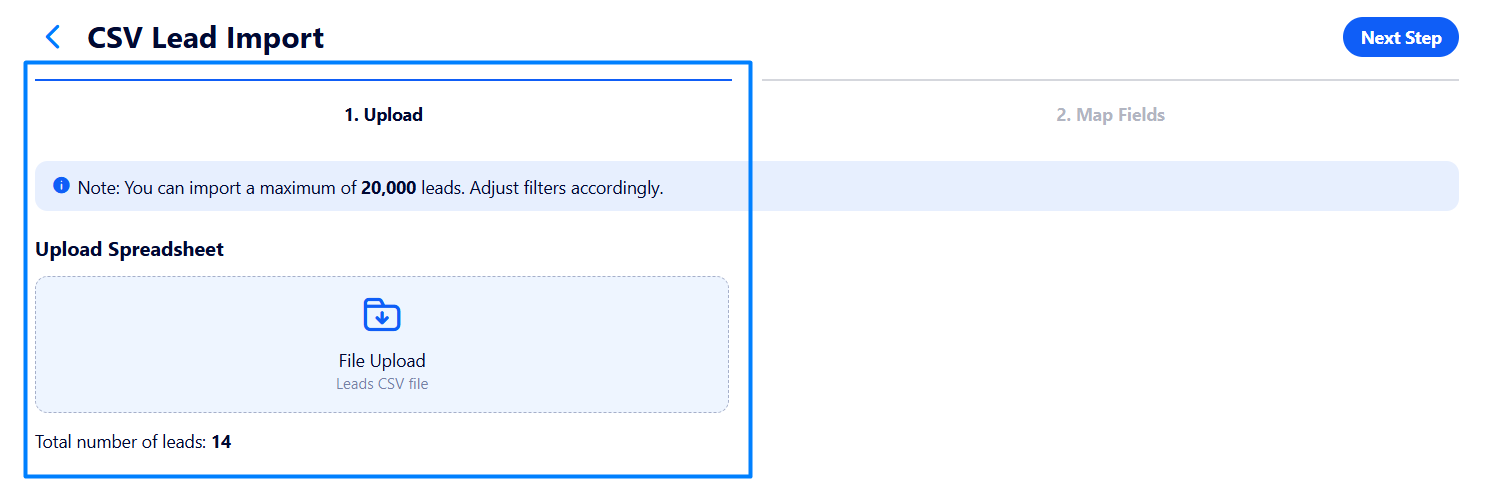
Once the file has been uploaded, you can see the number of valid leads to be re-pushed as well as the number of invalid ones (the leads with no required fields specified).
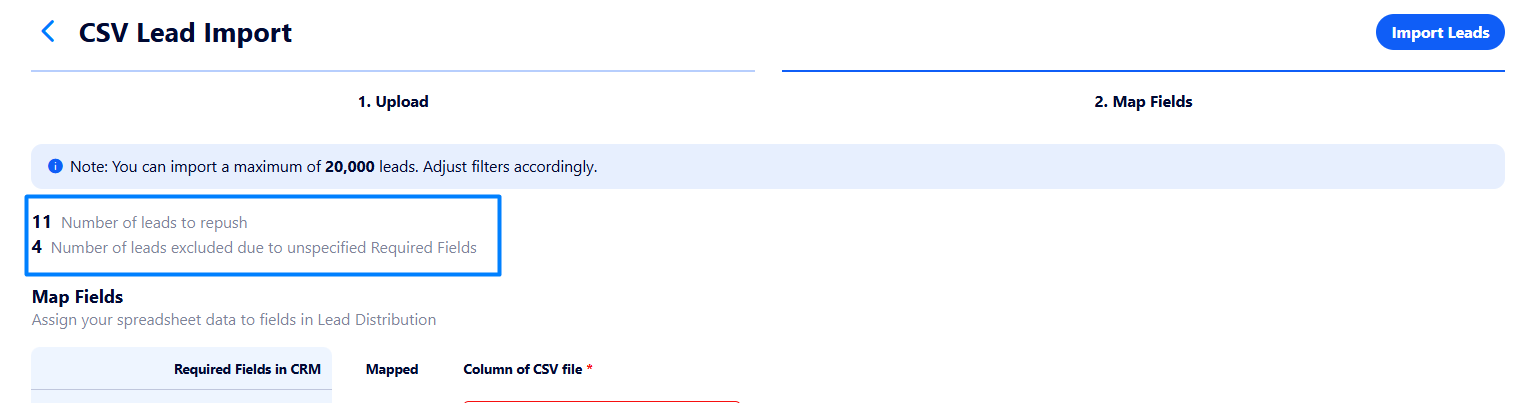
On the Step 2 you need to map fields in the uploaded file with the corresponding fields in the CRM (some of them may be mapped automatically).
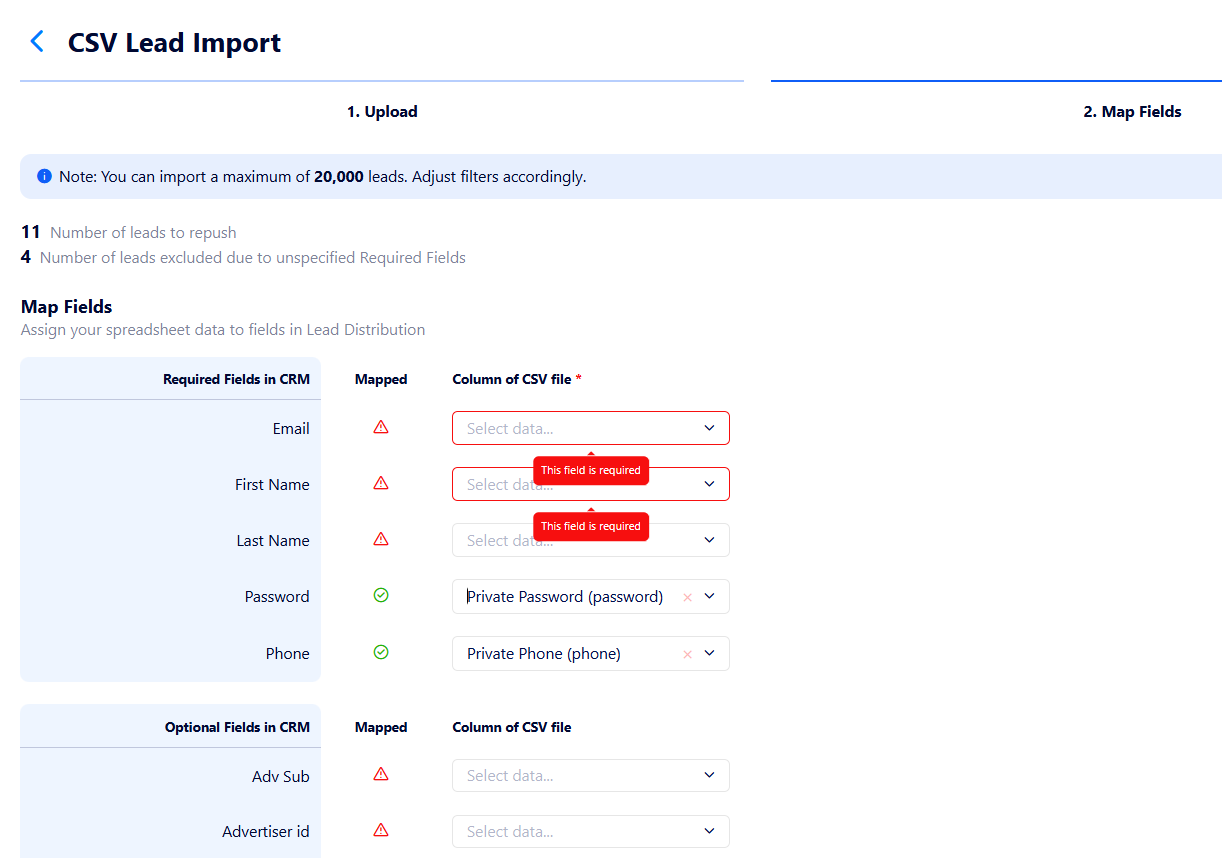
You can import leads when you mapped at least all the required fields.
Important: Do not close the current tab or turn off the internet connection or VPN until the lead import is finished.
Optimized the Sale Statuses tab
The interface is now more user-friendly, allowing you to easily assign sale statuses and save time on manual mapping using AI-driven statuses sorting.
Now, you can drag unassigned advertiser sale statuses to a corresponding CRM sale status line.
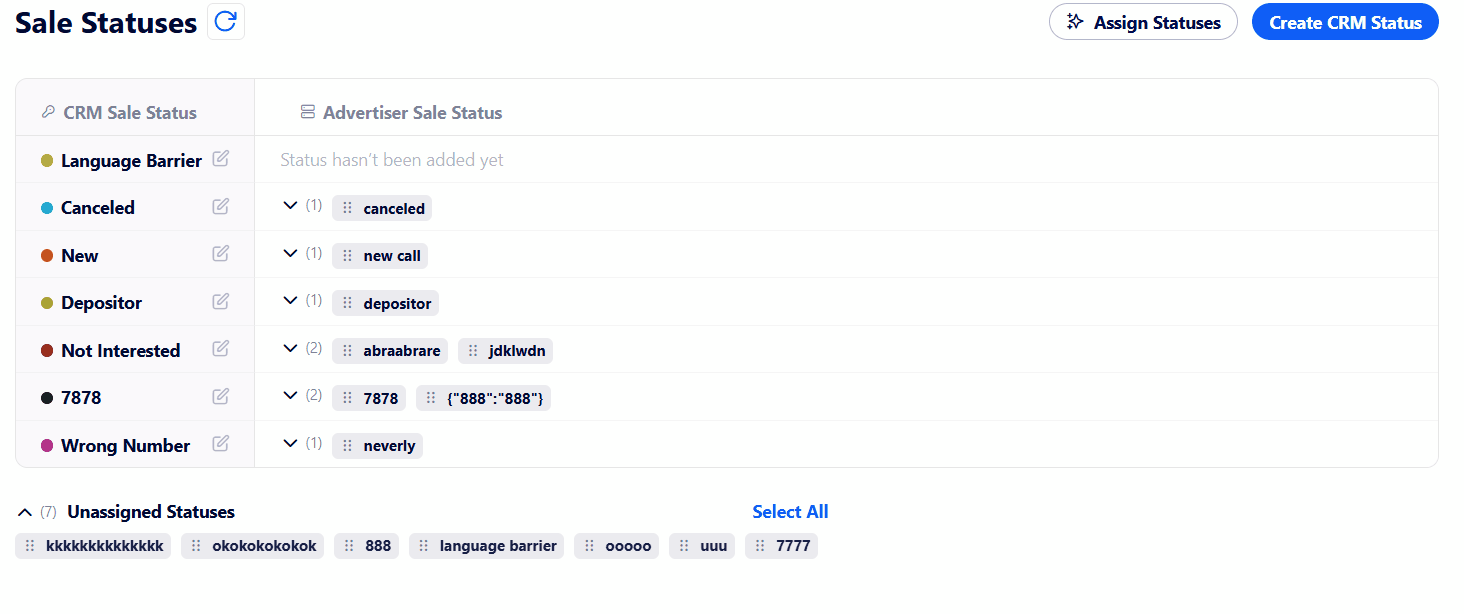
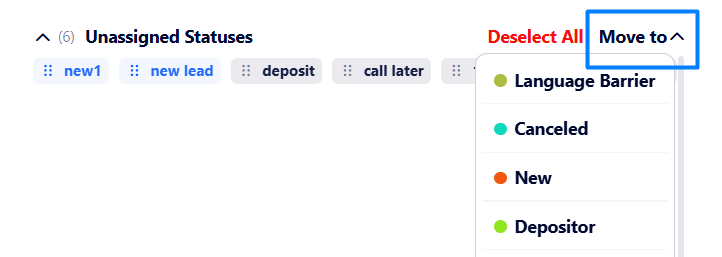
Also, you can select several statuses and map them in one click using the following button:
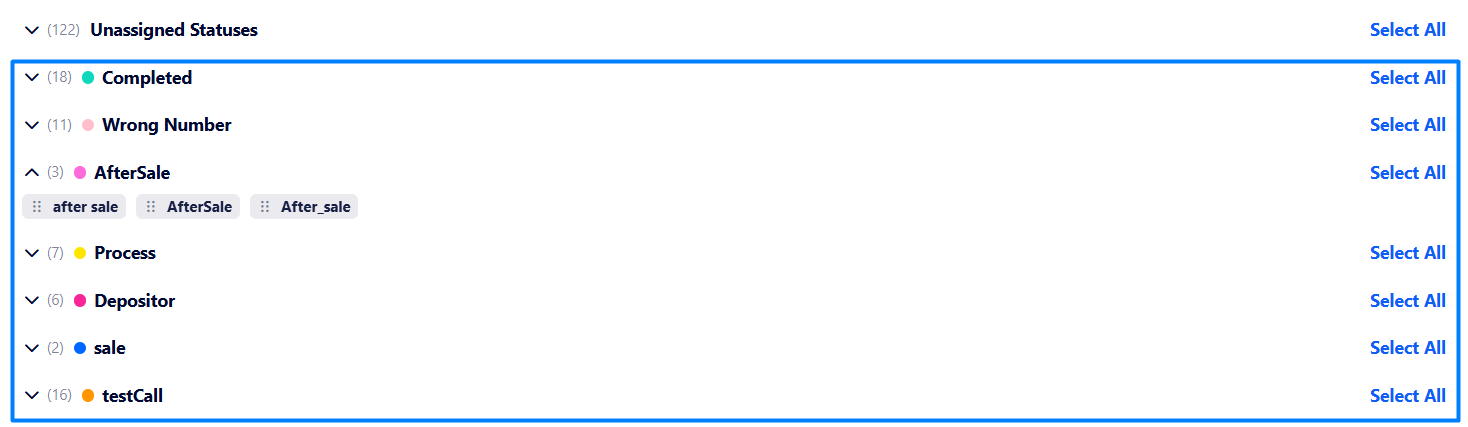
Moreover, if you do not want to map sale statuses manually, there is an option to map them automatically. To do that, click the “Assign Statuses“ button at the top right corner of the page:

Once clicking, the system analyzes all currently assigned statuses with AI assistance, and then sort all unassigned ones accordingly as a suggestion below the Unassigned Statuses area.
If the statuses match as needed, you can confirm mapping by clicking Select All → Move to and select a corresponding CRM sale status.
If there are only several statuses that match, you can select them and then click “Move to“ as well.
Otherwise, you can click “Unassign Statuses“ to undo the action.

Note: The suggestions are made based on the already assigned sale statuses.
Thus, now you can map sale statuses faster using AI-driven sorting based on already mapped sale statuses.
Common
Implemented auto-saving settings for tables and Capacity Management
Now, the tree structure, column arrangement, and selected filters are preserved even when logging in from a different browser, device, or session.
The functionality is available for all users by default.
Improved lead logging
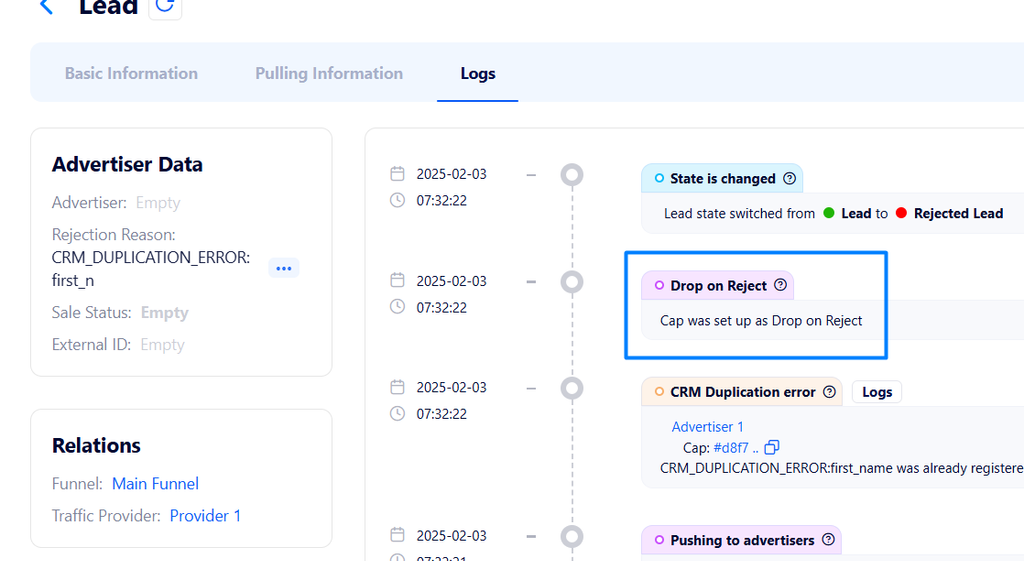
Added a new lead log type – Dropped on Reject (highlighting leads being rejected due to the “Drop on Reject“ cap) – to make lead logs more detailed and accurate.
You can find it in a lead logs (on a lead’s page):
As well as in Lead Push Logs Report in Data Exporter as a condition:
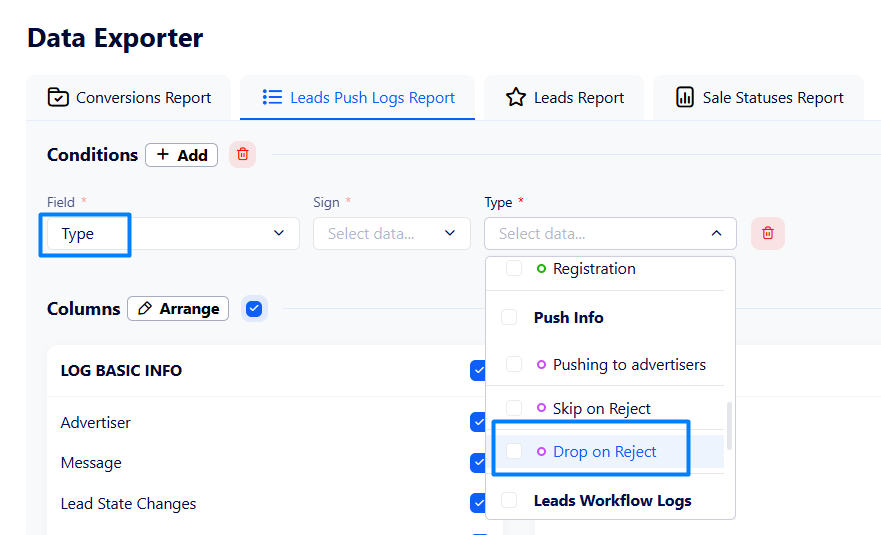
And in Lead Push Logs as a type filter:

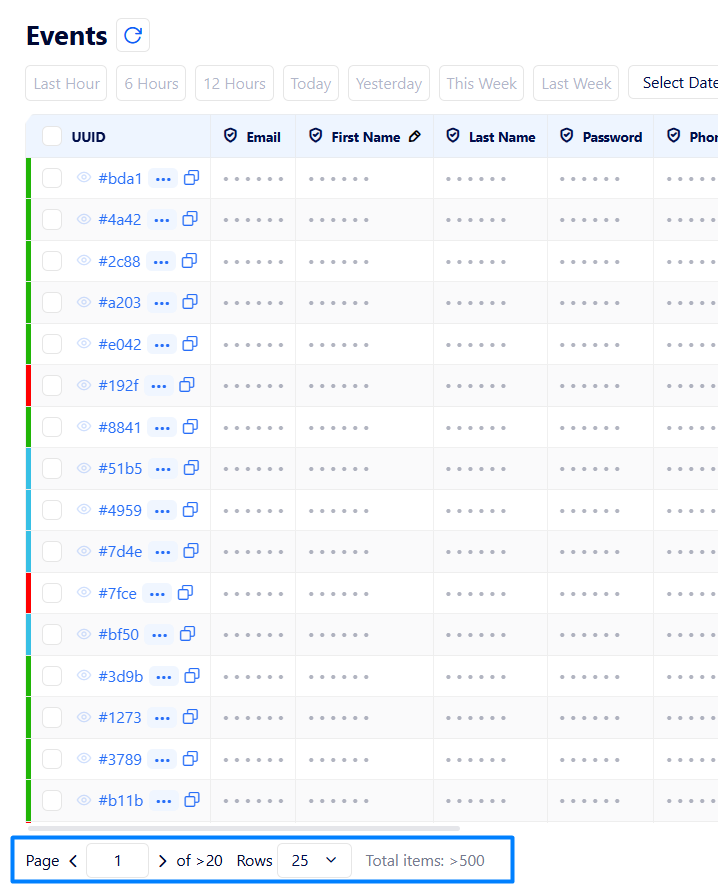
Reorganized pagination
Now it is positioned at the bottom of the page for better usability.
Bugs
Fixed an issue with data selecting in CRG Reports
CRG revenue reports failed to be generated if a date range was selected.
Now, the reports can be generated properly.