Custom Funnel basic setup
This brief illustrated guide walks you through the fundamental steps of integrating your Lead Distribution registration form with your funnel.
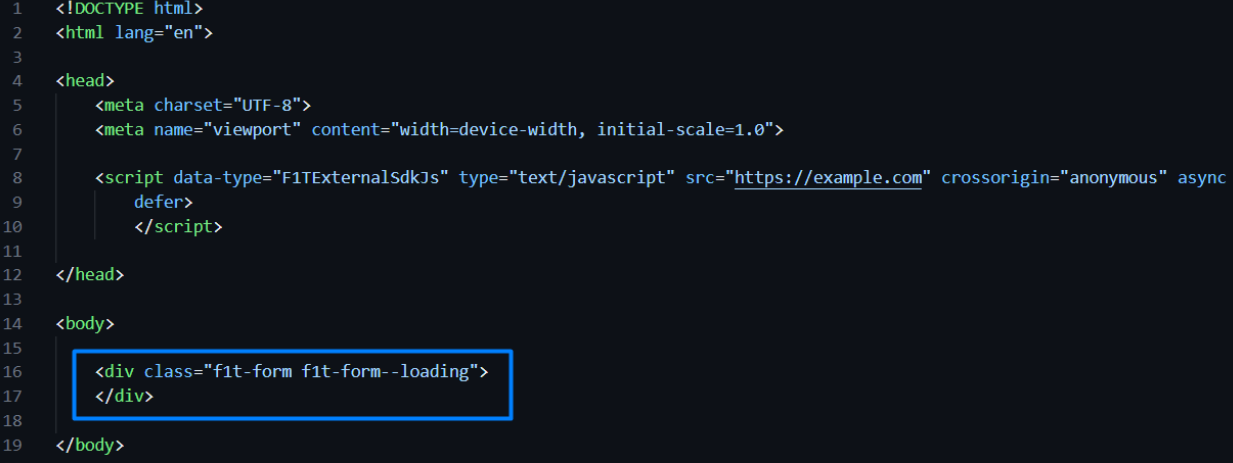
Open your HTML funnel page in any suitable editor (e.g., Visual Studio Code) and copy the following script:
<script data-type="F1TExternalSdkJs"
  type="text/javascript"
  src="https://example.com"
  crossorigin="anonymous" defer>
</script>
Then, add it inside the <header></header> section:
Note: You can find the domain to be placed in the script above (instead of example.com) via Landings → Custom Funnel. If the Custom Funnel page is disabled, contact our support team to enable the functionality for you.
Copy the <div></div> element with the f1t-form class shown below:
<div class="f1t-form f1t-form--loading"></div>Add it inside the <body></body> section to the place where you want the form to be displayed on the page, for example:
Next, you can see that the form set as default in your Lead Distribution CRM is displayed:
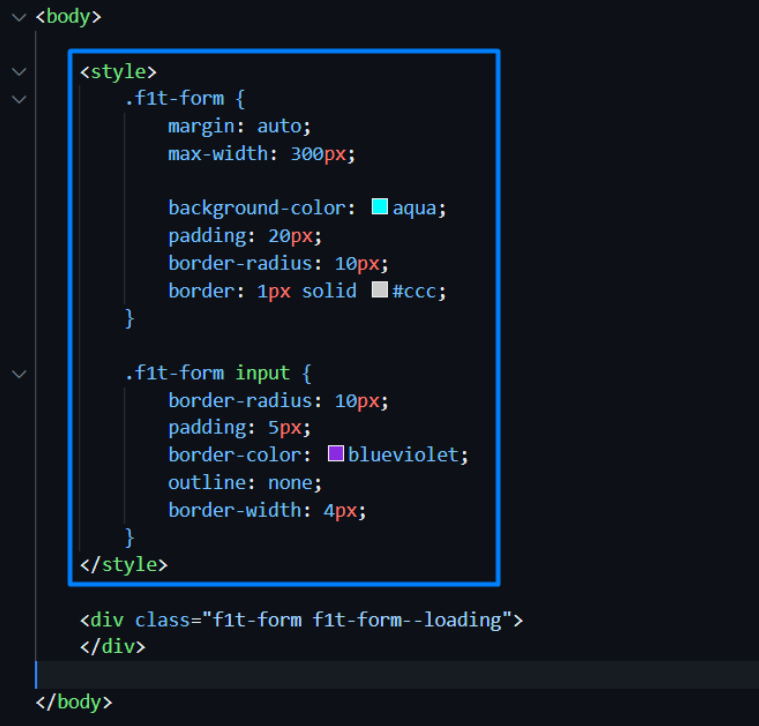
You can customize your form (e.g., change its color, shape, paddings, size, etc.). For example, for the form to be displayed as follows:
Add the following inside the <body></body> section:
Important details to get familiar with:
You can change your form fields, placeholders, validation, etc. via your CRM → Settings Navigation → Forms → required form’ page.
The article describes a case where a registration form automatically pops up when a lead lands on the page. Alternatively, the form can be triggered manually (e.g., after clicking a button).
Also, it is possible to customize post-registration windows (success, declined, access restricted).
Important: You can find the mentioned expanded functionality as well as other optional details in our advanced guide via Lead Distribution CRM → Landings → Custom Funnel.


