How to create a scheduled report on rejected leads?
If you want to get regular updates about rejected leads via Telegram, consider setting up a corresponding scheduled report.
Setting-up the report
We recommend you to create 2 separate reports depending on error types: advertiser-related errors (validation errors, duplicated data, timeout, etc.) and setup errors (rotation-related errors, blocking by traffic filter, etc.).
So, let us describe the report setting up procedure step by step.
Advertiser errors report
Go to Reports → Scheduled Reports and click + next to the page title.
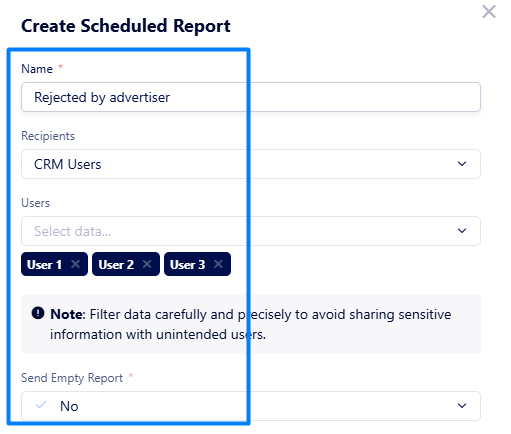
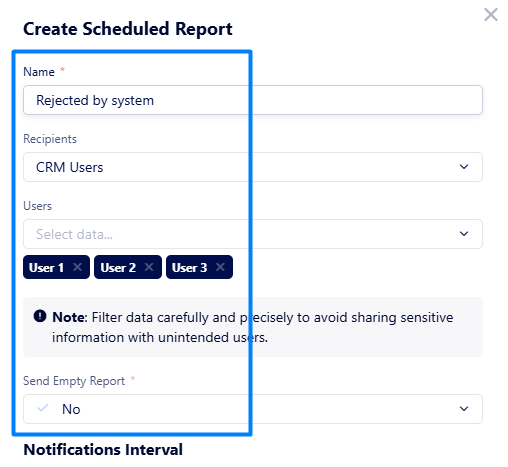
In the appeared window, specify the following:
Name – enter a unique report name.
Recipients – define type of users which the report will be sent to.
CRM Users – select if you want to send the report via Telegram to Lead Distribution users.
Non-CRM Users – select if you want to send the report via Telegram to recipients outside Lead Distribution.
Users – select Lead Distribution user(s) which the report will be sent to.
Send Empty Report – define if you want to receive an empty report or not (if there is no data for a specific period of time, a blank report marked "Empty" will be sent).
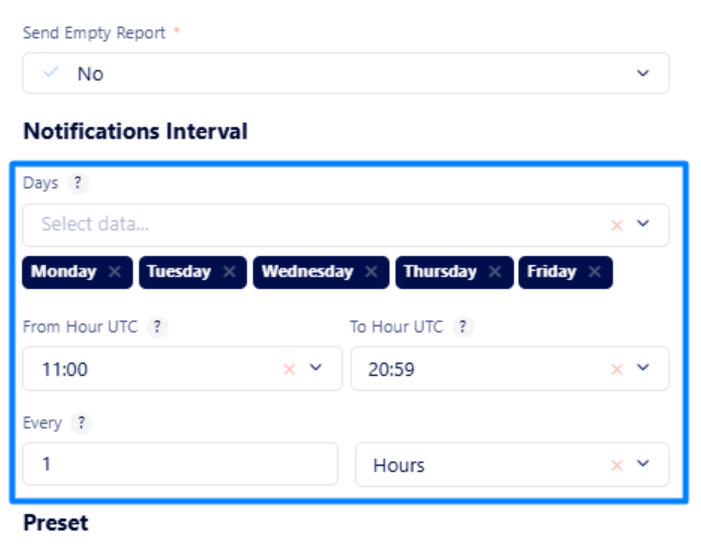
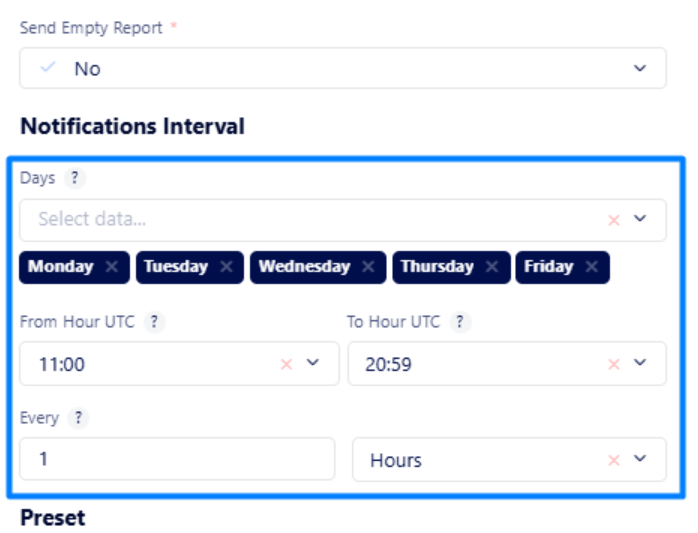
Notifications Interval (optional) – in this block, you need to specify when and how often you want to receive the report.
Days – select day(s) of the week when you want to receive the report.
From Hour UTC / To Hour UTC – select specific hour(s) of the day (in UTC format) when you want the report to be sent.
Every – define how often the report to be sent during the selected period.
The example above says that you will receive the report every hour from 11:00 UTC to 20:59 UTC from Monday to Friday.
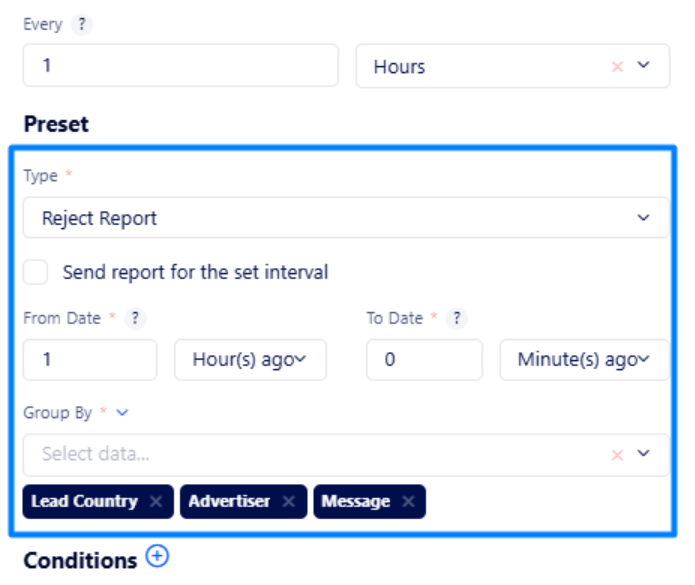
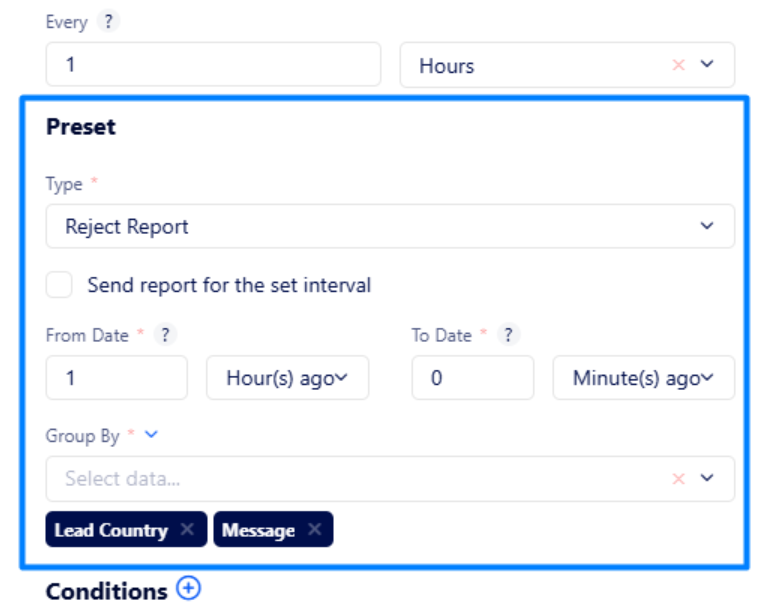
Preset – here, you need to customize the report data.
Type – select the “Reject Report” option.
Next, specify the time period for which the rejected lead data should be included in the report:
Check “Send report for the set interval” if you need to monitor rejected leads only during the period you set in the “Notifications Interval” section above.
Select a specific time range with From Date / To Date, if you need to monitor data for a certain period of time (e.g., if you need to study rejected leads for the last 30 minutes up to now).
Group By – select data you want to include in your report. We recommend you to select the following: Country, Advertiser, Message.
Note: To avoid data repetition in future reports and get notified on new rejected leads only, ensure the "Every" interval matches "From/To Dates".
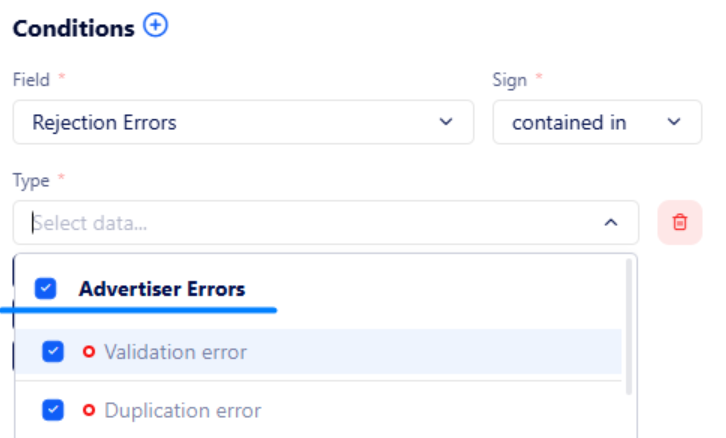
Conditions – select the required conditions to view only relevant information and filter out unnecessary details.
Here, select the “Advertiser Errors” section for “Rejection Errors" as displayed in the screenshot below:
According to the configuration above, you will receive your first report on rejected leads (if any) at 11:00 UTC for the period 10:00-11:00 UTC of the same weekday.
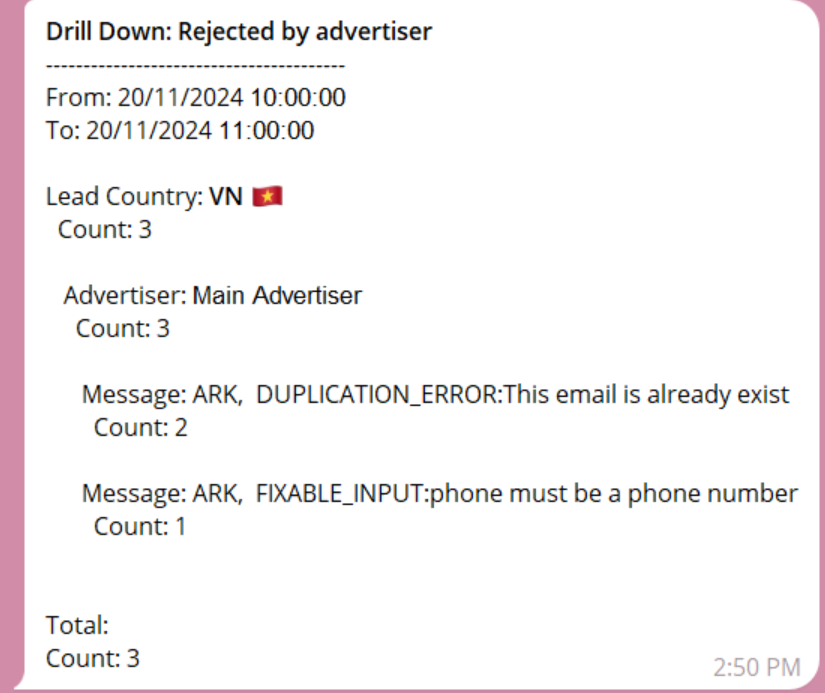
The report will look as follows:
The report indicates that 3 leads were rejected during the period 10:00–11:00 UTC on 20.11.2024. All 3 were rejected by the same advertiser, Main Advertiser, and for the same country, Vietnam. Two leads were rejected due to duplicate email addresses in the advertiser's system, while the other was rejected for having an invalid phone number.
Setup errors report
Go to Reports → Scheduled Reports and click + next to the page title.
In the appeared window, specify the following:
Name – enter a unique report name.
Recipients – define type of users which the report will be sent to.
CRM Users – select if you want to send the report via Telegram to Lead Distribution users.
Non-CRM Users – select if you want to send the report via Telegram to recipients outside Lead Distribution.
Send Empty Report – define if you want to receive an empty report or not (if there is no data for a specific period of time, a blank report marked "Empty" will be sent).
Notifications Interval (optional) – in this block, you need to specify when and how often you want to receive the report.
Days – select day(s) of the week when you want to receive the report.
From Hour UTC / To Hour UTC – select specific hour(s) of the day (in UTC format) when you want the report to be sent.
Every – define how often the report to be sent during the selected period.
The example above says that you will receive the report every hour from 11:00 UTC to 20:59 UTC from Monday to Friday.
Preset – here, you need to customize the report data.
Type – select the “Reject Report” option.
Next, specify the time period for which the rejected lead data should be included in the report:
Check “Send report for the set interval” if you need to monitor rejected leads only during the period you set in the “Notifications Interval” section above.
Select a specific time range with From Date / To Date, if you need to monitor data for a certain period of time (e.g., if you need to study rejected leads for the last 30 minutes up to now).
Group By – select data you want to include in your report. We recommend you to select the following: Country, Message.
Note: To avoid data repetition in future reports and get notified on new rejected leads only, ensure the "Every" interval matches "From/To Dates".
Conditions – select the required conditions to view only relevant information and filter out unnecessary details.
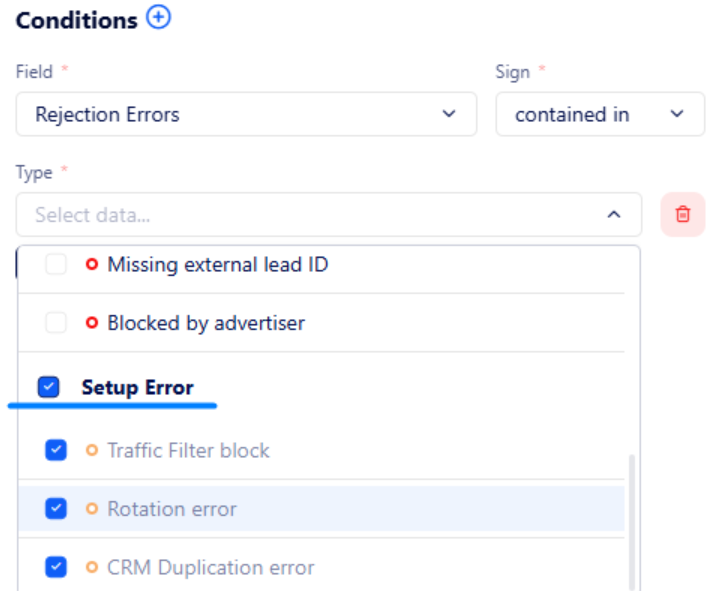
Here, choose the “Setup Errors” section for “Rejection Errors" as displayed in the screenshot below:
According to the configuration above, you will receive your first report on rejected leads (if any) at 11:00 UTC for the period 10:00-11:00 UTC of the same weekday.
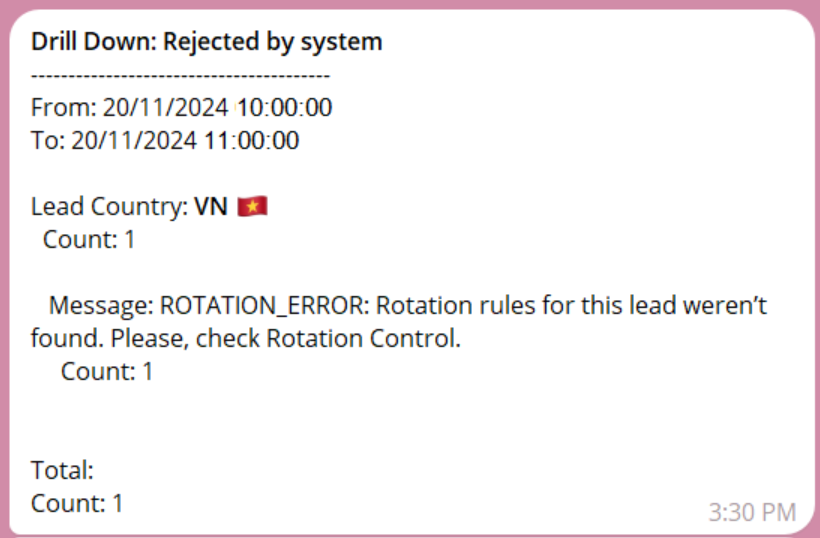
The report will look as follows:
The report indicates that 1 lead failed to be pushed to any advertiser between 10:00–11:00 UTC on 20.11.2024 due to the absence of a suitable rule (e.g., no rules existed for the specified country, or the lead was pushed outside acceptable hours).
Notifications Interval vs Preset timerange
You may notice that time ranges need to be specified in two different sections. While they may seem similar, there is a key difference between them.
Let us explain the difference with the example below:
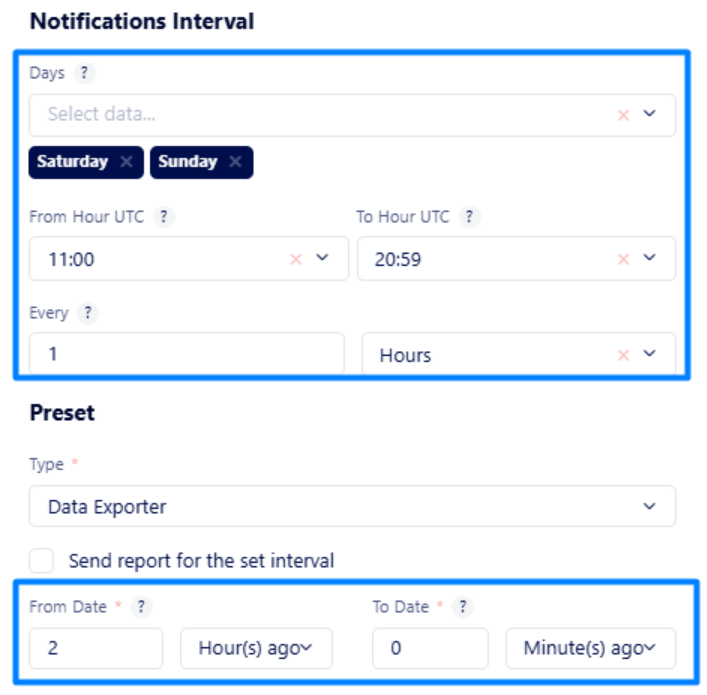
The screenshot shows that you will receive hour-based reports only on Saturdays and Sundays, between 11:00 UTC and 20:59 UTC.
The first report will be received on Saturday at 11:00 UTC with the data for the period 09:00 UTC until 11:00 UTC.
The second report will be received on Saturday at 12:00 UTC with the data for the period 10:00 UTC until 12:00 UTC.
Last Saturday’s report will be received at 20:59 UTC with the data for the period from 19:00 UTC until 20:59 UTC on Saturday.


