How to setup Notifications (MSOA)
In this guide, we’ll cover everything that you need to set up the notifications in our MSOA (LD Services) system
Notifications are set up when you need to be alerted about a specific action being performed in the CRM (for example: lead state changes, new conversions, etc.).
Below, we’ll go through all the settings that can be applied in case you need to get notifications
Finding the Notifications section
There are two sections on this page:
Notifications: Settings
Notifications: Providers
Notifications: Providers
The place where the notification is about a specified action performed in the CRM will be sent
It can be:
IREV Telegram bot (@irev_com_bot)
A website (works as a postback)
The LD CRM
When setting up the provider, we need to specify:
The name of the provider
Provider - what kind of provider is used (as mentioned above)
Recipients - who will receive the notification
Here’s how it looks for the:
1) Telegram Bot
Name - the name of the provider
Provider - set the provider type which will determine the destination of the notification (Telegram Bot in this case)
Recipients - the users who will receive the notification
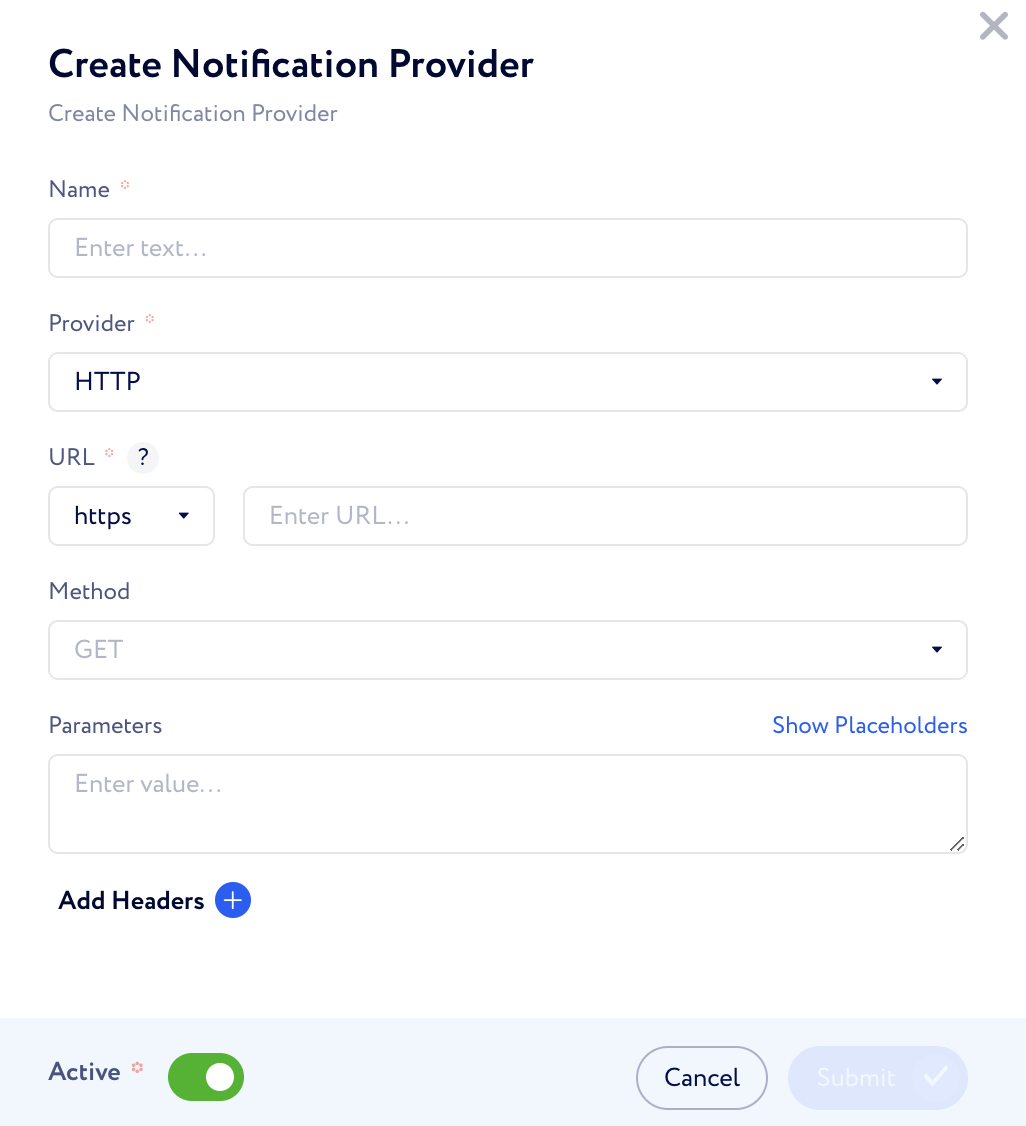
2) HTTP (Website)
Acts as Postback request
Name - the name of the provider
Provider - set the provider type which will determine the destination of the notification (HTTP in this case)
URL - the destination URL where the notification will go to
Method - the request type to the website based on the documentation (GET or POST)
Parameters - enter the body of the request
Add headers - add key parameters in the postback depending on your requirements
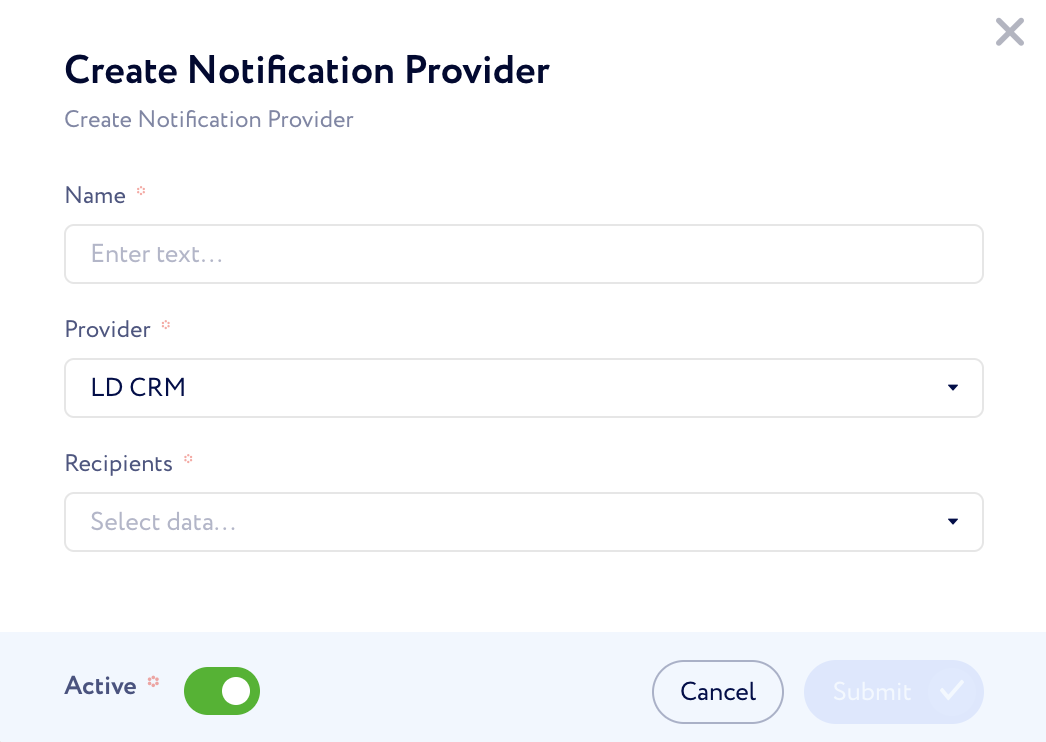
3) LD CRM
Name - name of the provider
Provider - set the provider type which will determine the destination of the notification (LD CRM in this case)
Recipients - the users who will receive the notification
Once the provider is created, we can move on to the Settings section
Notifications: Settings
Here we specify for which event we would like to receive the notification
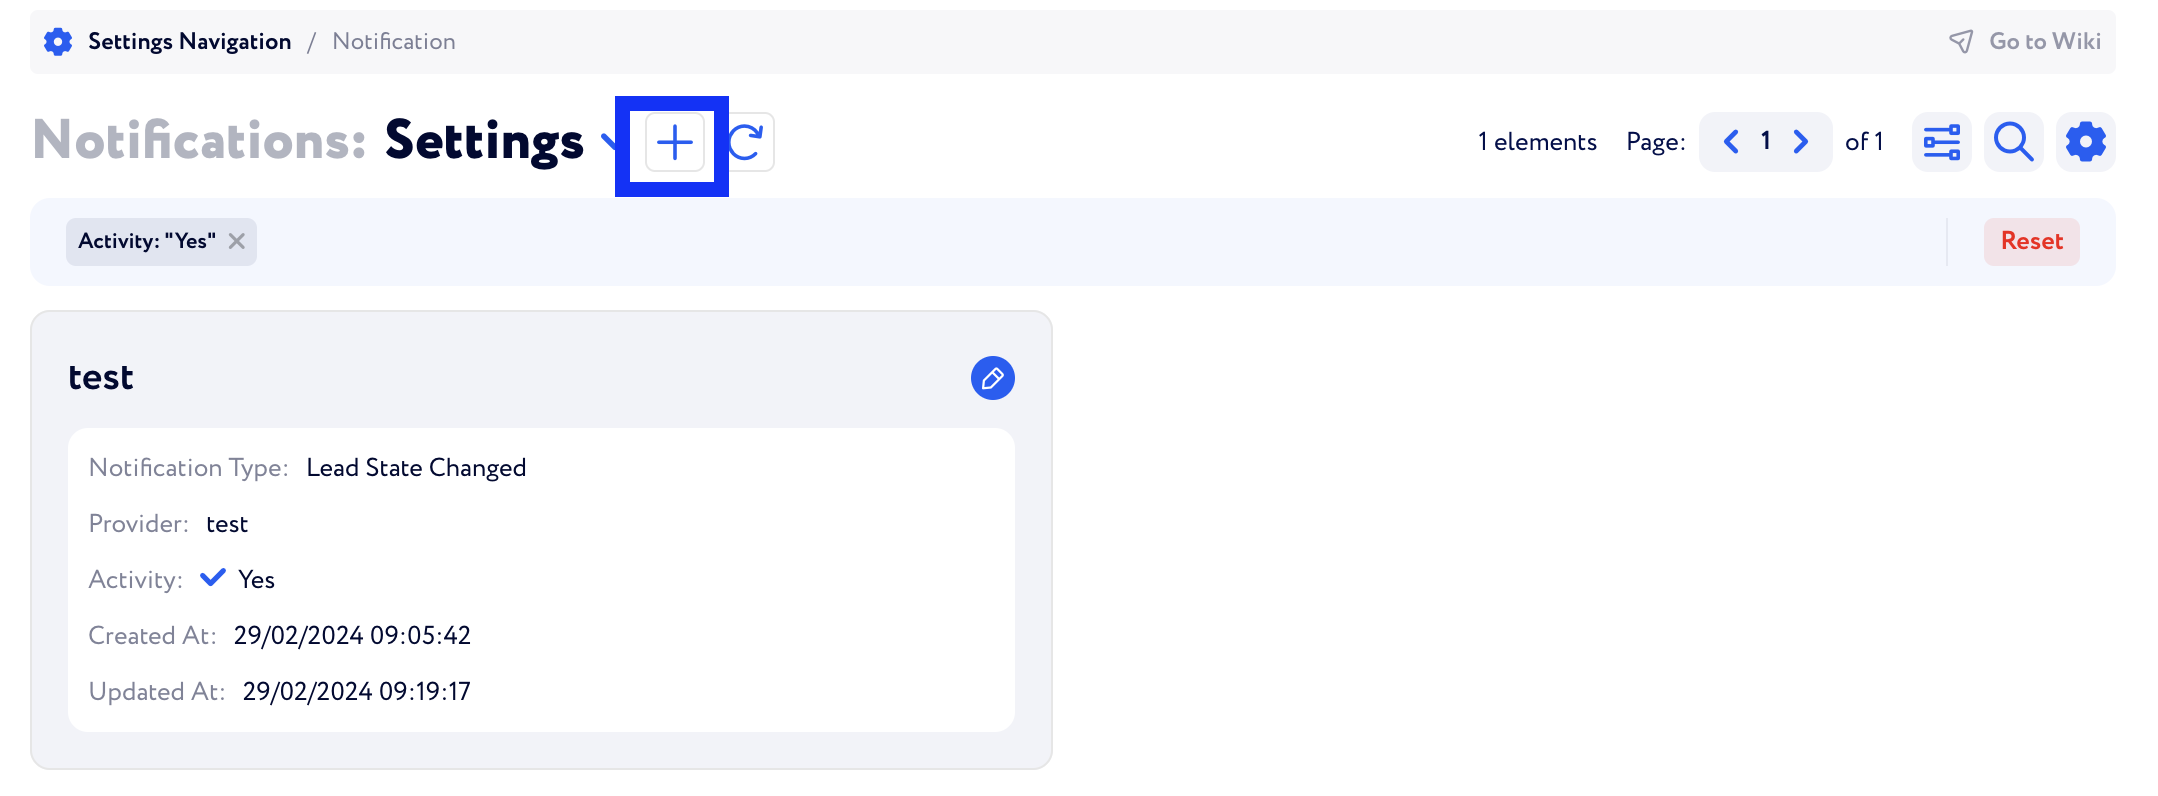
To add a new setting, press on the “+” sign as shown in the screenshot below
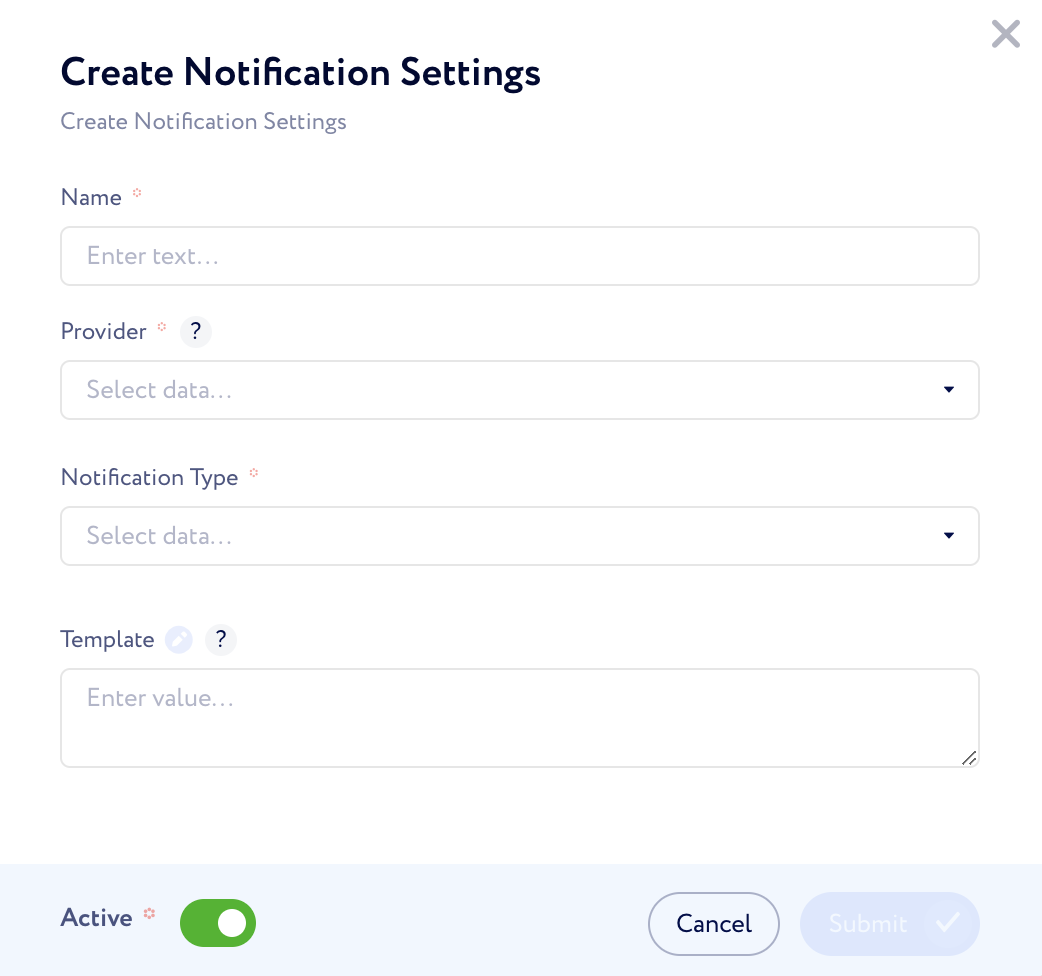
Set up the new setting by specifying the following:
Name
Provider - the Notification Provider created previously
Notification Type - the event for which the notification will be sent (New Conversion, Full Rotation Cap, Lead State Change)
Template - the message that will be sent in case the specified event triggers
Templates and placeholder examples
Here are 2 examples of the most popular notifications with the information that should be inserted in the relevant fields for the notification to work.
If you require assistance with setting up additional notifications, please contact our support team.
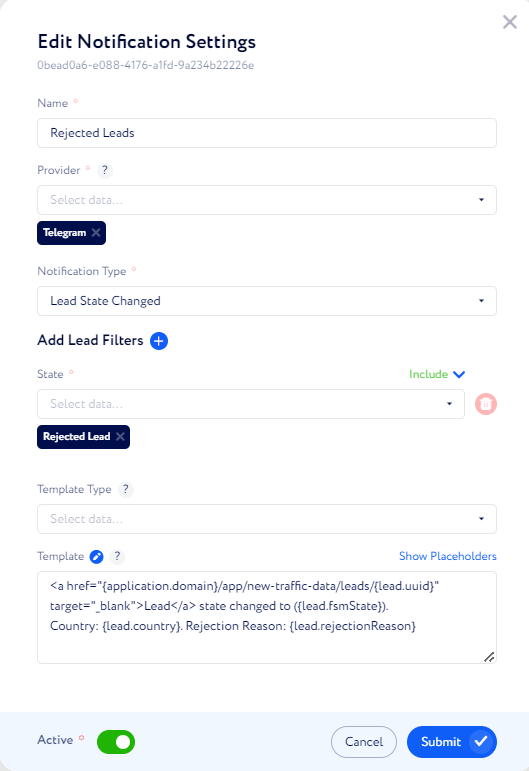
Rejected Leads
This notification setup is for cases when the leads get rejected
The following information should be inserted in the “Template” field: <a href="{application.domain}/app/new-traffic-data/leads/{lead.uuid}" target="_blank">Lead</a> state changed to ({lead.fsmState}). Country: {lead.country}. Brand: {lead.advertiserName}. Rejection Reason: {lead.rejectionReason}. Affiliate : {lead.affiliate_id}
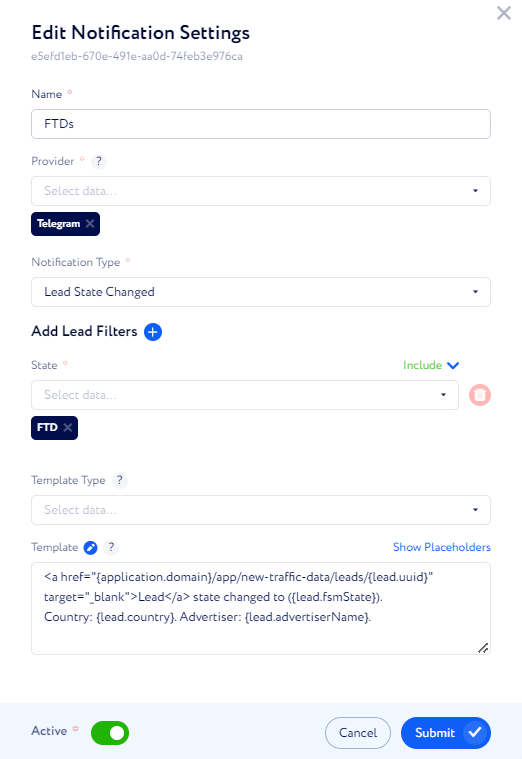
FTDs
This setup is intended for cases when the “Lead State” changes to “FTD”
The following information should be inserted in the “Template” field: <a href="{application.domain}/app/new-traffic-data/leads/{lead.uuid}" target="_blank">Lead</a> state changed to ({lead.fsmState}). Country: {lead.country}. Advertiser: {lead.advertiserName}.
If you require further assistance, please contact support


