Conversion Profile
This feature allows you to create custom conversion fields to track specific data, keep them available for the main tools of the Partner Platform, and get seamless integration with third-party platforms.
When to use it?
If you use unique conversion fields that don’t match any represented in the Partner Platform, you can create up to 50 conversion fields via the Conversion Profile.
Where can I see this data?
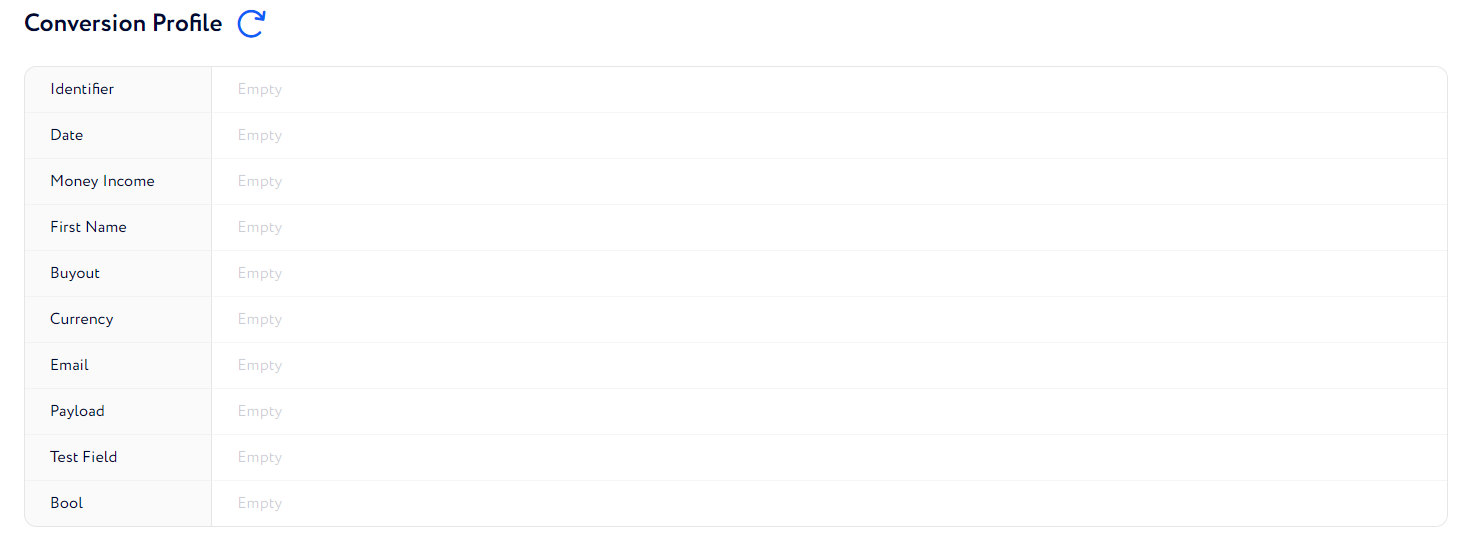
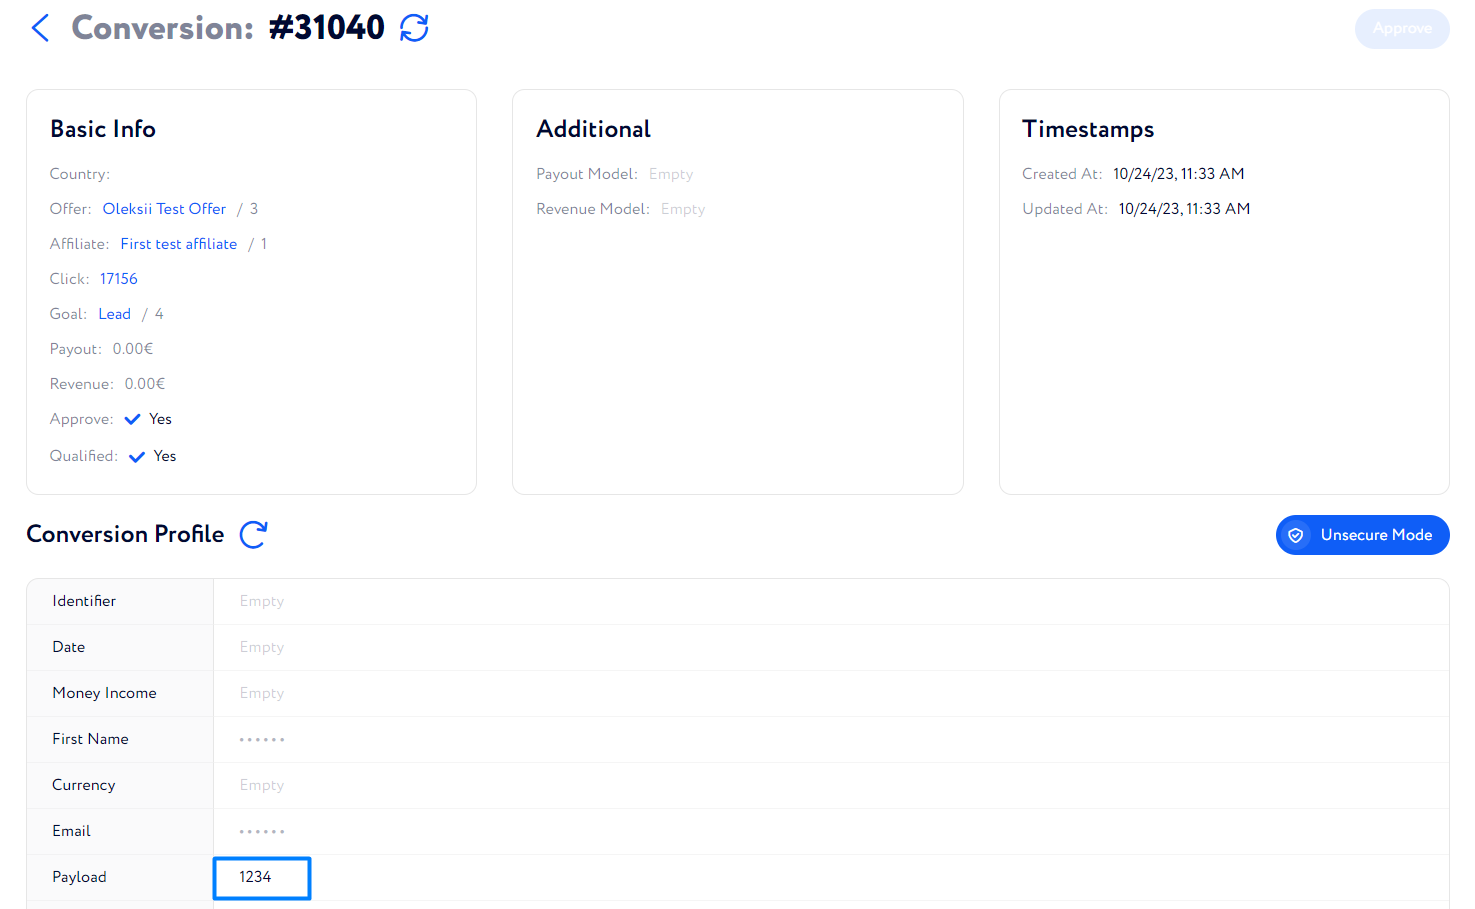
It’s located in Traffic Data>Conversions>Conversion Profile widget.
How to confugure conversion profile?
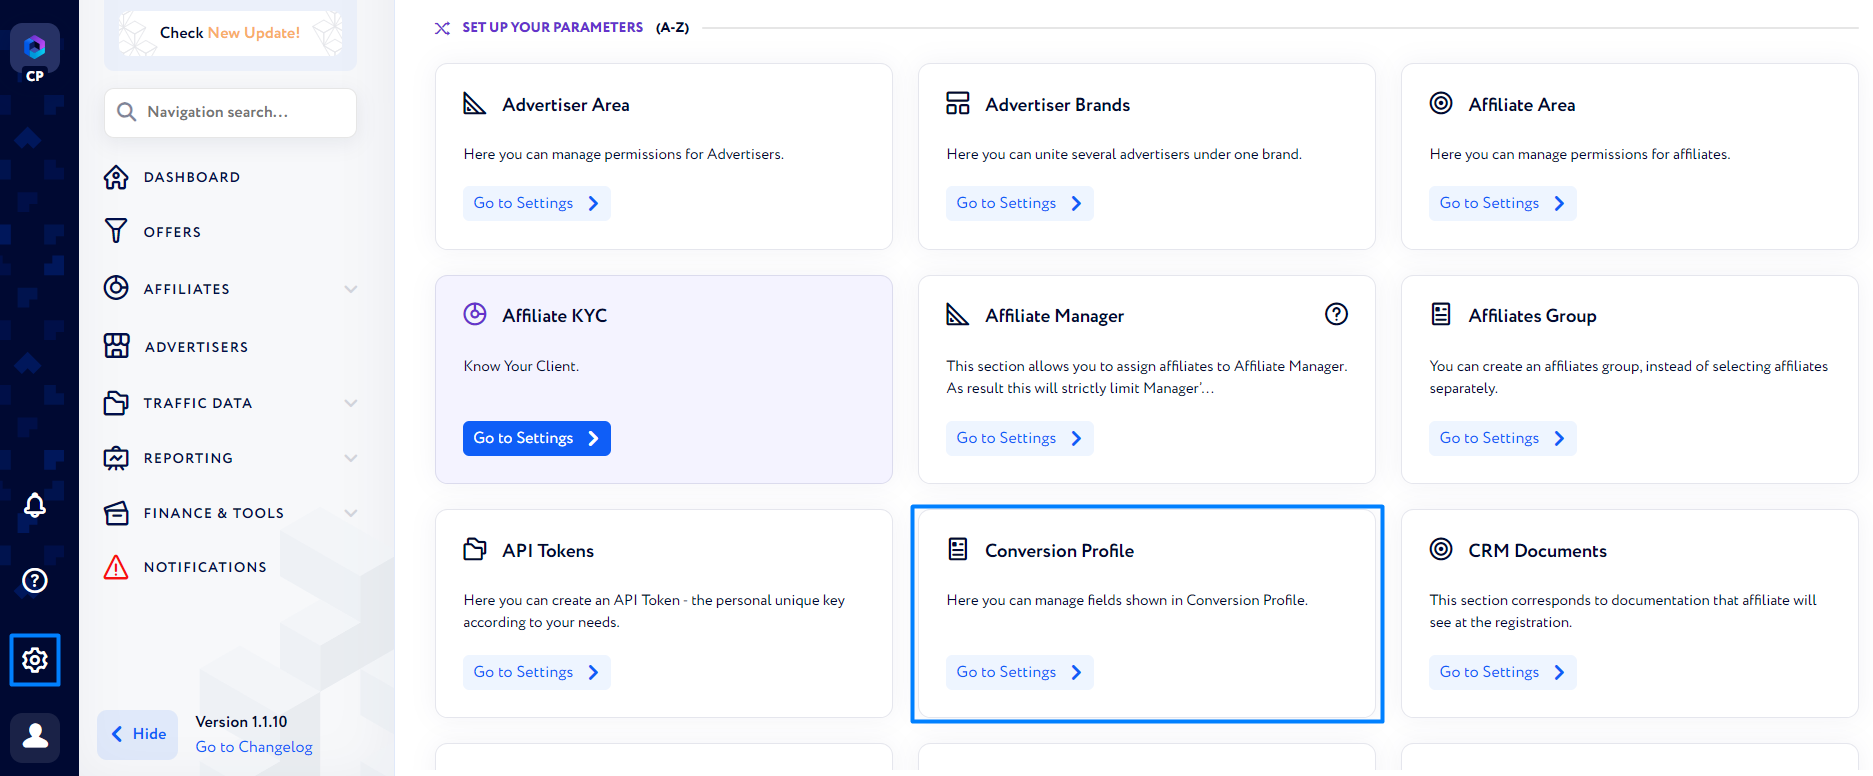
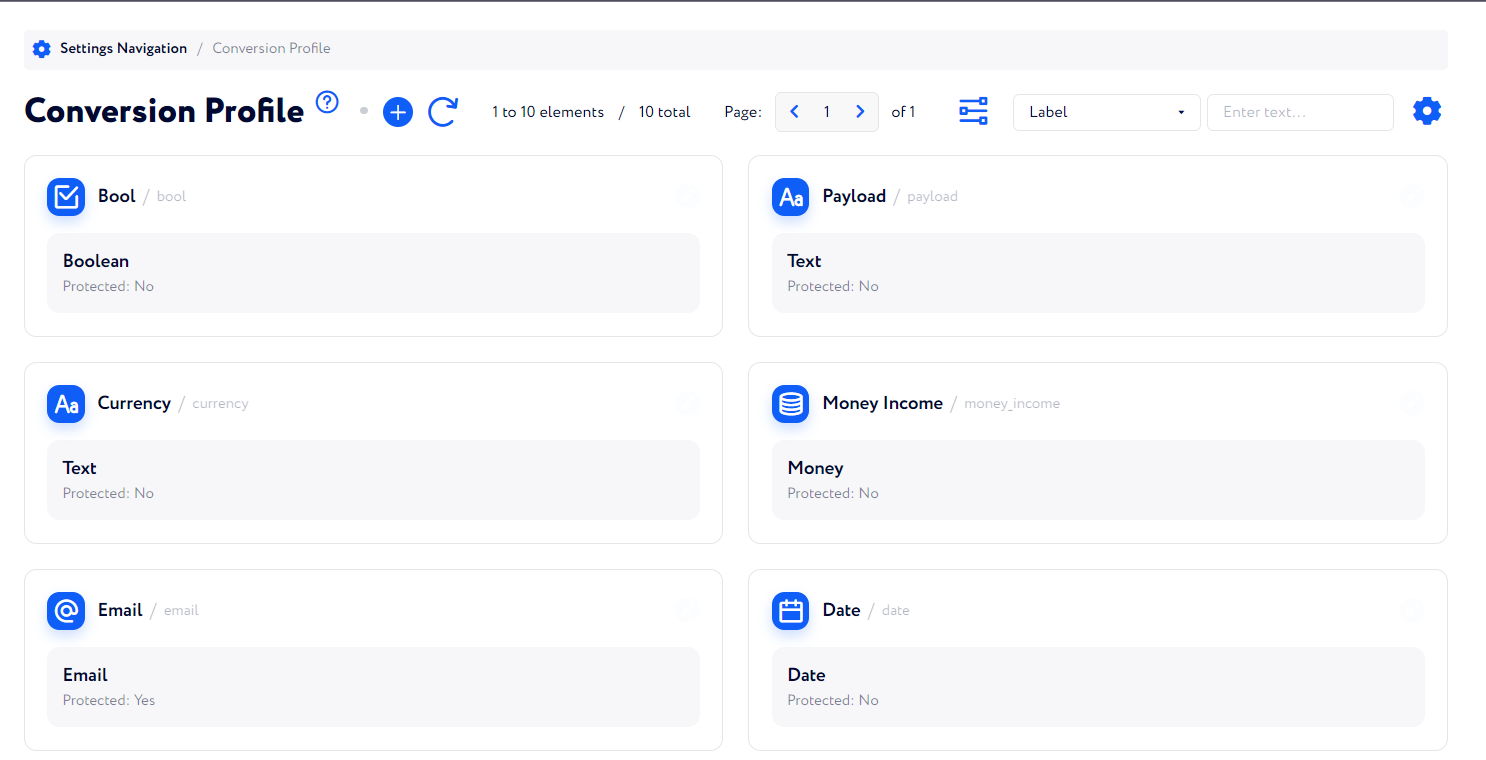
Go to Settings Navigation>Conversion Profile.
Click the Plus icon to create a new item or click the Pencil button to edit an existing one.
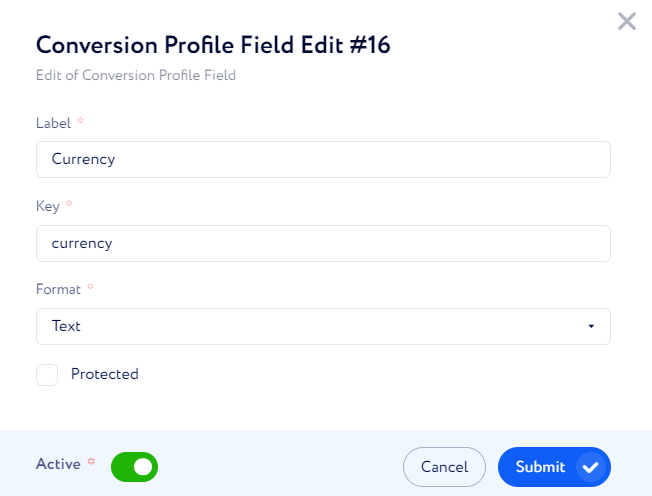
Fill in the fields and click Submit.
Label: the name of the data point in the CRM (mostly columns).
Key: it can be added as a URL parameter to an Offer Conversion Link. When the conversion is created via this link, the data from that parameter is added to Conversion Profile.
Format: the data type of the specification.
Protected: when turned on, the field is protected with 2FA.
How to use Conversion Profile?
The most important use case is adding custom information about conversions when it’s created.
To configure it, follow these steps:
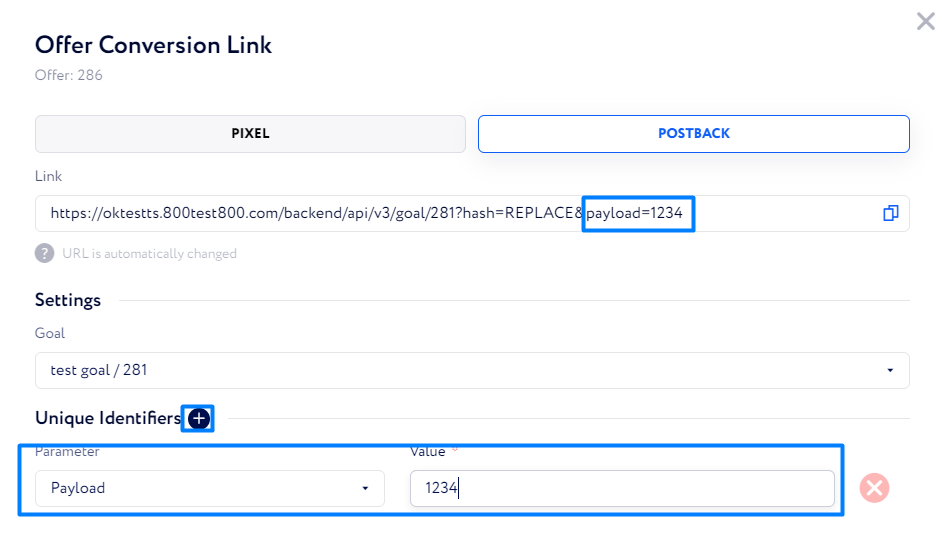
Go to an Offer and click the Conversion Pixel/Postback to configure the conversion link.
Click Unique Identifiers and add one or several conversion profile fields.
These conversions will be recorded in Conversions table. Fields from the conversion porfile can be added to the table as columns if you click the Gear button.
When you click such a conversion, all of its conversion profile data is recorded in a widget.

