
How to create a postback?
In this article you can learn how to set up rules to sort the data and send only the necessary information using postbacks.
Note: As the procedure includes a lot of peculiarities and important details, we recommend going through this article to take in the process completely.
Important: All the rules in the Postbacks list have their priority from top to bottom. The higher the rule, the higher its priority is. To change a rule priority, drag it up or down in the list.
So, let us describe how to create a rule step by step.
Go to Postbacks and click the "Add New" button at the top right corner of the page.

Choose an element you would like to create in the appeared window.
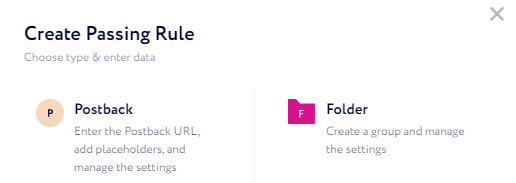
There are two element types to choose from:
Postback – element which contains rules for one Postback only (simple option).
Folder – general folder which contains rules for any number of Postbacks. The rule you set for this folder will be applied for all the elements inside it (advanced option).
Creating a simple postback rule
This entity type may be useful when you need to create a rule for only one particular Postback.
To create a Postback and set rules for conversions filtering, perform the following steps:
Select Postback in Step 2 above.
Create a rule and define criteria considering which conversions data will be sent to an affiliate.
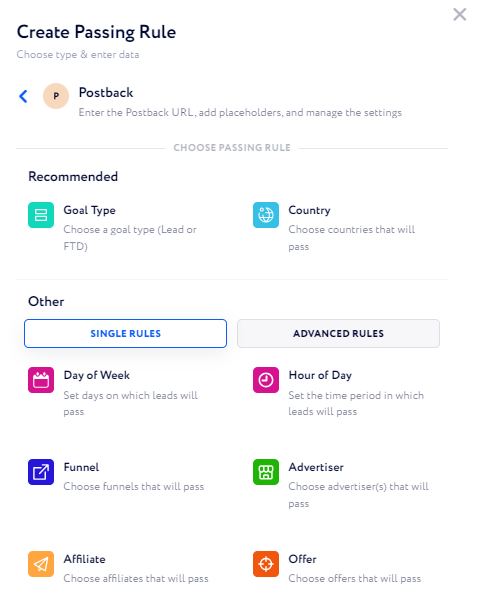
You are required to choose one option out of the "Recommended" or "Other" sections.
Recommended:
Goal Type – select a goal type (Lead or FTD) to be sent to the affiliate's tracking system as conversion along with the respective Postback URL and tracking parameters.
Country – specify country/countries from which conversions to be sent to the affiliate's tracking system along with the respective Postback URL and tracking parameters.
Other:
Single Rules:
Day of Week – day(s) of the week during which conversions are sent to the affiliate’s tracking system.
Here, you can also choose a timezone considering which traffic is filtered. By default, your CRM timezone is set.Funnel – funnel(s) from which conversions to be sent.
Affiliate – affiliate(s) which conversions to be sent.
Hour of Day – time period during the day in which conversions are sent to the affiliate’s tracking system.
Here, you can also choose a timezone considering which traffic is filtered. By default, your CRM timezone is set.Advertiser – advertiser(s) which conversion to be sent.
Offer – advertiser platform and offer(s) which conversion to be sent.
Advanced Rules
Here, combinations of single rules are introduced. However, there is one advanced rule that needs explaining.
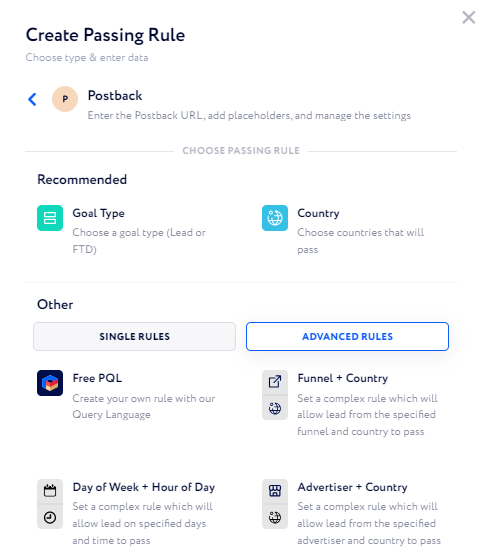
Free PQL – this option allows you to create more detailed and precise rules for conversion filtering (i.e., you can specify ways of conversion filtering here).
If you need to add your own filter, add it to Lead Profile first and then include it into the lead form.
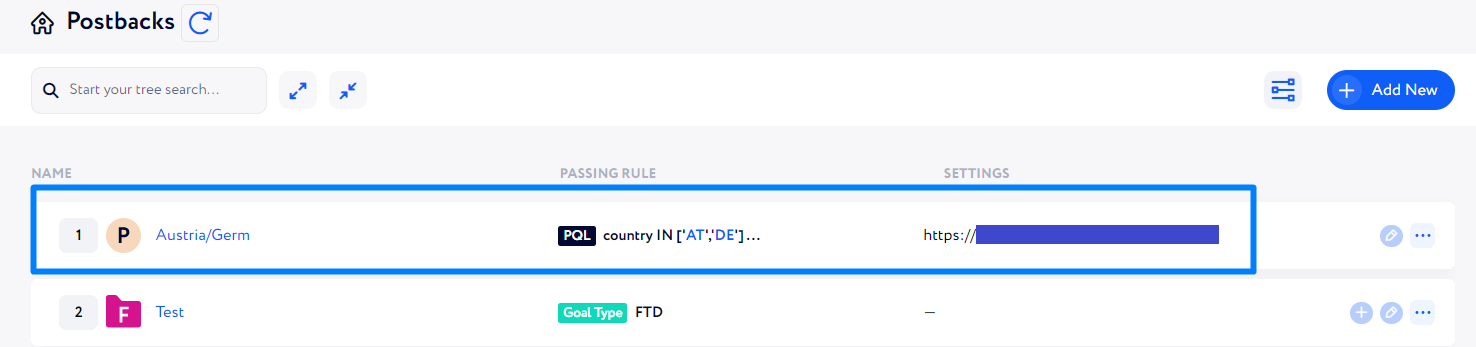
Example: If you need to only transmit conversions from Germany and Austria as well as all leads to be of male gender, rules for PQL will look like in the screenshot below.
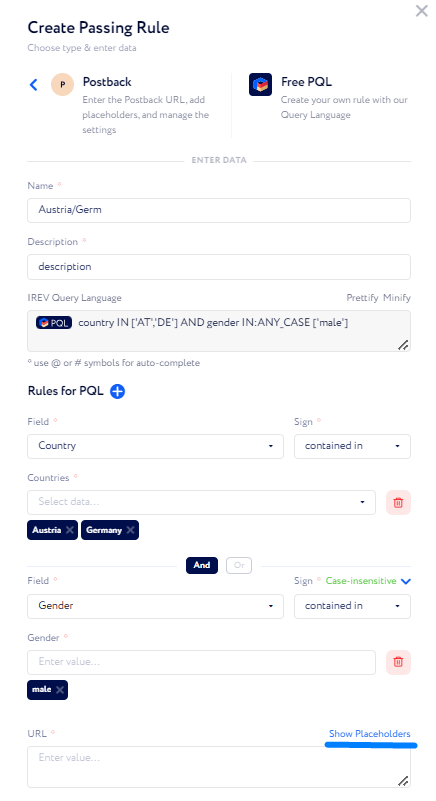
Regardless of the rule you choose, you need to enter the Postback URL provided by your affiliate to the URL field.
You can also incorporate some tracking parameters which a lead will be assigned to if it comes via this link. You can find these parameters once clicking "Show Placeholders".
Once you click the "Submit" button, the rule with the name you set appears in the Postbacks list.
There is an option to study all the rule logs. To do so, click the button as it is shown in the screenshot below.
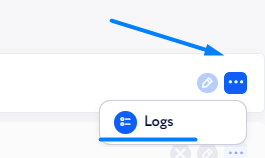
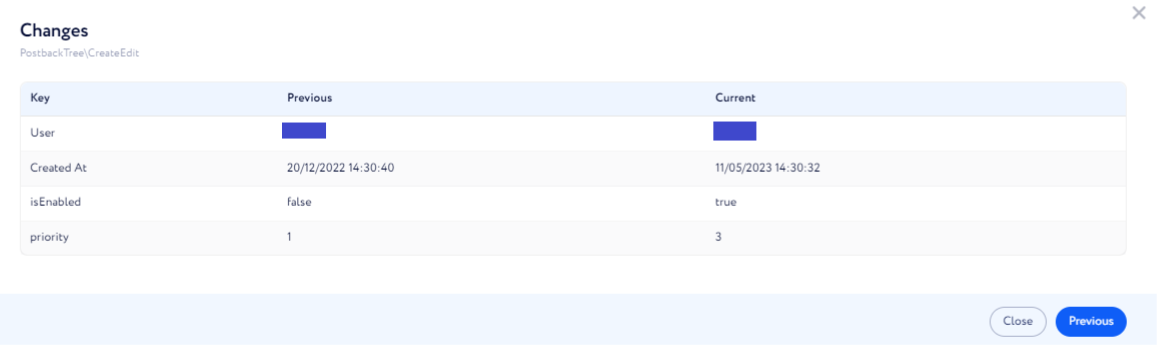
Then, choose logs for what date you wish to look at and click the "Logs" button in the "Argument" column of the corresponding line. Then, you will see clear and precise information on a particular action as shown below:
Creating an advanced postback rule
The Folder type is a regular folder where you can add another Folder or a Postback element.
You can use it when you need to arrange transmitted conversions by some criteria or for setting more complex rules.
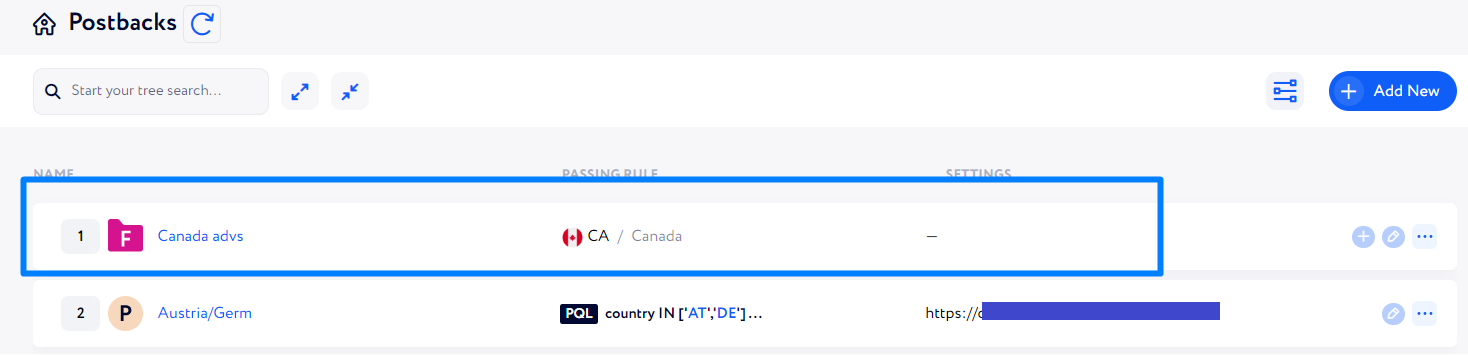
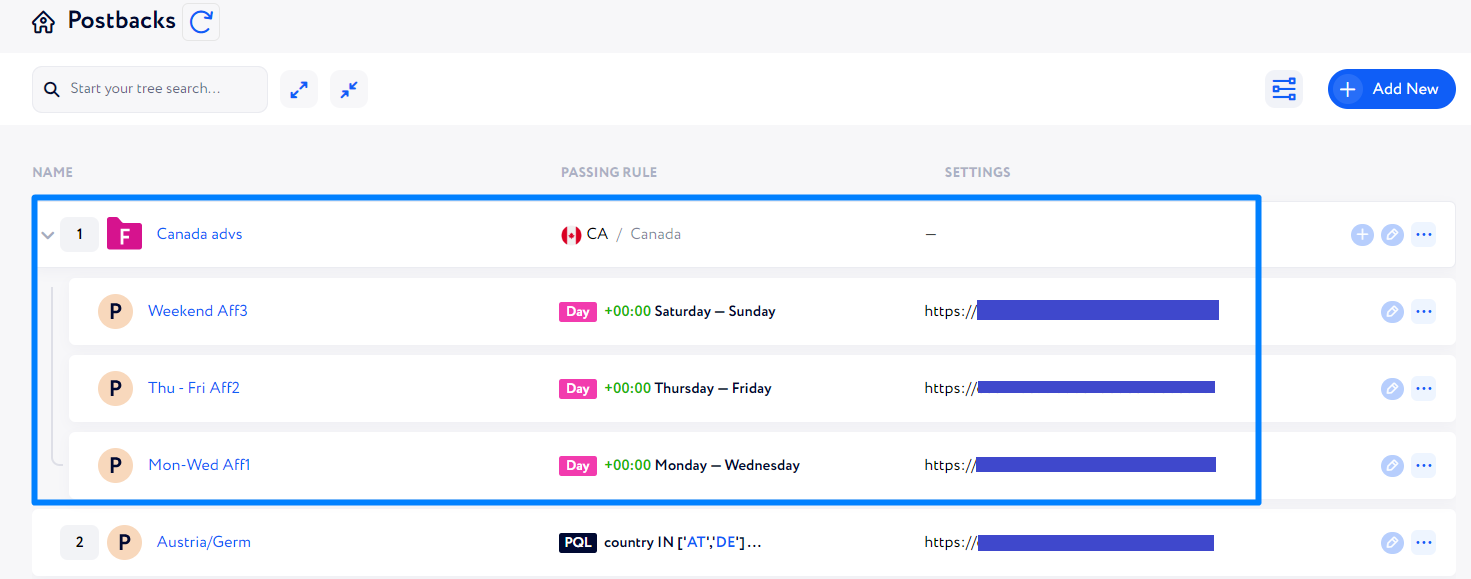
Example: You need to transfer conversions to several Postbacks URLs for different days of the week but from one and the same country – Canada.
To create a Folder and set rules for conversions filtering, perform the following steps:
Select Folder in Step 2 above.
Create a rule and define criteria considering which conversions will be counted. Here, rules are the same as for the Postback element.
A newly-created folder looks like this:
To add subelements inside this folder, click + at the right of this line and set up rules as needed.
Thus, an example of the folder targeted to Canada with three different Postback URLs for different days of the week is shown in the screenshot below.
Important details to get familiar with
If an element or a whole folder needs to be deleted, you should deactivate it first and then, click ⨯ appeared on the right of the corresponding line.
You can study all the executed postbacks via Settings Navigation → Executed Postbacks.
Mind that not all the companies support Postback URL usage. In such cases, consider using tracking pixels instead.