How to create a Drilldown preset?
Let us demonstrate how to create a Drilldown preset step by step.
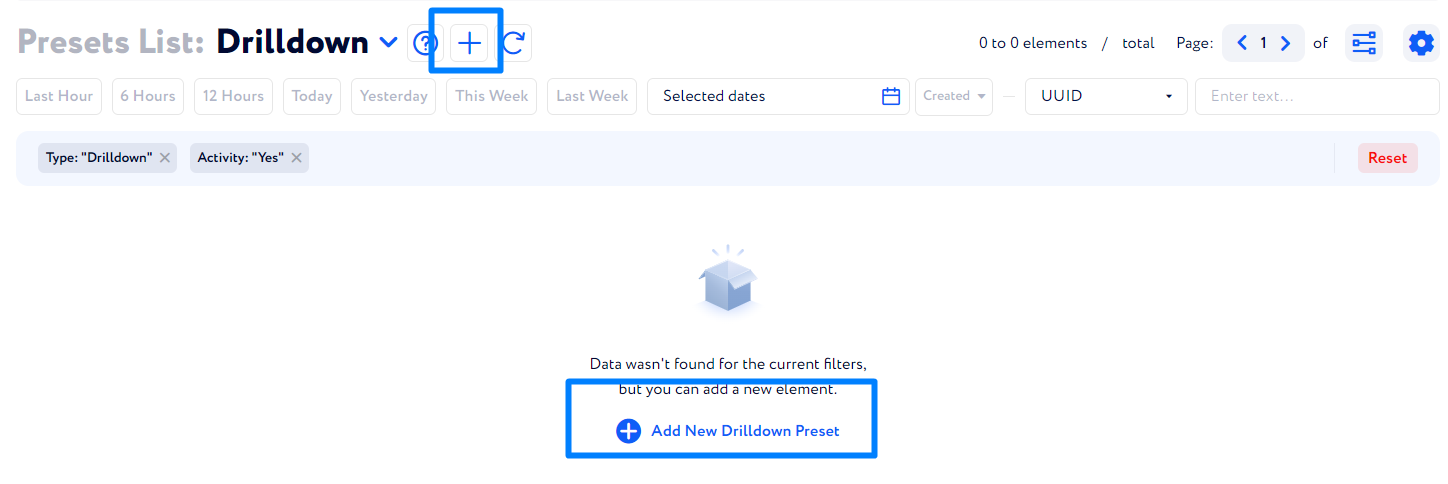
When clicking "Manage Presets", you are redirected to another page – Presets List. Here, to create a new preset, you can either click + next to the page title or "Add New" in the page center (depending on what preset you wish to create).
Then, a window for creating a new preset appears.
Metric Report
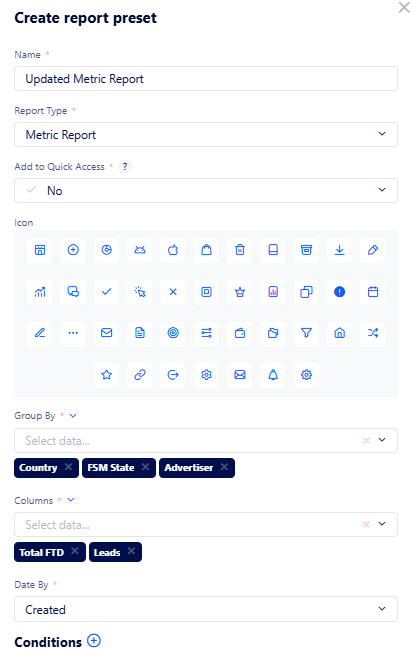
Fill in the following fields here:
Name – set a name for this preset.
Report Type – select a report type. In this case, choose Drilldown.
Add to Quick Access – define if you want a preset to be displayed in the quick access area or to be shown in the dropdown list (see screenshot examples below).
Icon – choose an icon for the preset to make it more recognizable.
Group By – select which data the report to be grouped by (i.e., report rows). In the report, the following group is nested within the previous one.
Columns – choose the columns to be displayed in the report. In the report, the columns will be arranged according to the order you select them in this field.
Date By – sort the report data either by new leads or by lead state change date.
Conditions (optional) – set the conditions to filter data for the report.
Reject Report
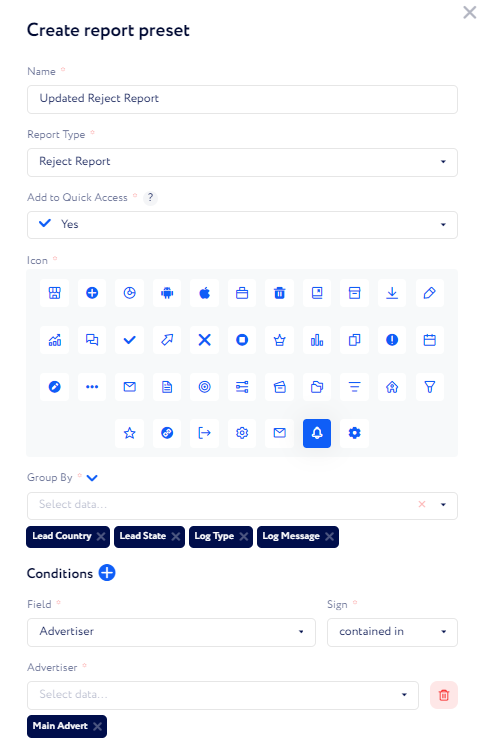
Fill in the following fields here:
Name – set a name for this preset.
Report Type – select a report type. In this case, choose Reject Report.
Add to Quick Access – define if you want a preset to be displayed in the quick access area or to be shown in the dropdown list (see screenshot examples below).
Icon – choose an icon for the preset to make it more recognizable.
Group By – select which data the report to be grouped by (i.e., report rows). In the report, the following group is nested within the previous one.
Conditions (optional) – set the conditions to filter data for the report.
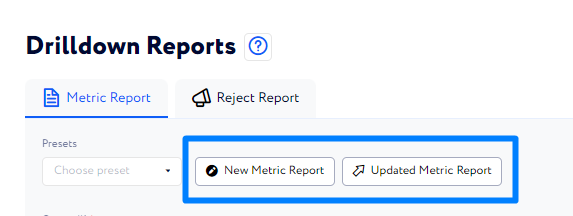
Once you are done with creating a new preset, it appears on the Drilldown Reports page. If you added a preset to the Quick Access Area, it is displayed as follows:
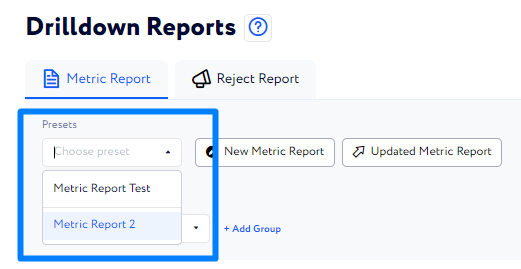
Otherwise, you can find presets in the dropdown list here:
When you chose a preset or created a customized template from scratch, select a period of time for report generating below.

Note: Mind that available time ranges for Metric and Reject Report are different. For Reject Report the maximum time range that can be set is 7 days.
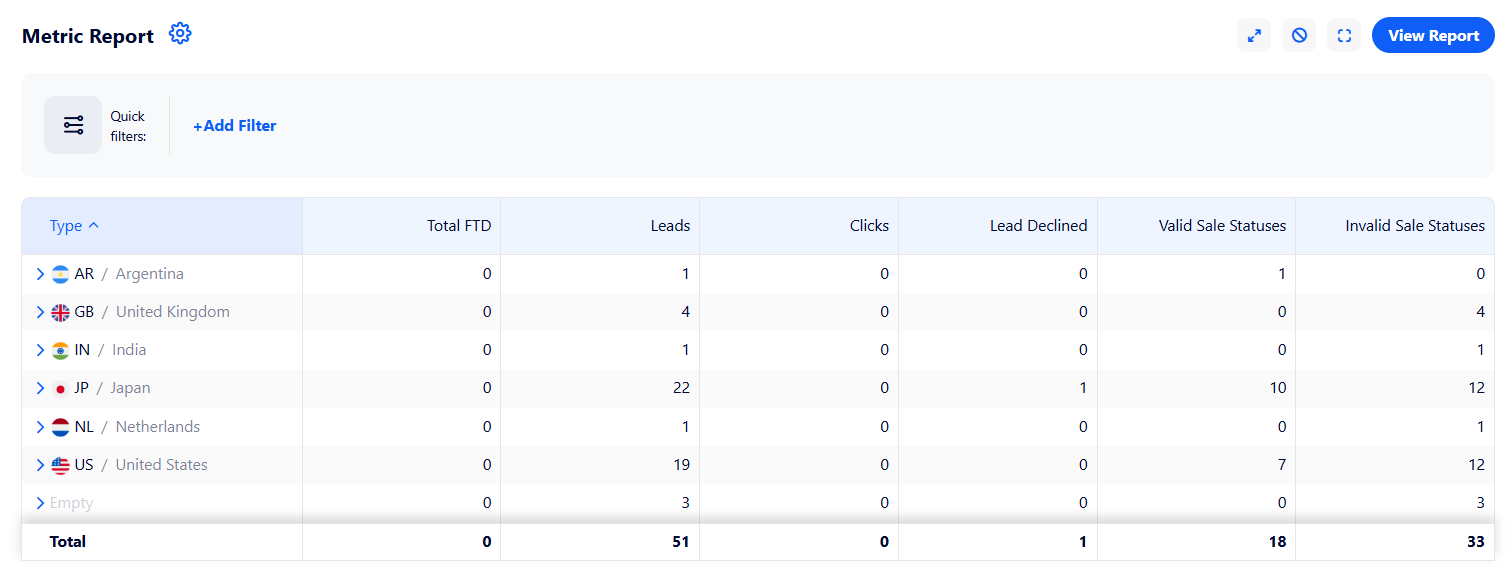
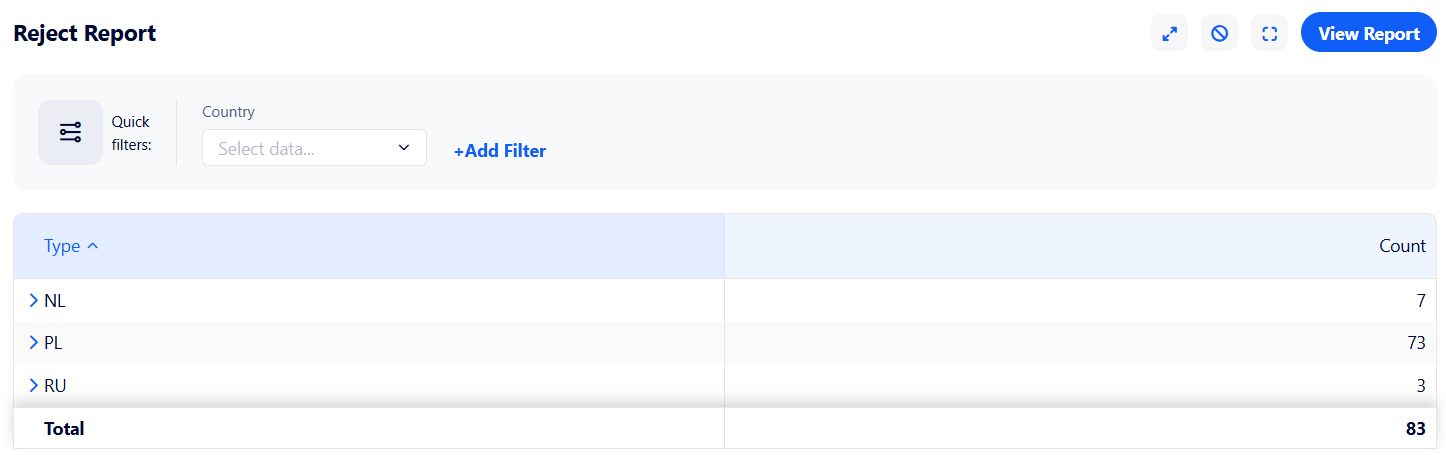
Then, you can generate a report by clicking the "Generate" button. The report will look as follows:
Metric Report
Reject Report
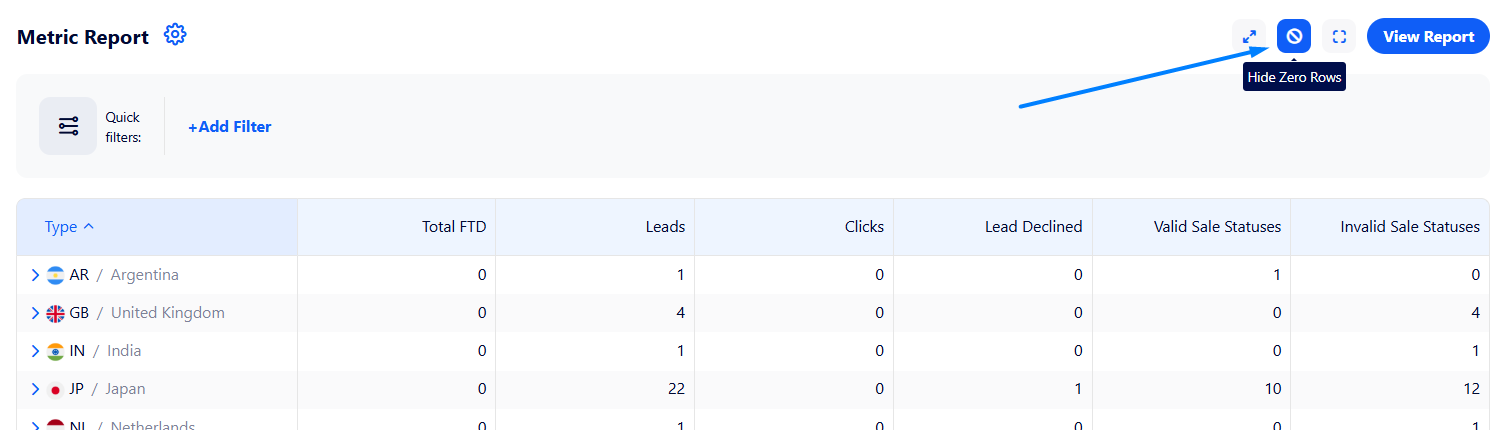
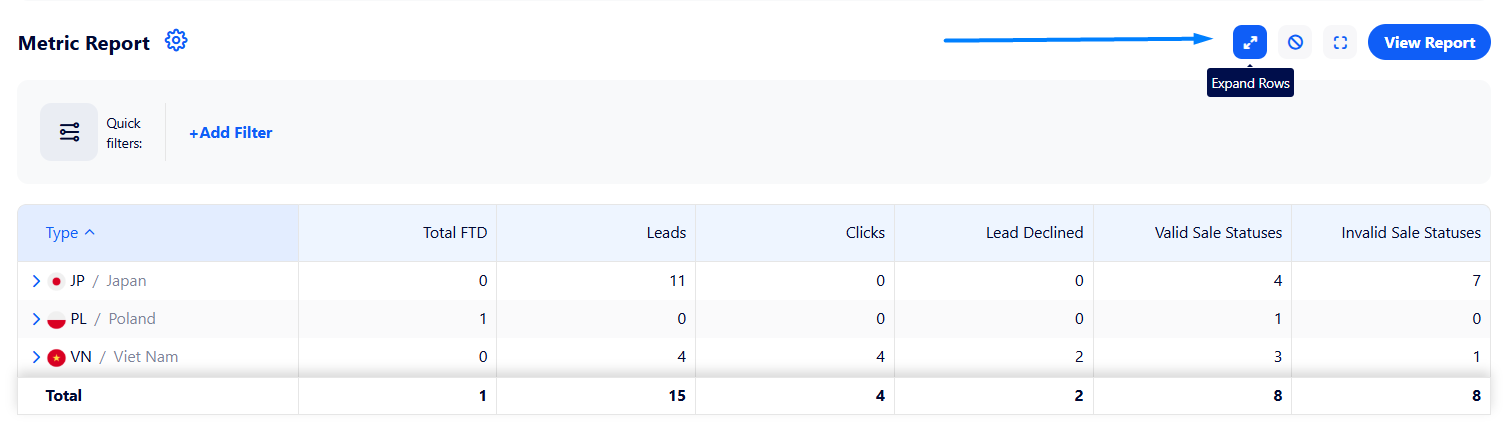
For both reports there is an option to expand or collapse all nested data in the generated report using the buttons highlighted in the screenshot below:
Additionaly, it is possible to hide rows containing only zero values: