Data Exporter walkthrough
This article can help you to understand the ssense of Data Exporter reports and CSV files.
On the Data Exporter tab you can generate thorough reports on conversions, logs, sale statuses, and leads as well as download them in the CSV format if needed.
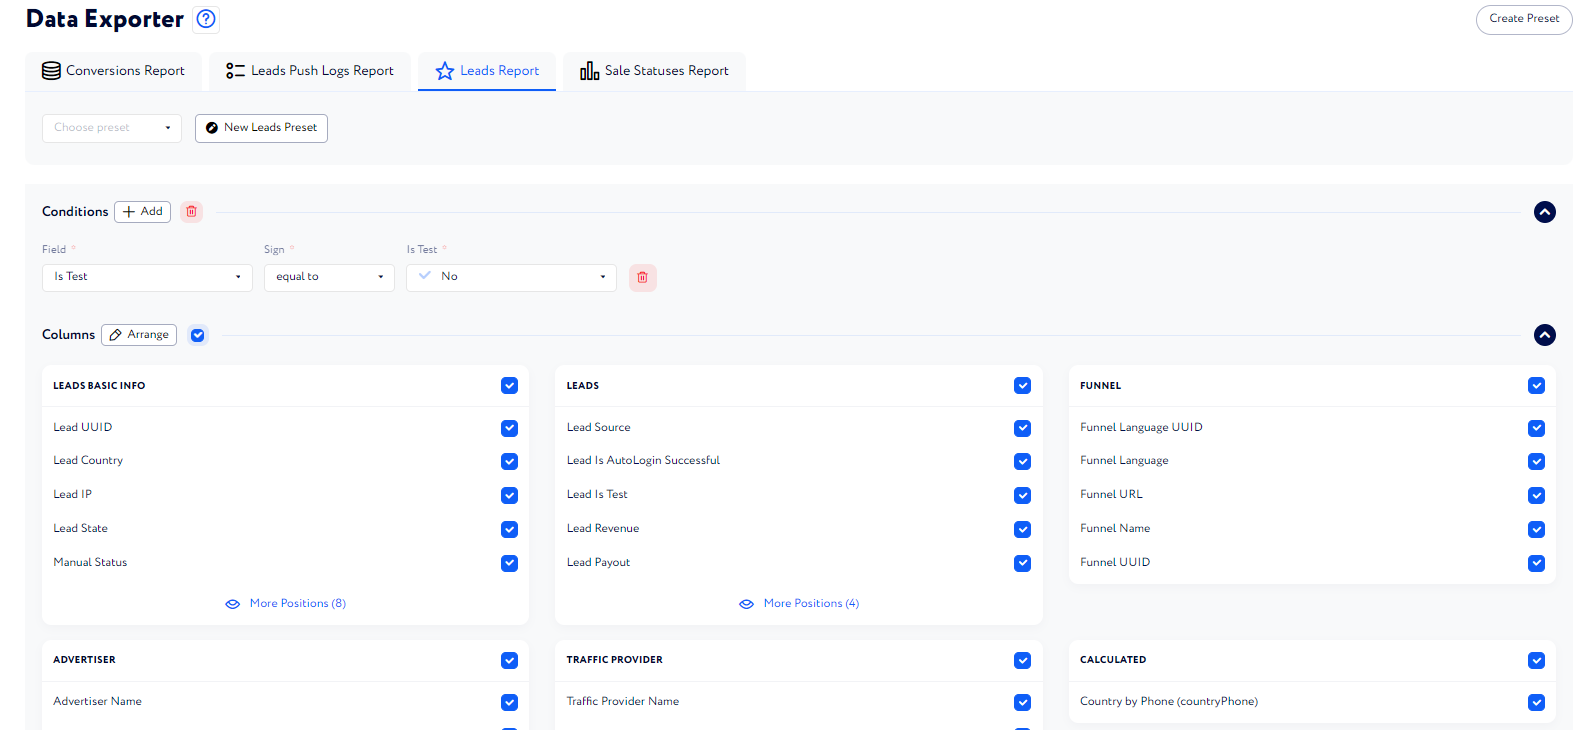
As all the report pages in their essence have the same functionality and filters and differ only in column sets, let us describe them using the Leads Report page as an example.
When you take a look at the page for the first time, you can see that there are a lot of fields that help you to configure a precise report.
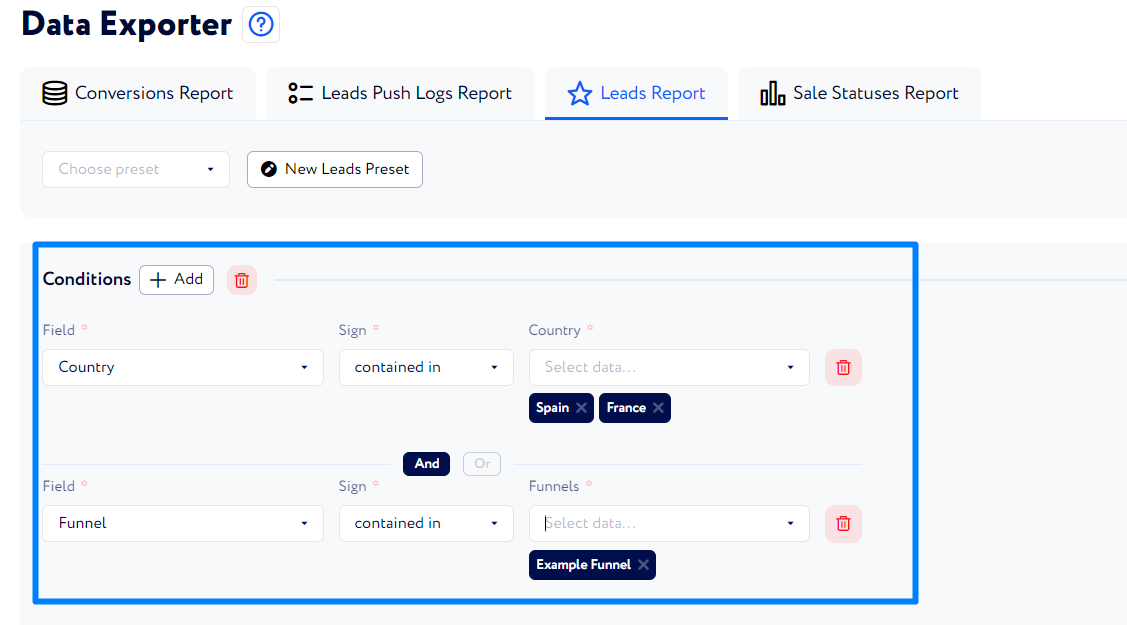
First of all, there is an option to set various conditions to filter necessary data. To do it, click "Add" next to the "Conditions" sections and select the required ones.
Besides selecting individual parameters, you can define their cooperation, i.e., if they are considered together (choose And) or either one or the other is considered (choose Or).
Under Conditions another section – Columns – is located.
Here, you can decide on what columns you wish to be in the report and check the corresponding column name boxes. By default, all the columns are included. If you want to check only a few, for convenience, you can uncheck the box next to the "Columns" title.
Once it is unchecked, all the columns are automatically excluded from the report, so you can select only ones that you need.
When you are done with customizing the report data, a date range for it needs to be set.
You can either select one of the suggested periods (last month, last week, etc.) or set up your own one with the "Select Dates" field.
Now, you can generate a report in the CSV format and then download it or generate its quick preview.
Important: In order to generate a report in the CSV format and download it, make sure that the Unsecured Mode is switched on.
In order for a whole report customizing procedure to be smooth and time-saving, there is an option to create a preset – a preconfigured set of conditions and columns for generating a report quickly. The button is located in the top right corner of the page.
Read this article to learn how to create a preset and use it for report generation.


