
Custom Funnel walkthrough
In this article you may learn how to manage lead forms and post-registration windows via Custom Funnel.
On the Custom Funnel page you can customize and implement lead forms generated via Lead Distribution as well as post-registration windows to your own funnel page and generate a corresponding funnel link containing necessary tracking parameters.
Note: As the procedure includes a lot of peculiarities and important details, we recommend going through this guide to take in the process completely.
So, let us describe how to manage a lead form together with post-registration windows and implement them into your funnel page step by step.
Adding the required script.
Open the funnel HTML page in any suitable editor. Then, add the script element shown below inside the <header></header> section of your HTML document.
<script data-type="F1TExternalSdkJs"
  type="text/javascript"
  src="https://doman.com"
  crossorigin="anonymous" defer>
</script>
Note: You can find the domain to be placed in the script above on the page where you downloaded this guide from. Alternatively, you may ask a person who provided you with this document.
Placing the form on the page.
There are 2 options for your form to appear on the page: it can pop up automatically once the script from Step 1 has been downloaded, or it can be manually triggered.
If you want the form to automatically pop up on the page, add the <div></div> element shown below inside the <body></body> section to the place where you want the form to be displayed and assign the f1t-form class to it.
<div class="f1t-form">
  // Set up your form here
</div>
If you want the form to appear after being triggered manually (e.g., after clicking a button), place the following script inside the <body></body> section of your funnel.
<script>
  const onload = () => {
    const onclick = () => {
      // here, place your code for the form to appear. For example:
      document.body.insertAdjacentHTML('afterbegin', '<div class="f1t-form f1t-form--loading"></div>');
      // then initiate the form:
      window.sdkInit();
    }
    document.querySelector("button").addEventListener("click", onclick);
  };
  window.addEventListener("load", onload);
</script>
Mind that the initial form is of the default design. To customize it as needed, set the necessary elements inside the <div></div> mentioned.
Note: To see all the available form inputs, open the funnel link without tracking parameters being set.
If you want to place a form which differs from the one you set in Lead Flow, specify its Lead Distribution UUID in the window.sdkInit() part as follows:
window.sdkInit({
    sdkFormUuid: "fd010281-d699-417d-b2ac-80ce9cf36cbd"
})
On a funnel, you can place as many forms as you need. However, make sure that their triggers are different.
Setting the form language.
To set the form language, place the script displayed below into any part of the
<body></body> section in the funnel file. All the modal windows, validation errors, and the entire form will be displayed according to the language you set here.
<script>
  window.F1TFunnelsSdkConfig = {
    language: 'es'
  };
</script>
Note: First, you should create a form for the required language so as the form in this language to appear on the funnel.
If the form fails to be displayed in both required and primary languages, the form in English will be shown by default.
Setting default tracking parameters (optional).
If you want to specify default tracking parameters, set them for the defaultQueryParams: "" parameter. They can be specified as follows:
As a string
<script>
  window.F1TFunnelsSdkConfig = {
      defaultQueryParams: "aff_sub='aff_sub'&aff_sub2='aff_sub2'"
  };
</script>
As an object
<script>
  window.F1TFunnelsSdkConfig = {
      defaultQueryParams: {
        aff_sub: 'aff_sub',
        aff_sub2: 'aff_sub2'
      },
  };
</script>
Or as an array
<script>
  window.F1TFunnelsSdkConfig = {
      defaultQueryParams: [["aff_sub", "aff_sub"], ["aff_sub2", "aff_sub2"]]
  };
</script>
Note: If you set default parameters here and the same ones in the Unique Identifiers section, the default ones will remain.
Setting the country code (optional).
For the country code as well as its flag sign to be displayed next to the phone number line, put the phoneCountry: "" line specifying the required country code right below the language: "" line mentioned above. The overall script block structure should look like this:
<script>
  window.F1TFunnelsSdkConfig = {
      language: "en",
      phoneCountry: "GB",
  };
</script>
Note: Country code must be of the ISO 2-digit format.
Creating several-steps form (optional).
If you want the form to be of several steps, paste the formSteps: [] block below the phoneCountry: "" line. Inside this block, every line represents a single step. Put the necessary inputs to required lines as it is shown in the example below.
<script>
  window.F1TFunnelsSdkConfig = {
    language: "en",
    phoneCountry: "GB",
    formSteps: [
      ["phone", "date", "textarea"],
      ["email"],
      ["single_select", "multiple_select", "password"],
      ["text", "number"],
      ["checkbox", "radio"]
    ]
  };
</script>
Mind that inputs (in terms of one step) will be displayed as they go in your Lead Distribution form, not like they are arranged in the step.
You should put all the fields set as required in your Lead Distribution form. However, we recommend specifying all the fields you set for the form.
Customizing post-registration window (optional).
You can customize the advertiser-accepted, advertiser-declined, and restricted-access windows. It means that you can set the required font, background color, link, etc. To do so, fill in the corresponding block within the overrideModal: {} block array. The sample is following:
<script>
        window.F1TFunnelsSdkConfig = {
            language: "en",
            overrideModal: {
                advertiserAccepted: (data) => {
                 const autoLogin = data.url;
                },
                advertisersDeclined: (data, retryCb) => {
                },
                trafficFilter: () => {
                },
            }
        };
</script>
Below examples of customized advertiser-declined, advertiser-accepted, and traffic-filter (restricted access) post-registration widows are placed respectfully:
<script>
        window.F1TFunnelsSdkConfig = {
            language: "en",
            overrideModal: {
                advertisersDeclined: (data, retryFn) => {
                    const modal = document.createElement("div");
                    modal.classList.add("modal-example");
                    modal.innerHTML = `
                    <h2>You’ve been declined</h2>
                    <p>Please try again</p>
                    <button>Retry</button>
                    `;
                         modal.querySelector("button").addEventListener("click", () => {
                     retryFn();
                        modal.remove();
                    });
                    document.body.appendChild(modal);
                },
                advertiserAccepted: (data) => {
                    const modal = document.createElement("div");
                    modal.classList.add("modal-example");
                    modal.innerHTML = `
                    <h2>Congratulations!</h2>
                    <a href=${data.url} target="_blank">To finish your registration please click here</a>
                    `;
                    document.body.appendChild(modal);
                },
                trafficFilter: () => {
                    const modal = document.createElement("div");
                    modal.classList.add("modal-example");
                    modal.innerHTML = `
                    <h2>Sorry, your region isn’t available now</h2>
                    `;
                    document.body.appendChild(modal);
                },
            }
        };
</script>
It is not necessary to set up these windows. If you do not set them up, the default design will be applied.
Response types
Advertiser-accepted – Autologin URL
{
    "url": "https://doman.com/../594f3a68-857f-491b-a69f-fad4ad6b1624"
}
Advertiser-declined (data, retryFn)
If needed, you can add the “Try again” button for leads to try to register again.
{
    "errorType": "FIXABLE_INPUT",
    "errorMessage": "Failed to push a lead with invalid phone."
}
Getting lead country code (optional).
If you need to get a lead country code, place the script you can see below into any part of the <body></body> section in your HTML code.
<script>
  const onload = () => {
    window.sdkEvents$
      .on("sdk:countryCode")
      .subscribe((country) => {
        console.log(country);
      });
  };
  window.addEventListener("load", onload);
</script>
Generating a funnel link.
To generate a unique funnel link, put your funnel URL in the area highlighted in the screenshot:
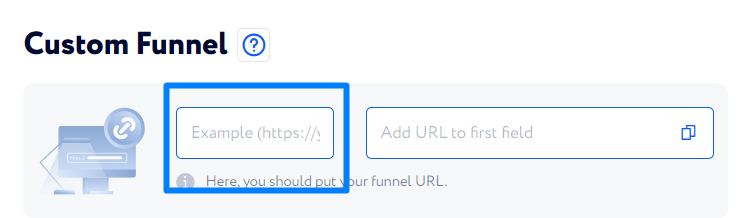
Then, in the section below, select a required Traffic Provider as well as add necessary tracking parameters in the Unique Identifiers section. Once you have generated the link, click the Copy button next to the resulting link.
Note: You are required to choose a Traffic Provider. Unique identifiers can be set optionally.