
Lead page walkthrough
In this article the comprehensive description of a lead page is presented.
Lead page consists of the following tabs:
Basic Information
Pulling Information
Logs
On these tabs you can find all lead's detailed information as well as all the events occured to this lead.
Let us describe each tab step by step.
Basic Information
Here, lead's basic information as well as its advertiser, funnel, etc are shown.
Below the mentioned data, you can see lead profile data, too.
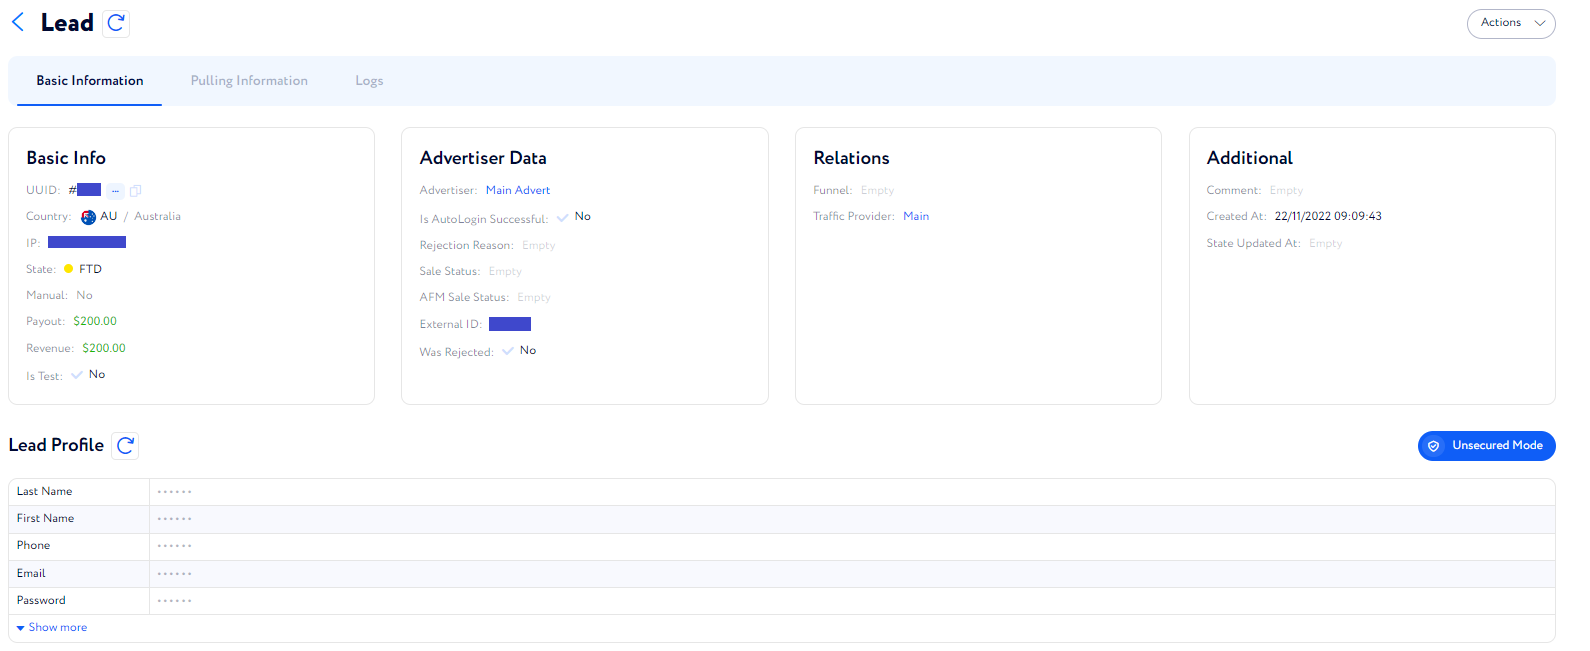
Note: Do not forget to switch to the Unsecured Mode to see protected lead profile details.
Then, under this section, the block showing lead status changing is placed.

Here, you can find what states a lead went through according to its lead flow.
Finally, a table with executed postbacks is displayed.

It shows the data of postbacks which were completed successfully or with some errors.
Moreover, there is the "Actions" button at the top right of the page.
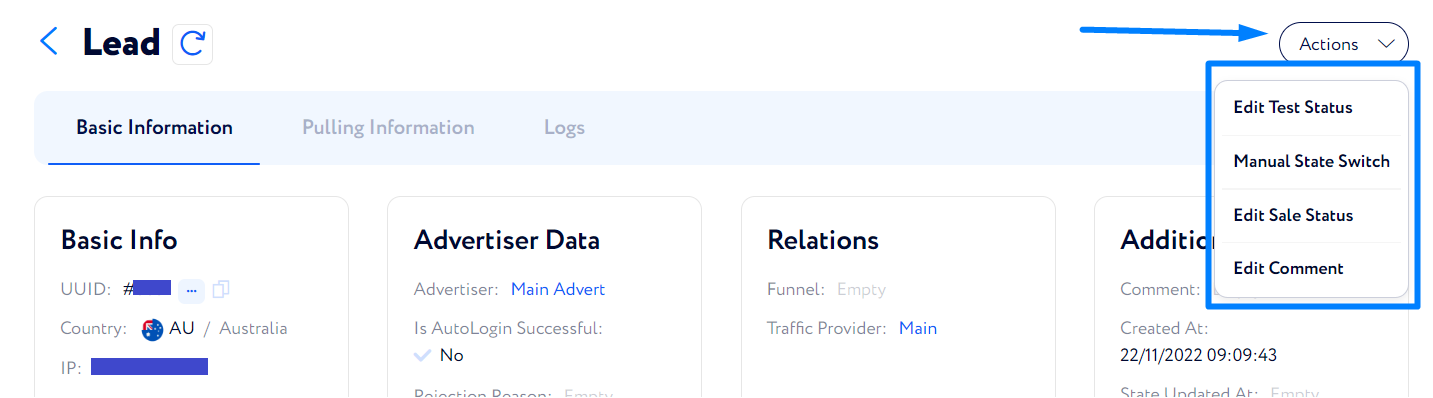
It aims at performing the following actions to a lead:
Edit Test Status – define if this lead is a test one or not.
Manual State Switch – manually switch a lead state to the next one.
Edit Sale Status – manually change a lead sale status.
Edit Comment – edit the lead comment displayed in the "Basic Information" section.
Pulling Information
First thing that you can see in this section is the "Advertiser Sale Status Registry" table.

It shows the history of lead sale statuses changes.
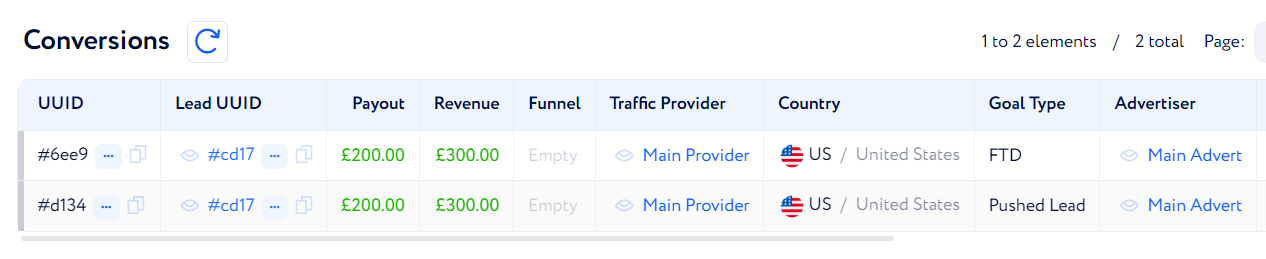
Also, there is another table – Conversions – which shows all the conversions connected to this lead.
Logs
On this tab all the lead actions (e.g., registration, state changing, errors) are displayed. Each action is accompanied with its own tooltip and clear explanation.
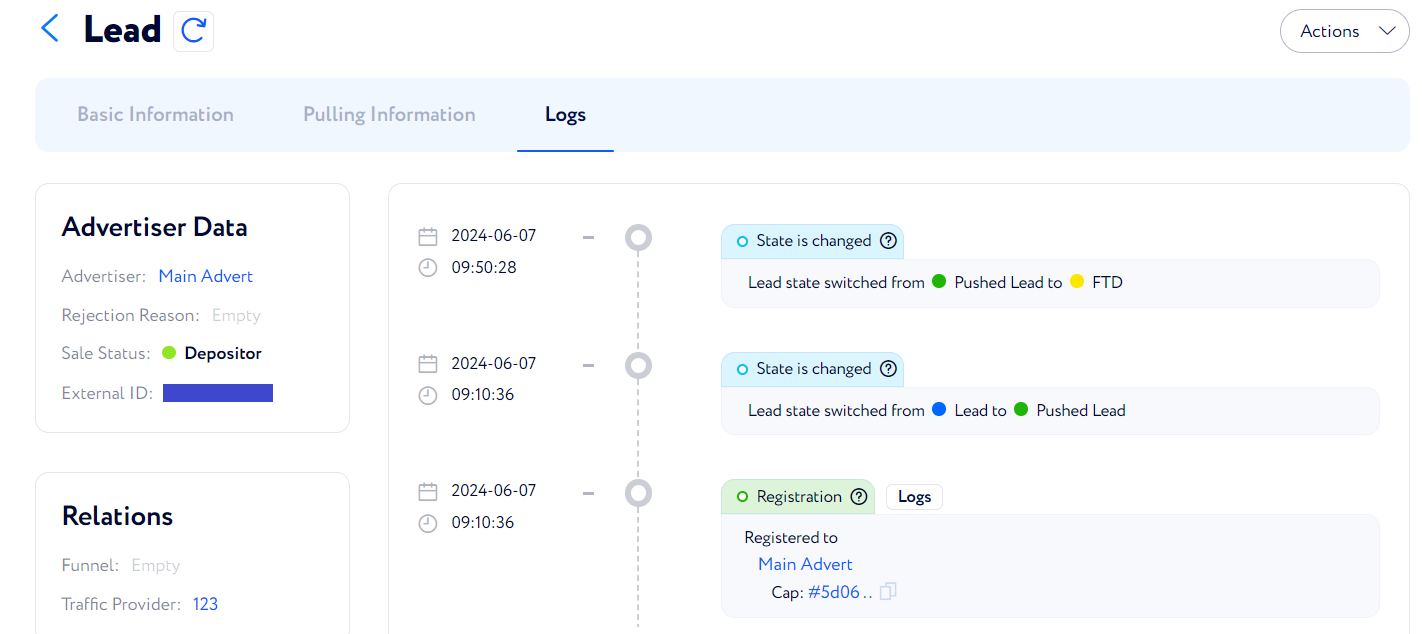
The older the action, the lower it is on the logs list.